IaaC Environment or Group Creation Flow
Note:
Prerequisite: An AWS Lambda function must be created.
The user has full access to predefined and custom templates across all environment groups.
Before creating any services, create the first VPC component. After completing the VPC, you can start the creation of other components.
For group level, you can only create VPC, MQTT, Redis, and RDS. Do not select ECS/EC2.
For Microservice Level, you can only create ECS/EC2.
Designer Workflow
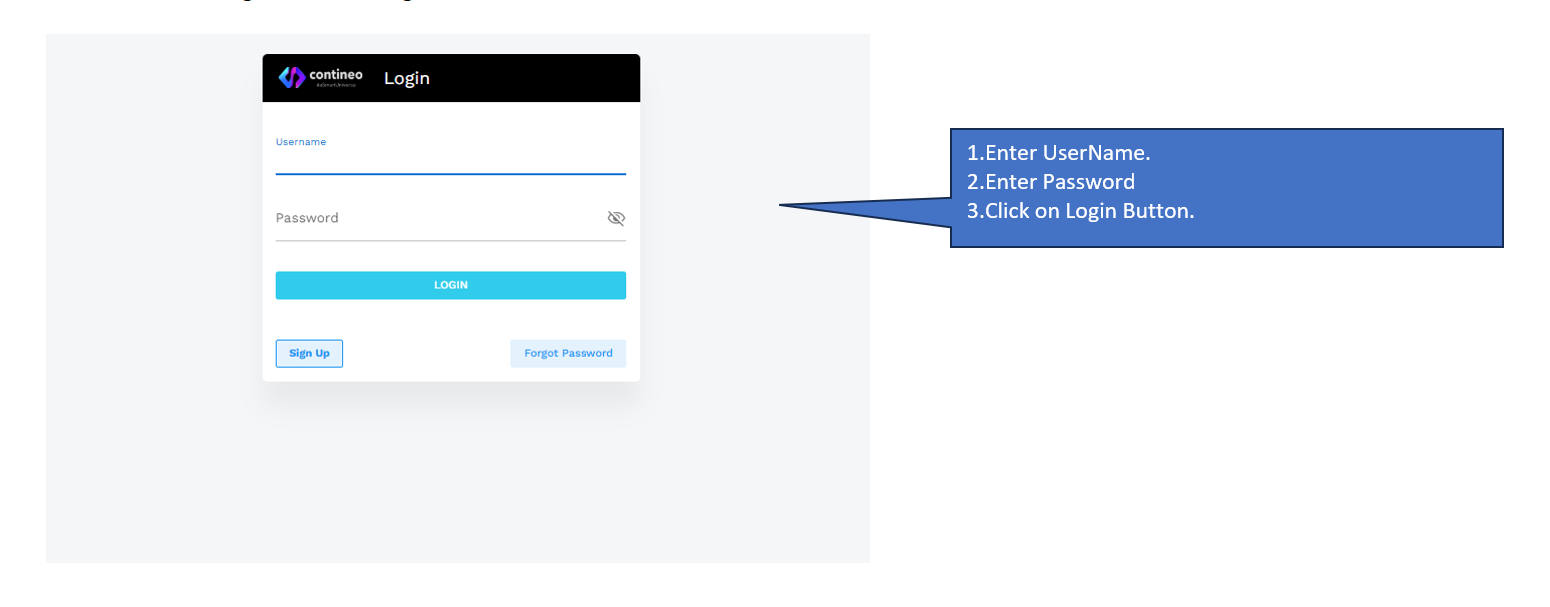
First, the user needs to log in to the Designer.
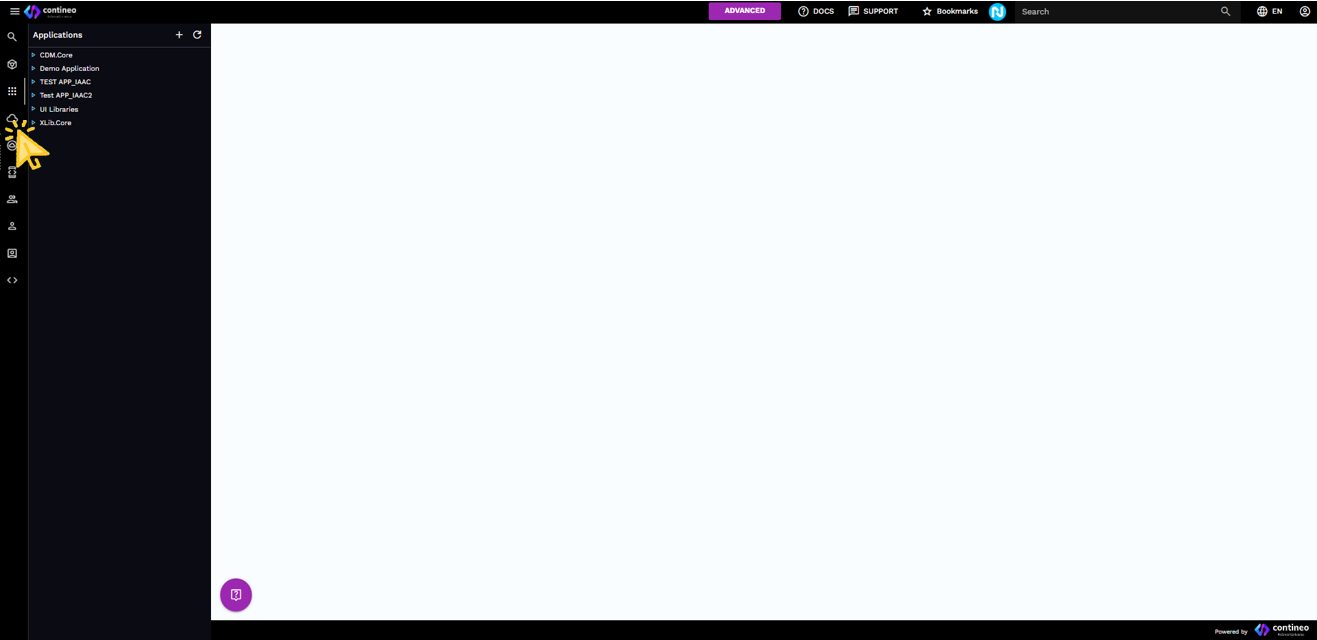
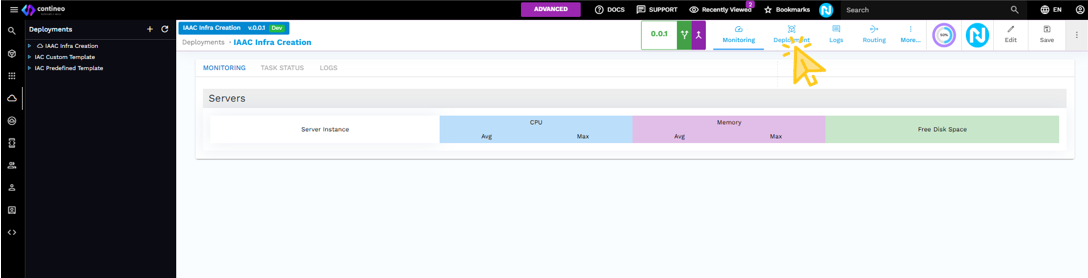
After logging in, the following window is displayed. Select the Deployment section.
After selecting the 'Deployment', the deployment environment screen is displayed.
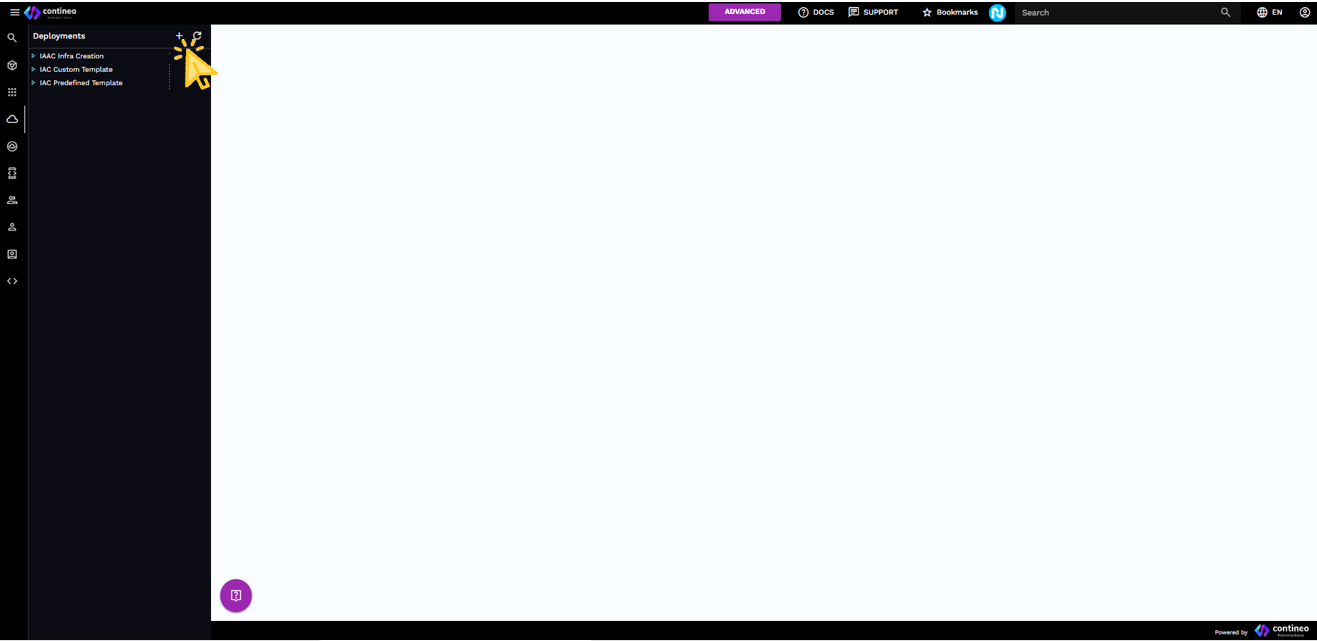
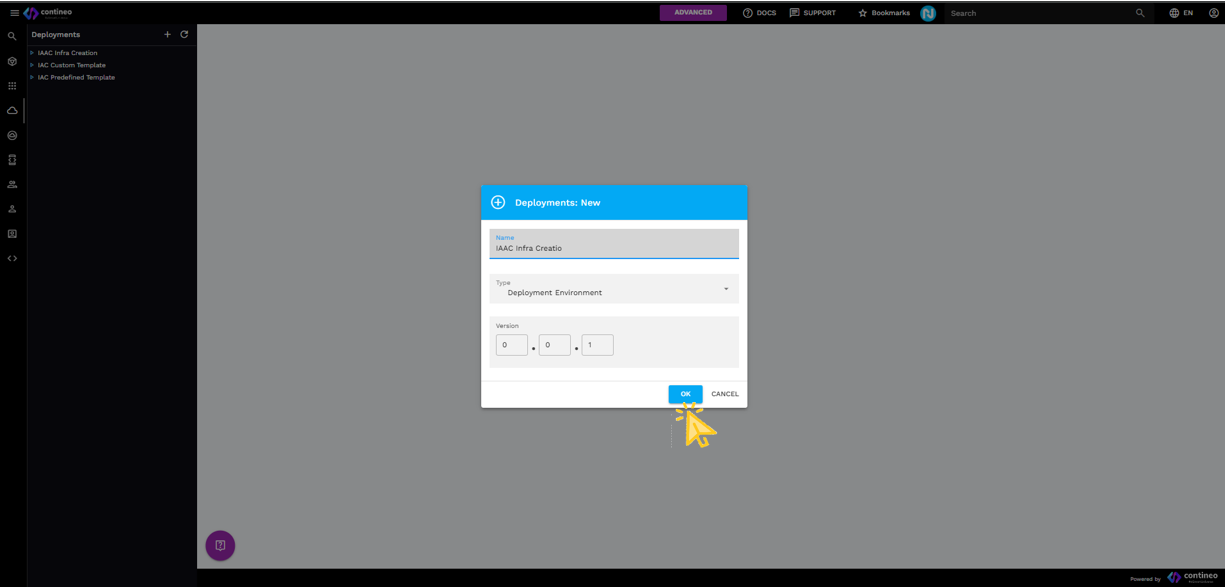
Click the + icon to create a new deployment environment. Now, the following window is displayed.
Enter the preferred name (For example, 'AWS Infra Creation') and select Type as Deployment Environment. Then click OK.
Click the Deployment tab.
Drag applications and libraries into the created deployment. After dragging, click SAVE.
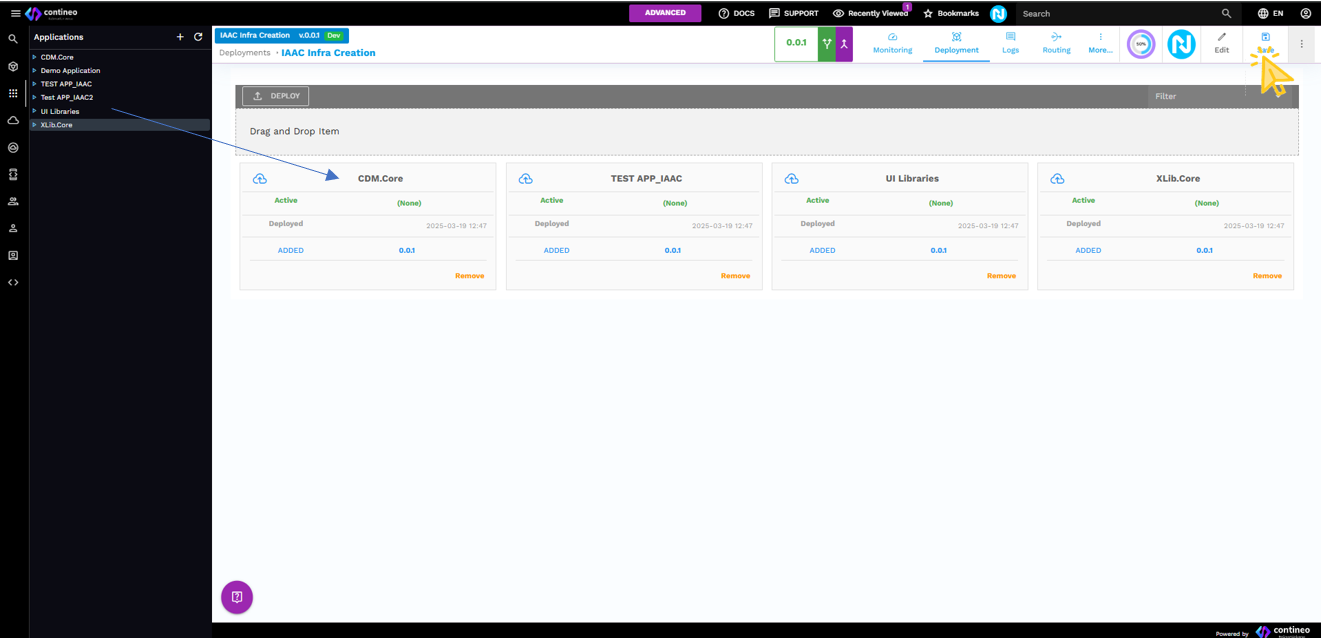
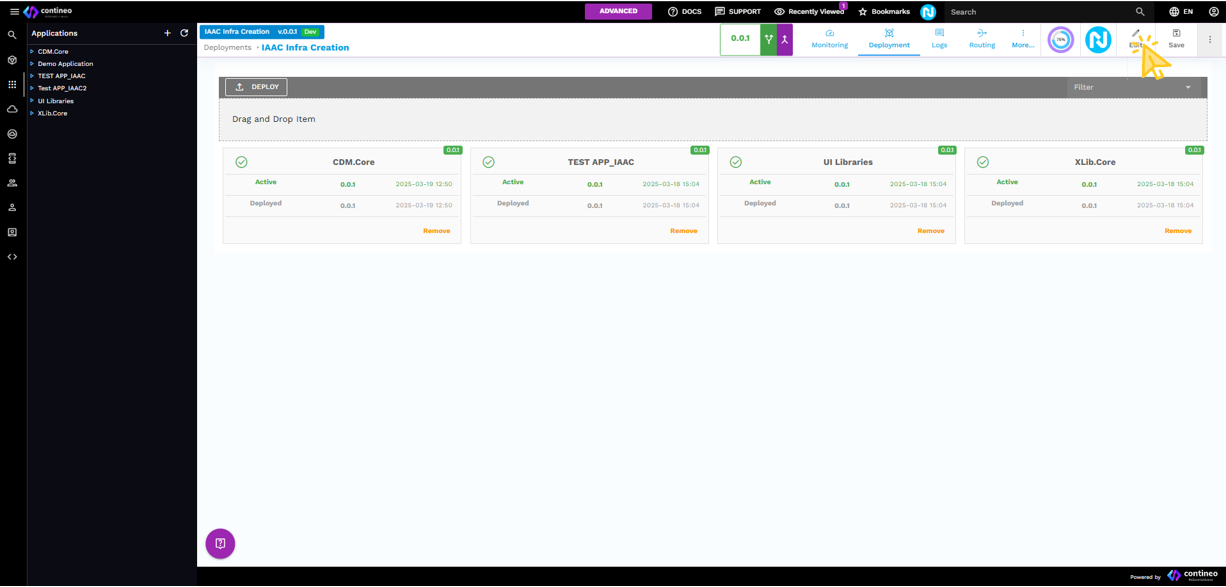
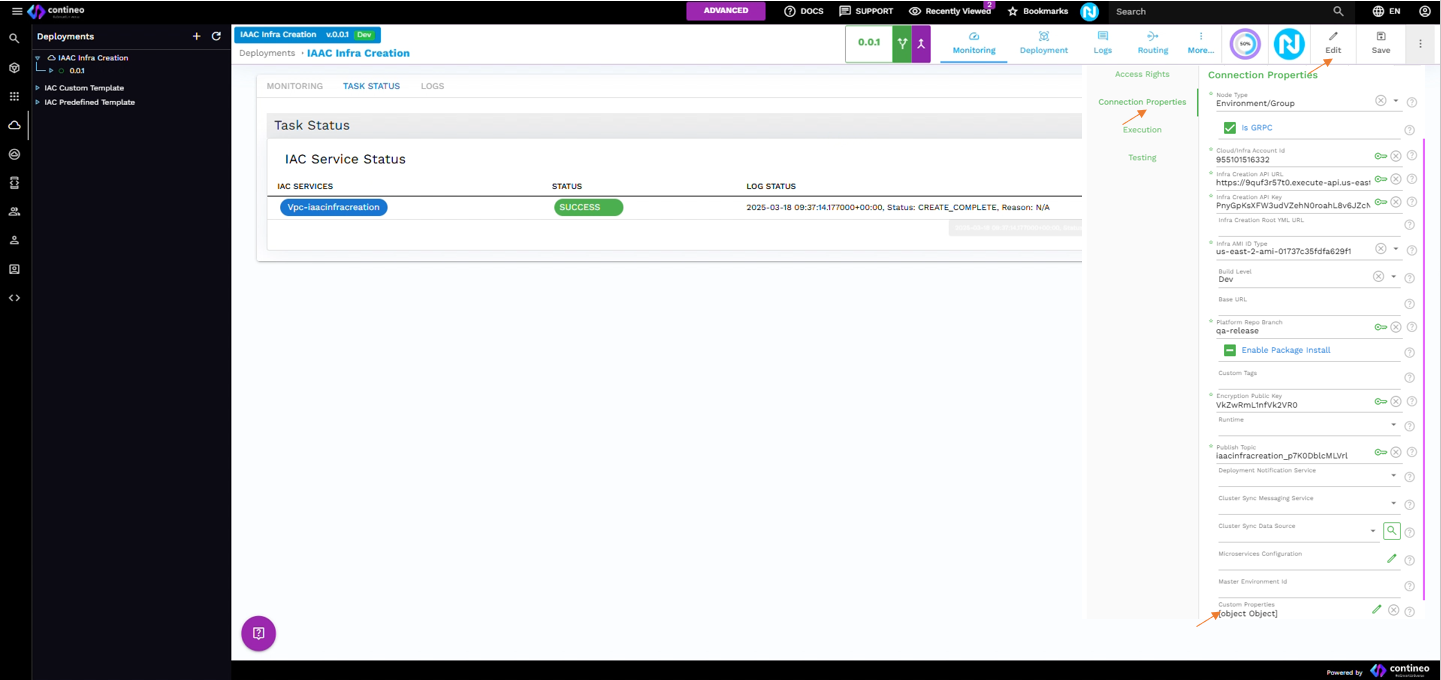
As shown on the screen, it displays all the deployed apps and libraries. Click Edit.
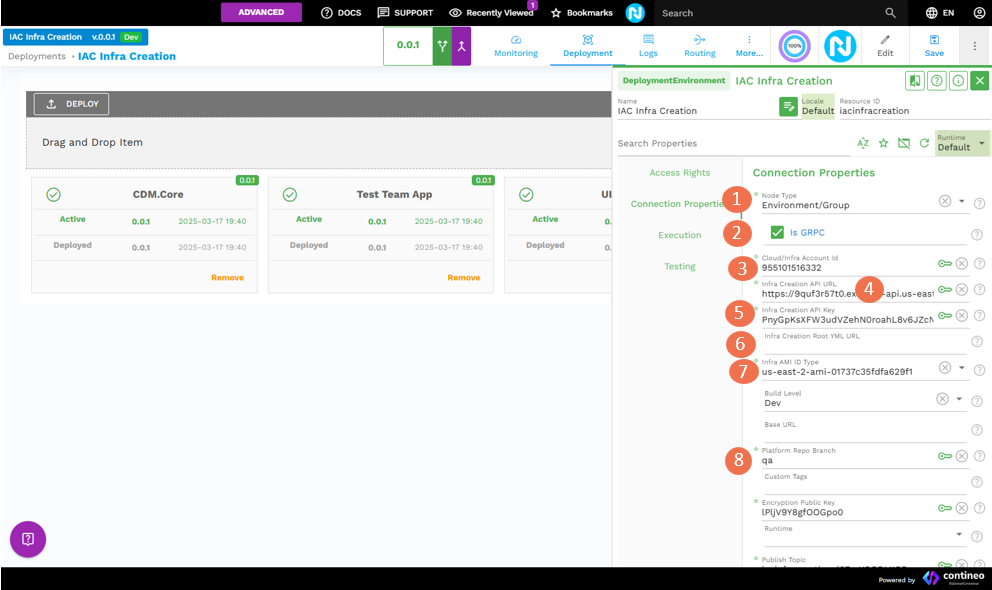
In the following window, click Connection Properties.
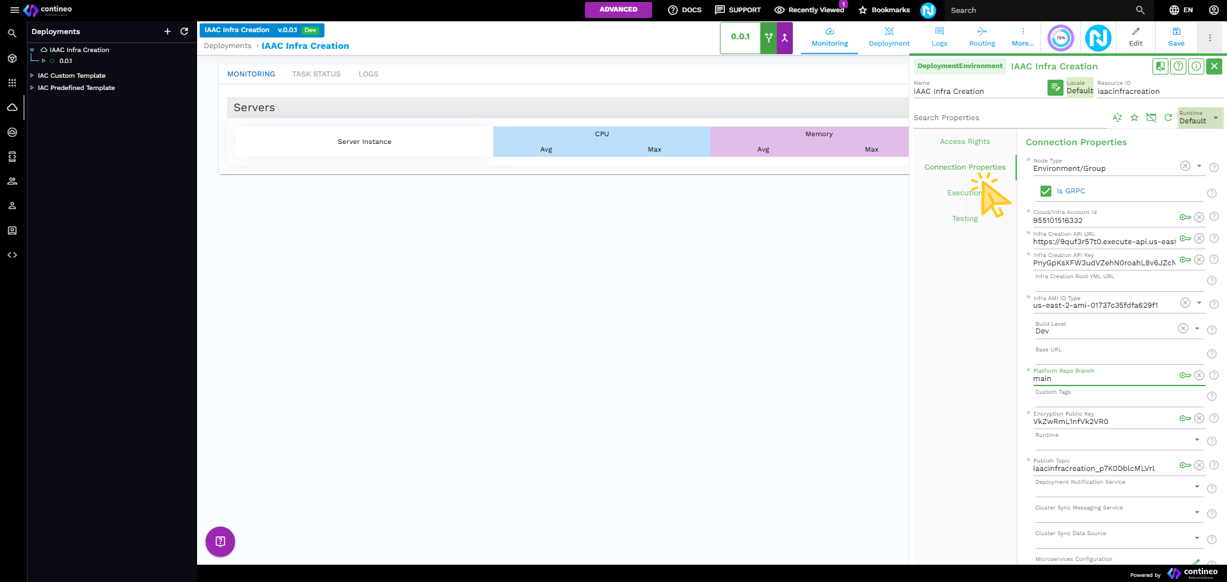
Select the Node Type: Environment/Group.
Select or clear the gRPC checkbox as needed.
Enter the AWS Account ID of the AWS account where the infrastructure is created.
Enter the Infra creation URL (AWS Lambda URL). (Refer to the 'AWS Lambda Configurations' sheet for the API Endpoint value.)
Enter the API Key for the Lambda URL. (Refer to the 'AWS Lambda Configurations' sheet for the API Key value.)
Select the Infra AMI ID Type.
Select the Platform Repo Branch, for example, 'qa release' or 'qa'.
Click SAVE.
Infrastructure Configuration Guide
1. Node Type
The nodeType specifies the type of infrastructure component being created. Options include:
environment – Used for creating a group.
server – Used for creating an EC2 instance.
container – Used for creating an ECS instance.
2. GRPC
If the gRPC checkbox is selected, the remote calls on this microservice are over gRPC. Otherwise, the remote calls are over HTTPS.
3. Infra Account ID
This field is required to identify the infrastructure account under which the Lambda services are created.
4. Infra Creation API URL
Defines the API endpoint used to trigger infrastructure creation, which is essential for provisioning the necessary resources for Lambda services.
5. Infra Creation API Key
A security key required for authenticating API requests to the infrastructure creation service. It ensures secure access and prevents unauthorized requests.
6. Infra Creation Root YML URL
Specifies the path to the root.yml configuration file. This file serves as the primary configuration for AWS service creation, linking multiple sub-configuration files (for example, VPC, RDS). If no path is provided, a default root.yml is used.
7. Infra AMI ID Type
Required when a Lambda server executes a component that needs an AMI ID. The AMI ID is region-specific, and users must select it from a dropdown displaying region-wise options.
If a Custom AMI ID type is selected, an additional field appears, allowing manual entry of an AMI ID. The provided ID must match the selected region for successful Lambda creation.
8. Platform Repo Branch
Specifies the branch from which the Contineo Platform runtime is pulled. This is a required field.
For example, specifying main ensures that the platform runtime is fetched from the main branch.
Click NioPilot and then click CREATE ENVIRONMENT.
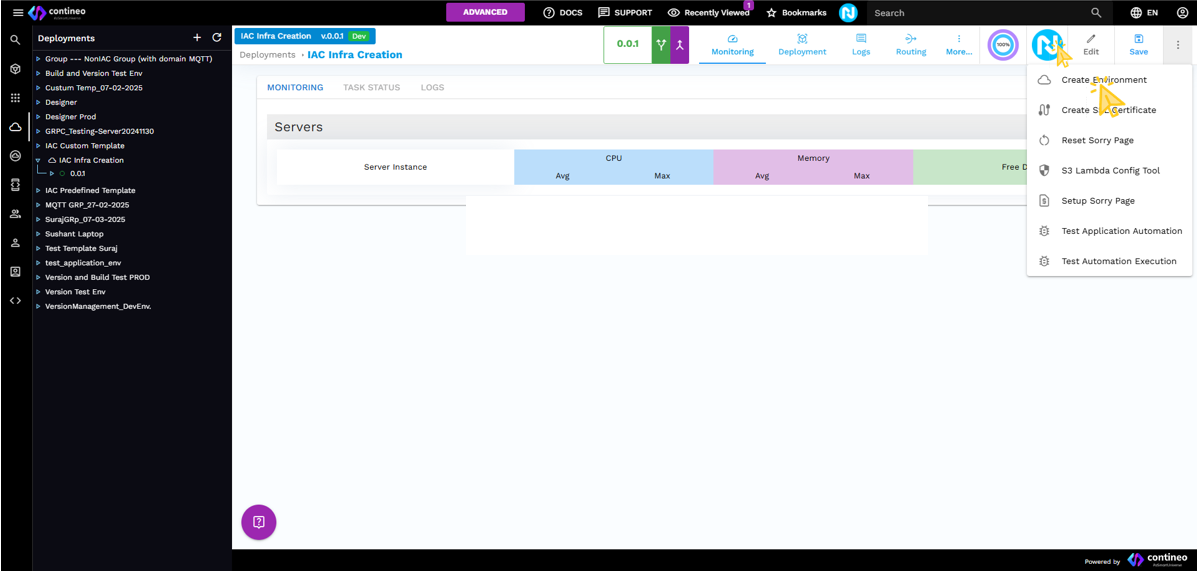
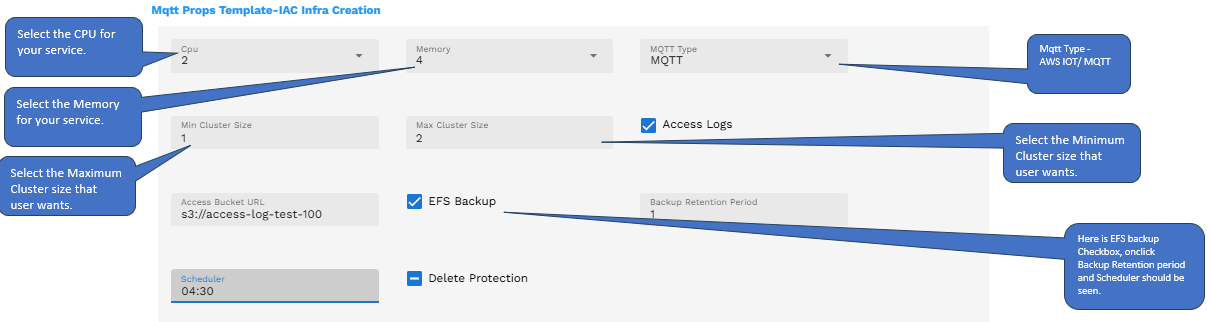
Inside the window, you can see the Add Lambda Services option. Choose either a custom template or the default templates provided by Contineo. Select any service.

Provide the required field values and finally click Create Environment.

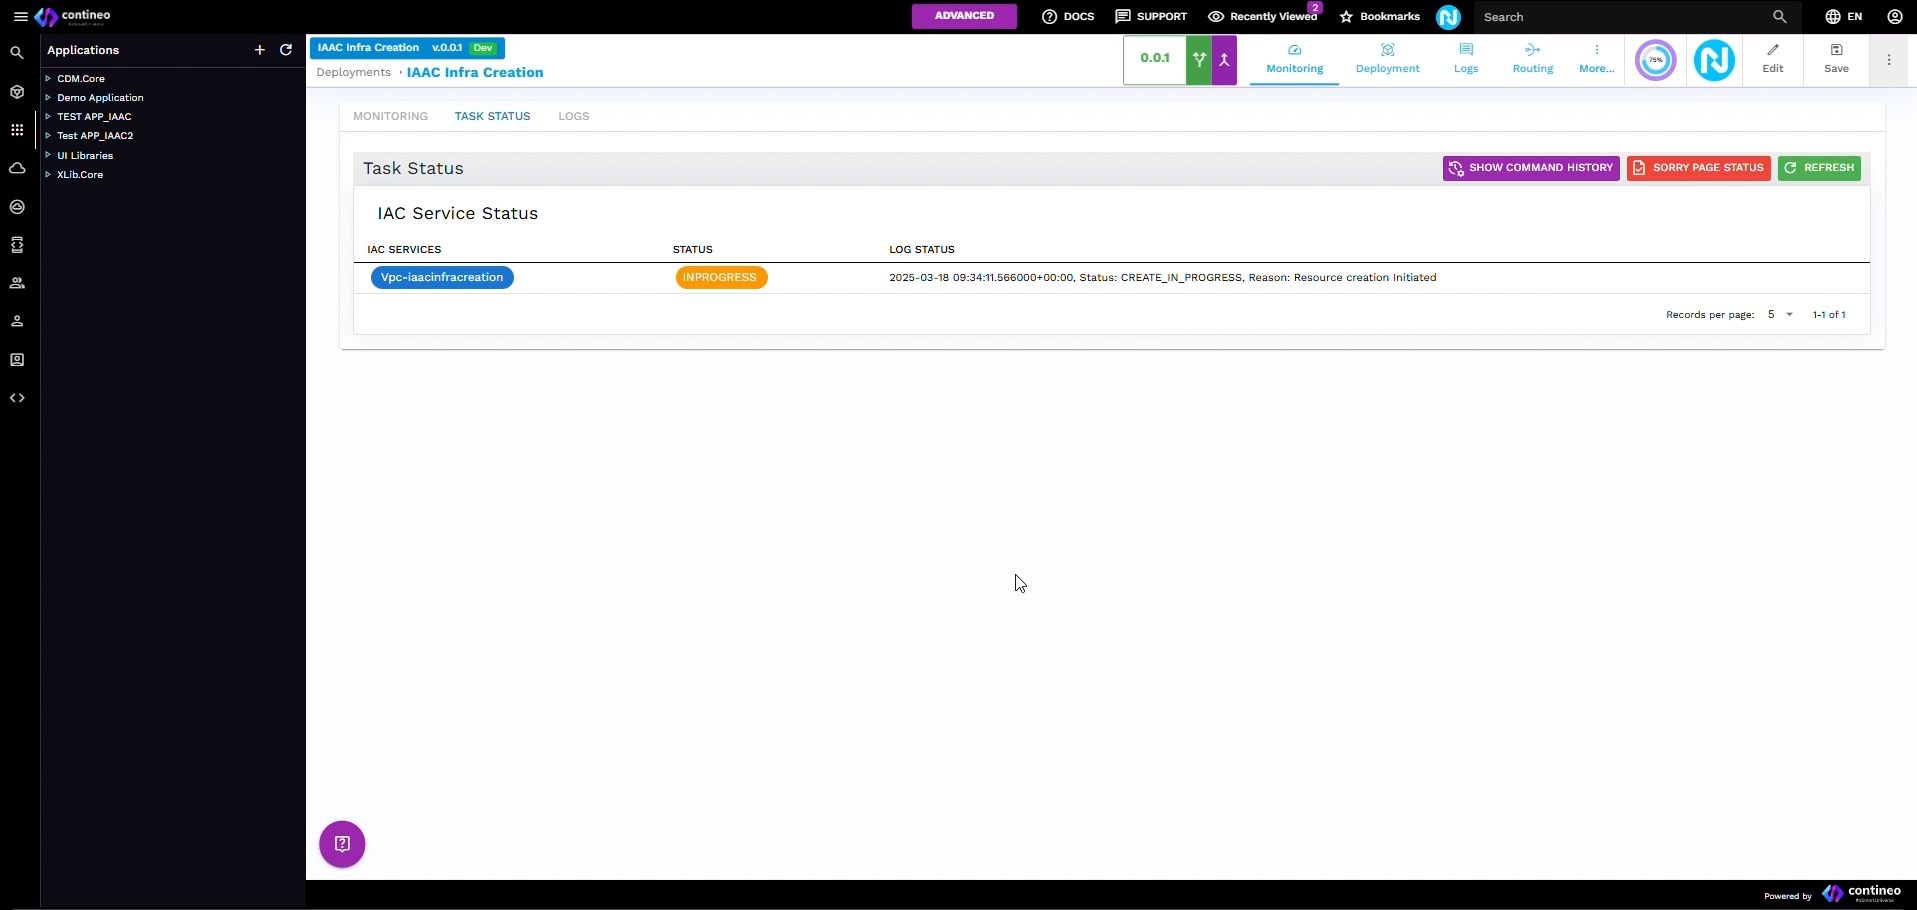
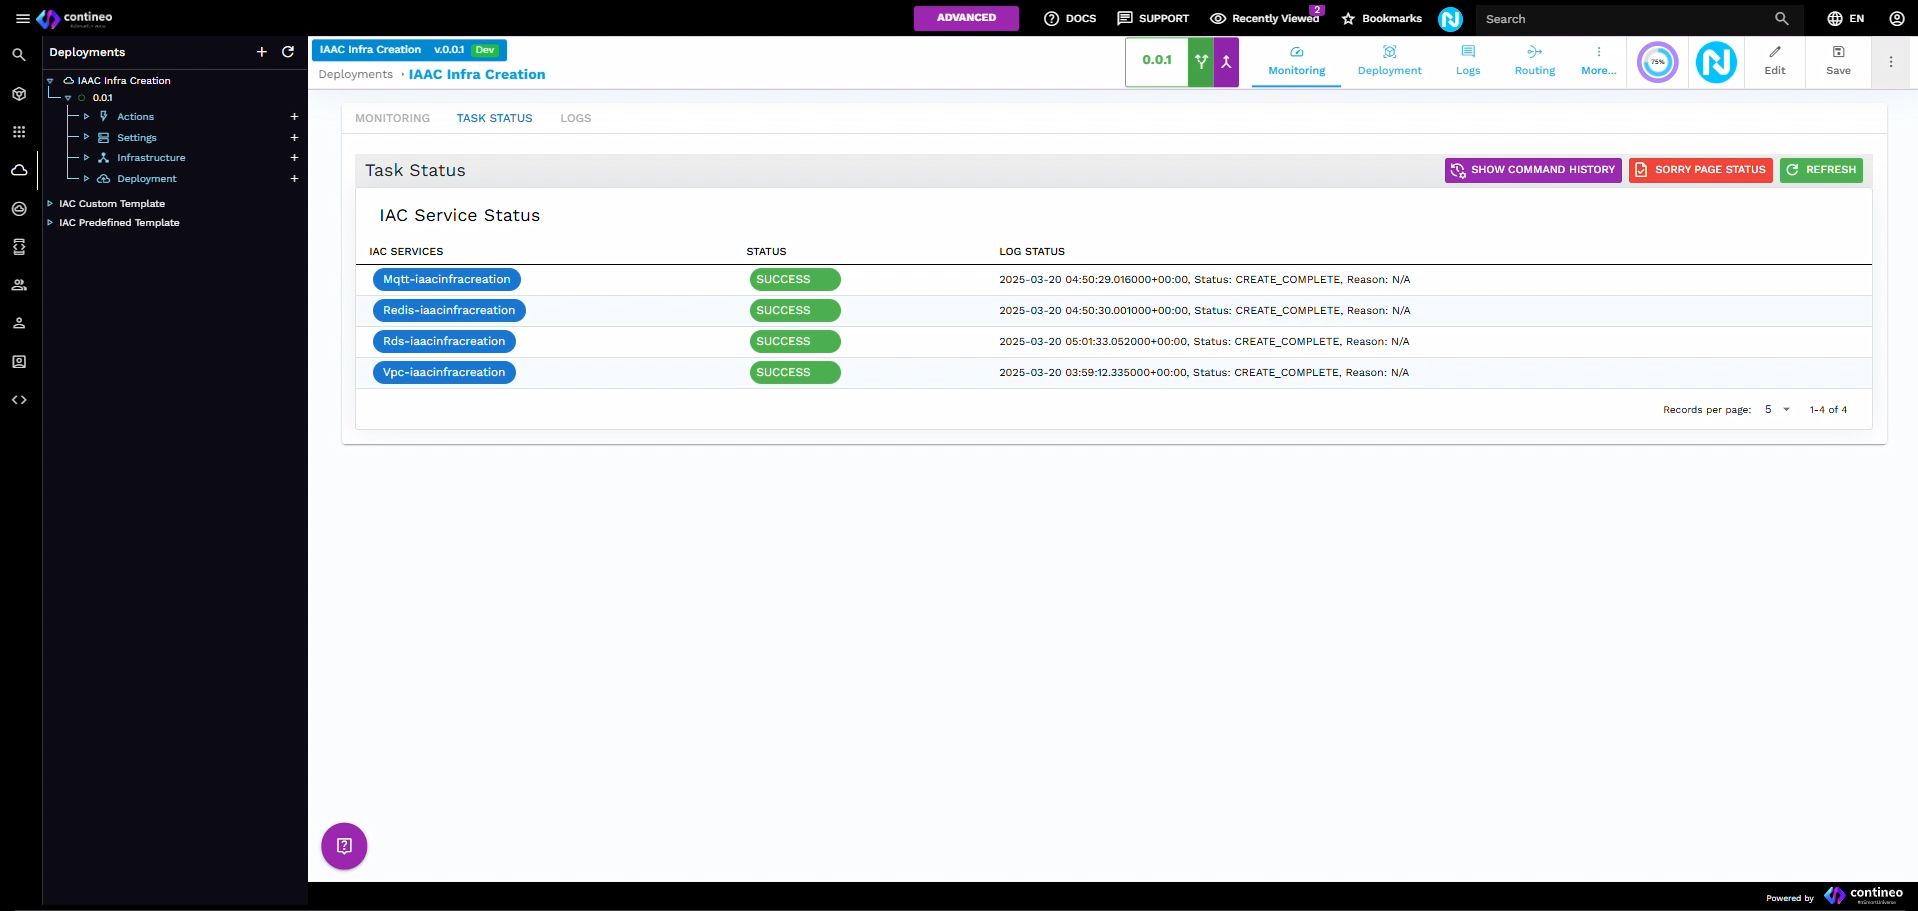
In the Task Status screen, you can see the status as IN PROGRESS.
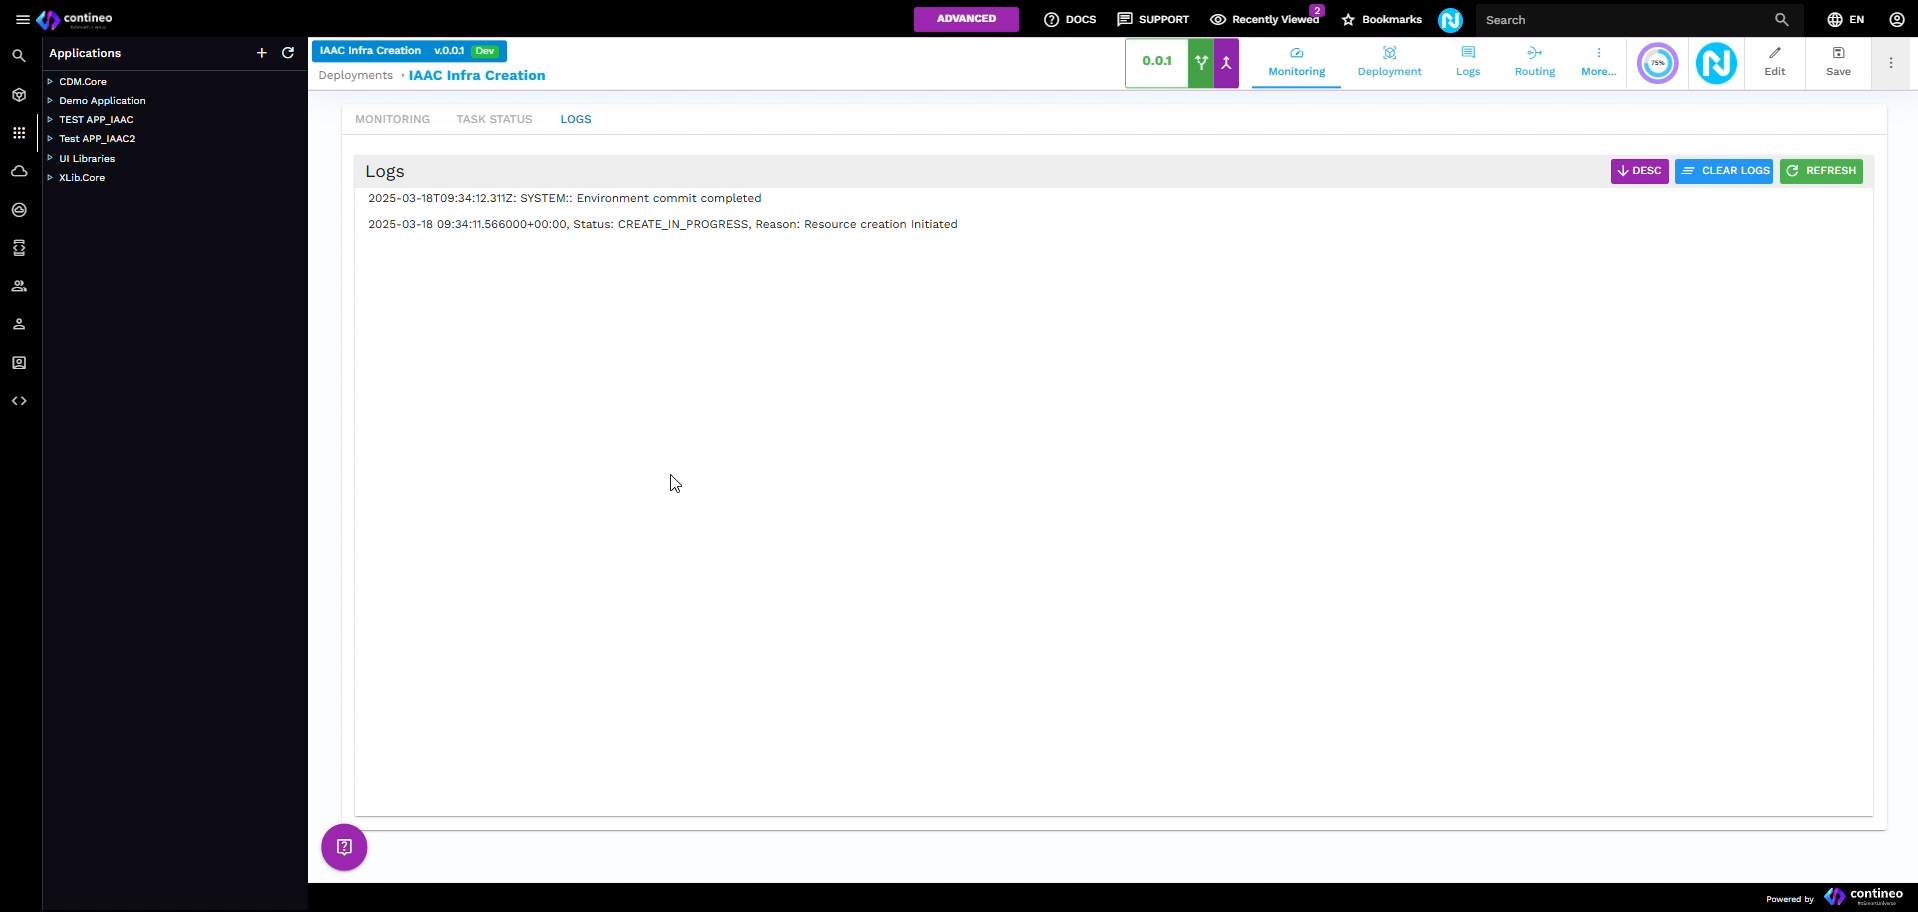
In the Logs screen, view the component logs.
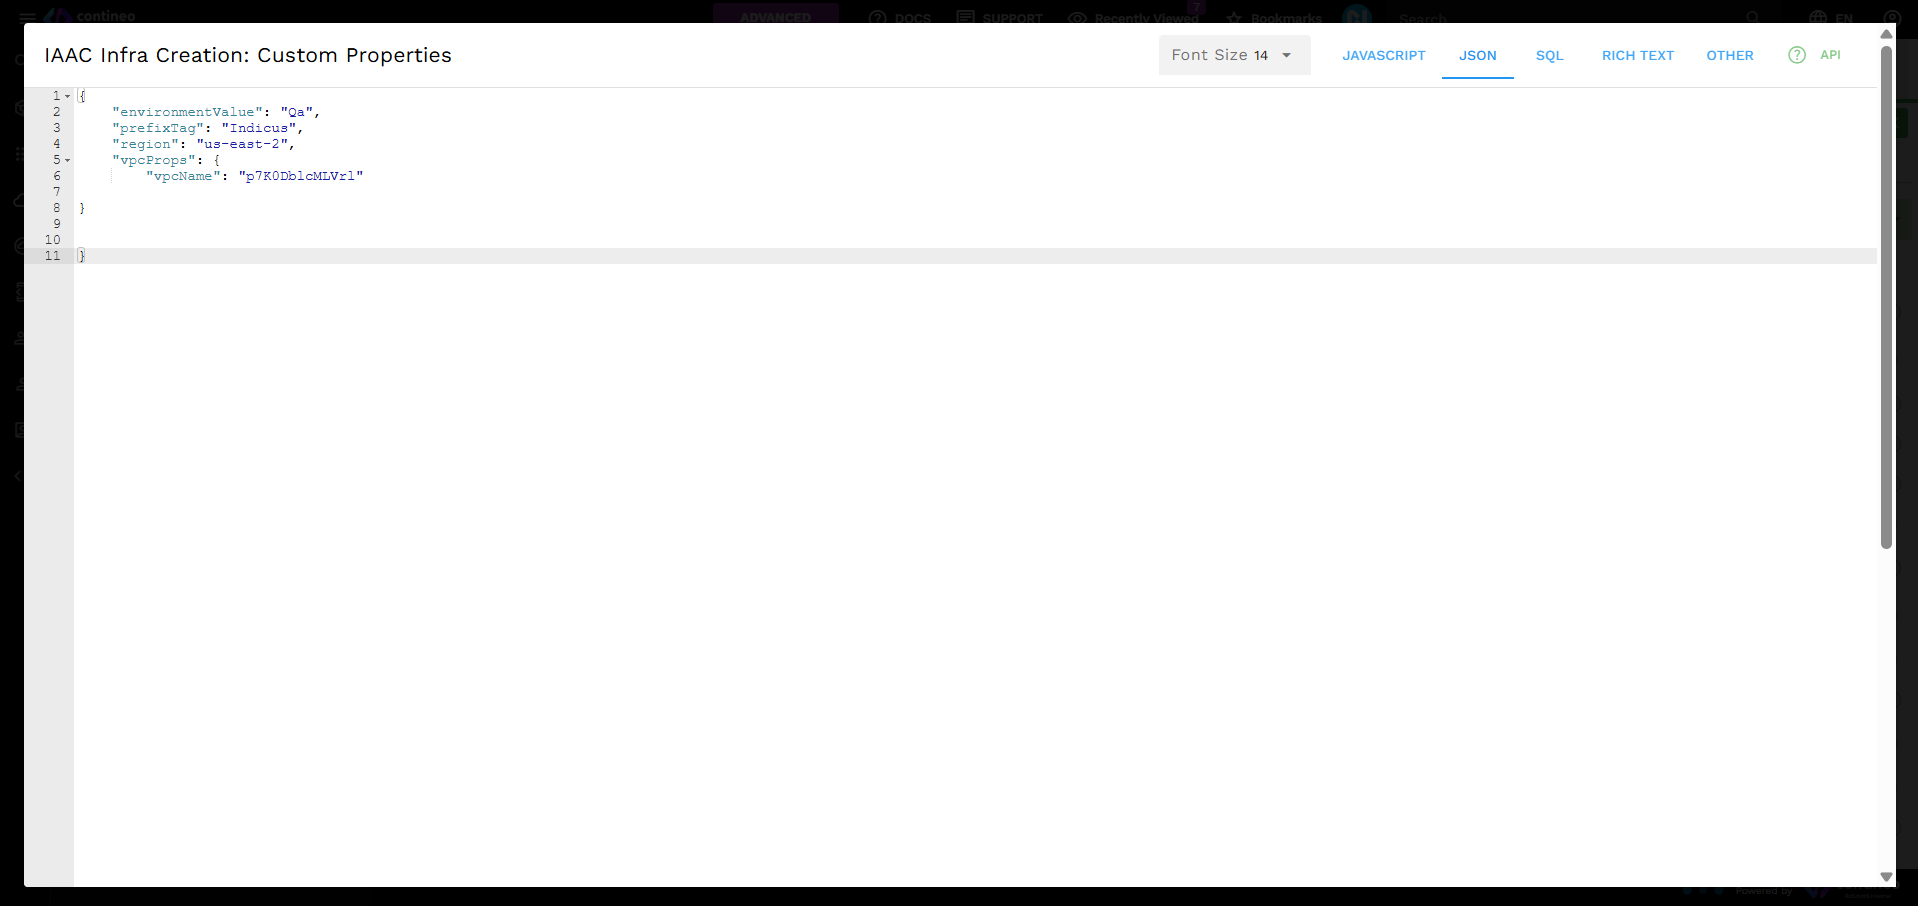
In the Task Status screen, once the status shows SUCCESS, the user can see the Lambda configuration for the custom service stored in Custom Properties.
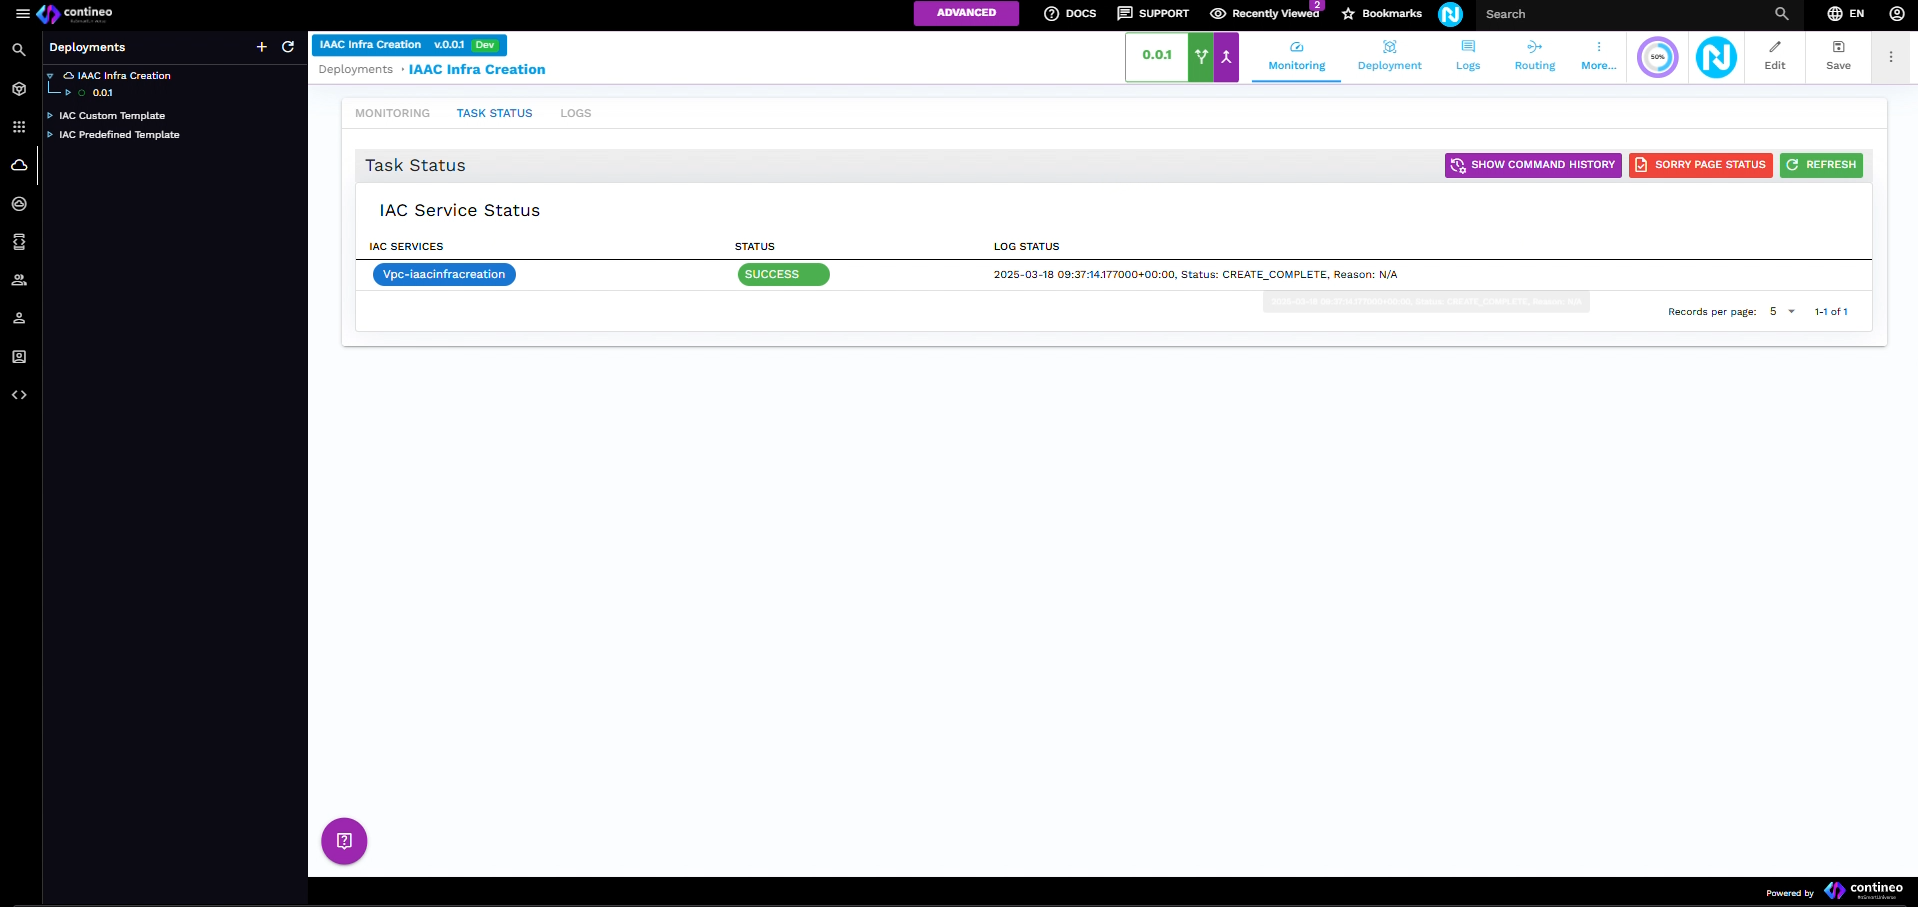
Here, you can view the component data received from the Lambda server. When the component status is successful, the data is stored in Custom Properties, as shown in the following screen.
After completing the VPC creation, proceed with creating Redis, MQTT, and RDS.

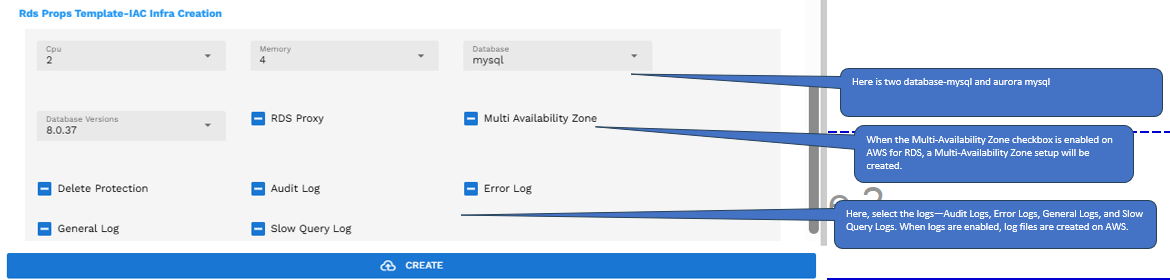
Provide the required field values and click Create. Afterward, in the Task Status screen, the you can see the status as SUCCESS.
After completing the VPC, Redis, RDS, and MQTT components, start the creation of microservices.