The GenAI Pipeline Builder allows users to create AI-powered workflows by visually connecting components without extensive coding. To create a pipeline, access the NeoPilot WorkSpace, navigate to GenAI Pipelines, and click + to create a new pipeline. After naming your pipeline, adding a description, and setting appropriate access levels, you can save it and begin designing your workflow by adding and connecting components to build custom AI solutions.
GenAI Pipeline Builder
This guide walks you through creating and configuring your first GenAI pipeline. The GenAI Pipeline Builder provides an intuitive visual interface where you can assemble AI components to create powerful workflows without extensive coding.
To get started, create a pipeline, add components, and configure how data flows between them. The following sections guide you through each step of this process, from initial setup to running your first pipeline.
Whether you are building a simple text generation pipeline or a complex conversational AI system, these fundamentals help you build effective AI workflows that meet your specific needs.
What is GenAI Pipeline Builder?
The GenAI Pipeline Builder is a powerful tool that enables you to create AI-powered workflows by connecting various components in a visual interface. It simplifies the process of building complex AI systems by providing a drag-and-drop environment where you can design, test, and deploy AI pipelines without writing extensive code.
When to Use This Component
Use the GenAI Pipeline Builder when you need to:
Create multi-step AI workflows that combine different AI capabilities.
Build custom AI solutions without extensive programming knowledge.
Prototype and test AI applications quickly.
Create reusable AI workflows that can be shared across your organization.
Connect various data sources and AI models in a single workflow.
Creating a Pipeline
Follow these steps to create a GenAI pipeline:
Access the NeoPilot WorkSpace
Click on App Palette and select the WorkSpace option. The NeoPilot WorkSpace is a central hub where you can manage AI agents, create GenAI pipelines, and access widgets and workflow tools. This interface provides all the tools needed to build and manage your AI pipelines in one place.
 Figure 1: NeoPilot WorkSpace Interface
Navigate to GenAI Pipelines
In the left navigation sidebar, click GenAI Pipelines to access the pipeline management interface. Here you see a list of existing pipelines, including any public pipelines that can serve as examples.
 Figure 2: GenAI Pipeline Interface
Create a New Pipeline
Click + to start creating a pipeline. The new pipeline creation form is displayed.
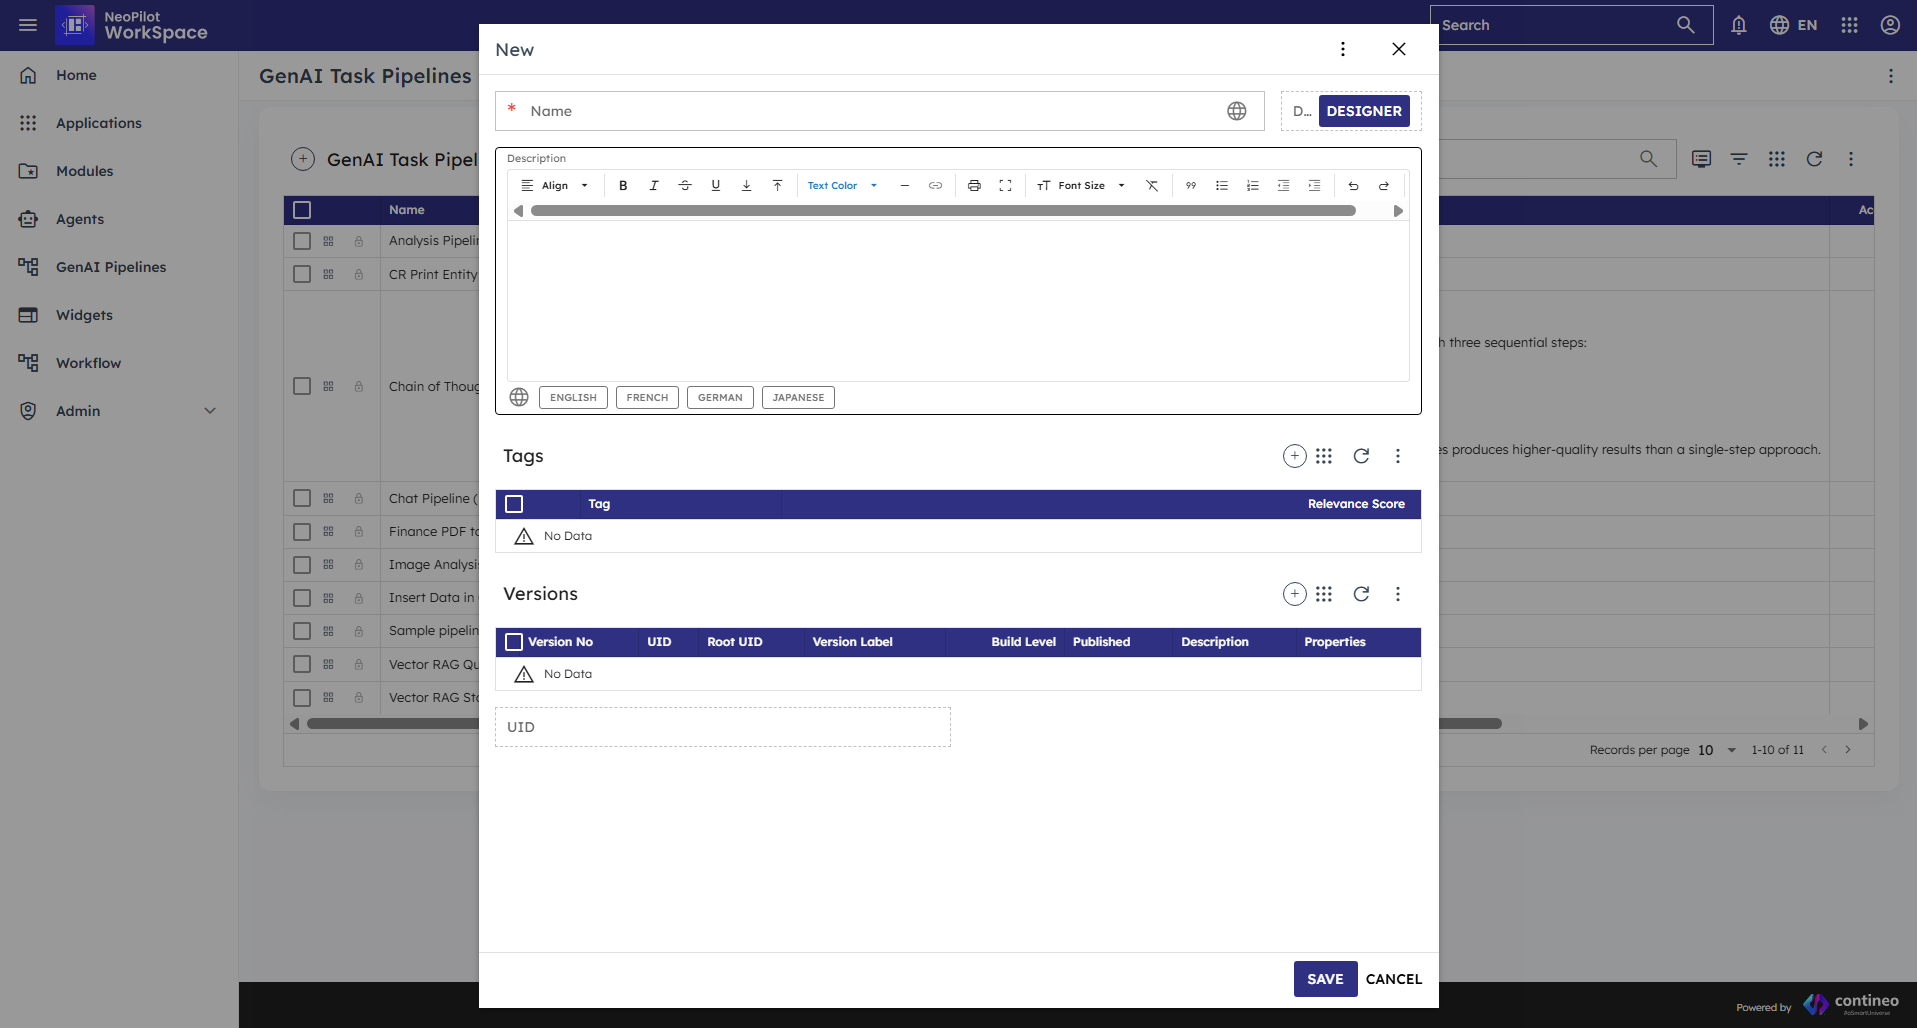 Figure 3: Create a New Pipeline
Name Your Pipeline
Enter a name for your pipeline in the Name field. You can provide the name in multiple languages by clicking on the globe icon next to the field, which allows you to add translations for different languages (English, French, German, Japanese, etc.).
Add a Description
In the Description field, provide details about what your pipeline does. Like the name, you can add this description in multiple languages by clicking on the language tabs at the bottom of the editor.
A good description explains:
What the pipeline does.
What types of inputs does it handle.
What outputs it produces.
Any special features or considerations.
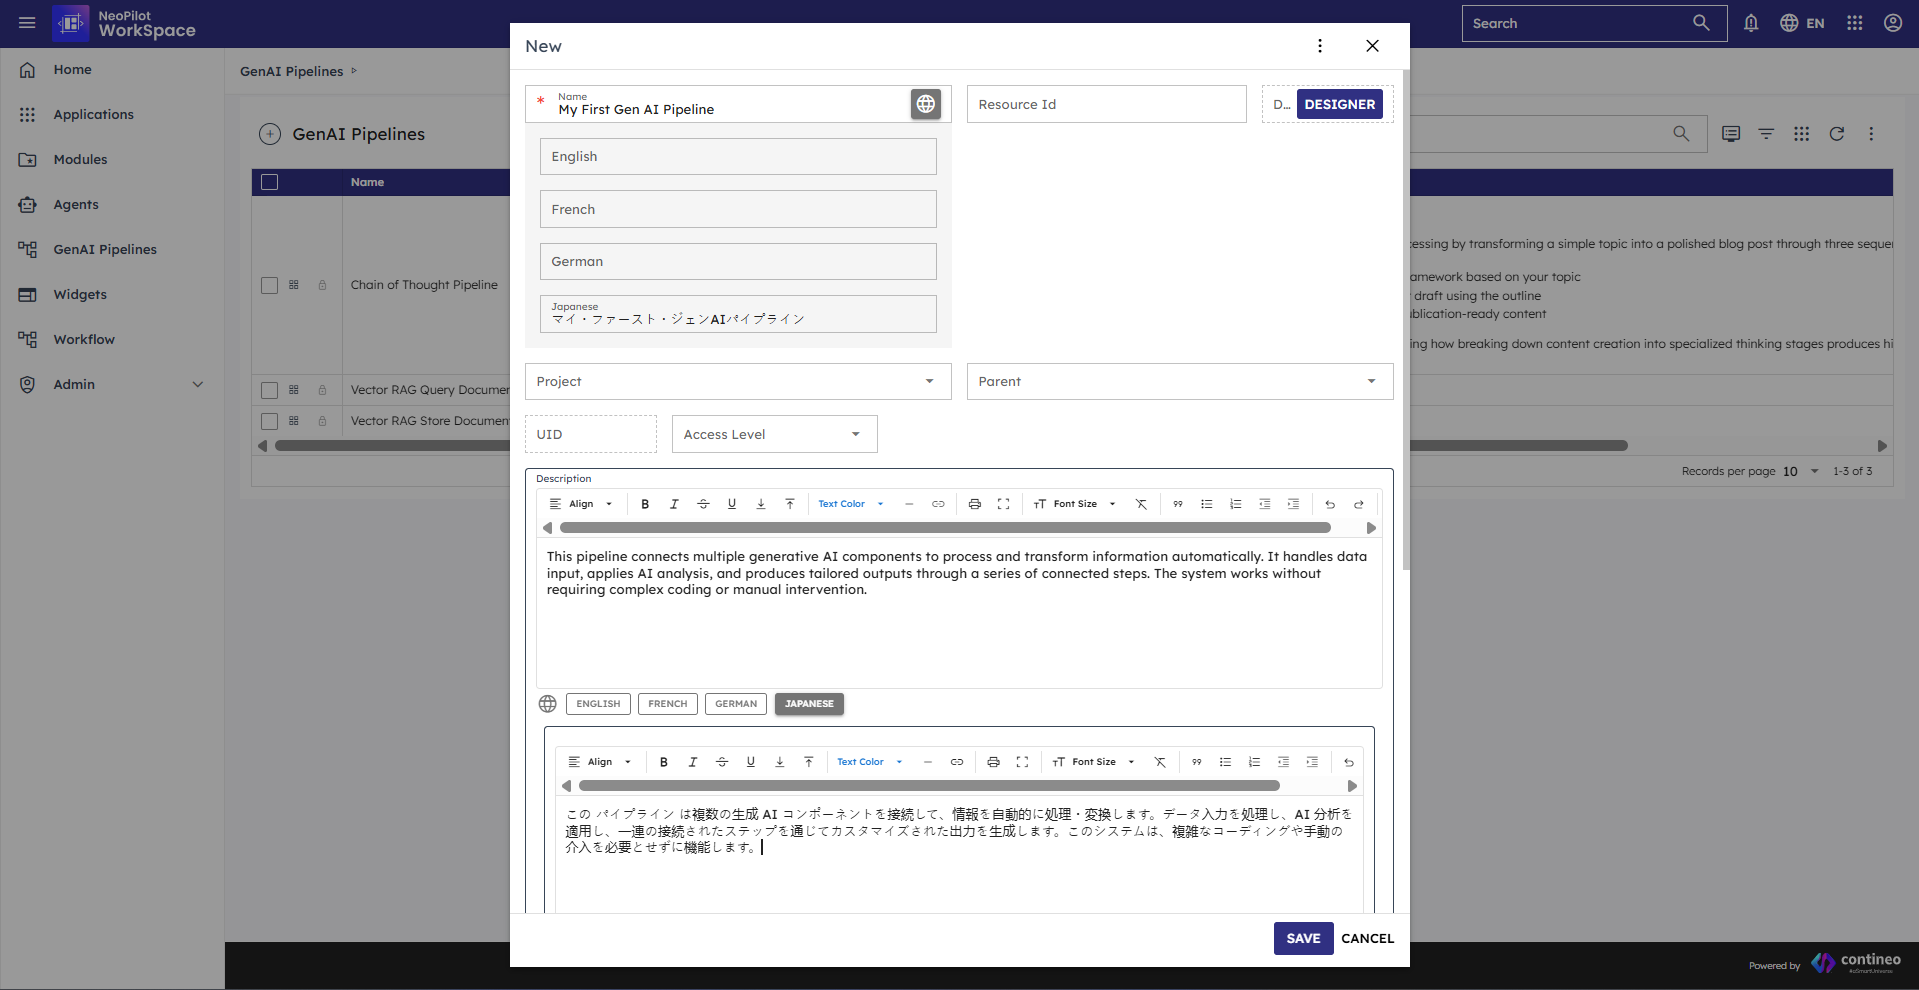 Figure 4: Pipeline Name and Description
Set Access Level
Choose the appropriate access level for your pipeline from the dropdown menu:
Private - Only you can see and use the pipeline.
Public - Anyone can see and use the pipeline.
Tenant - All users in your organization can see and use the pipeline.
Shared - Specific users you select can access the pipeline.
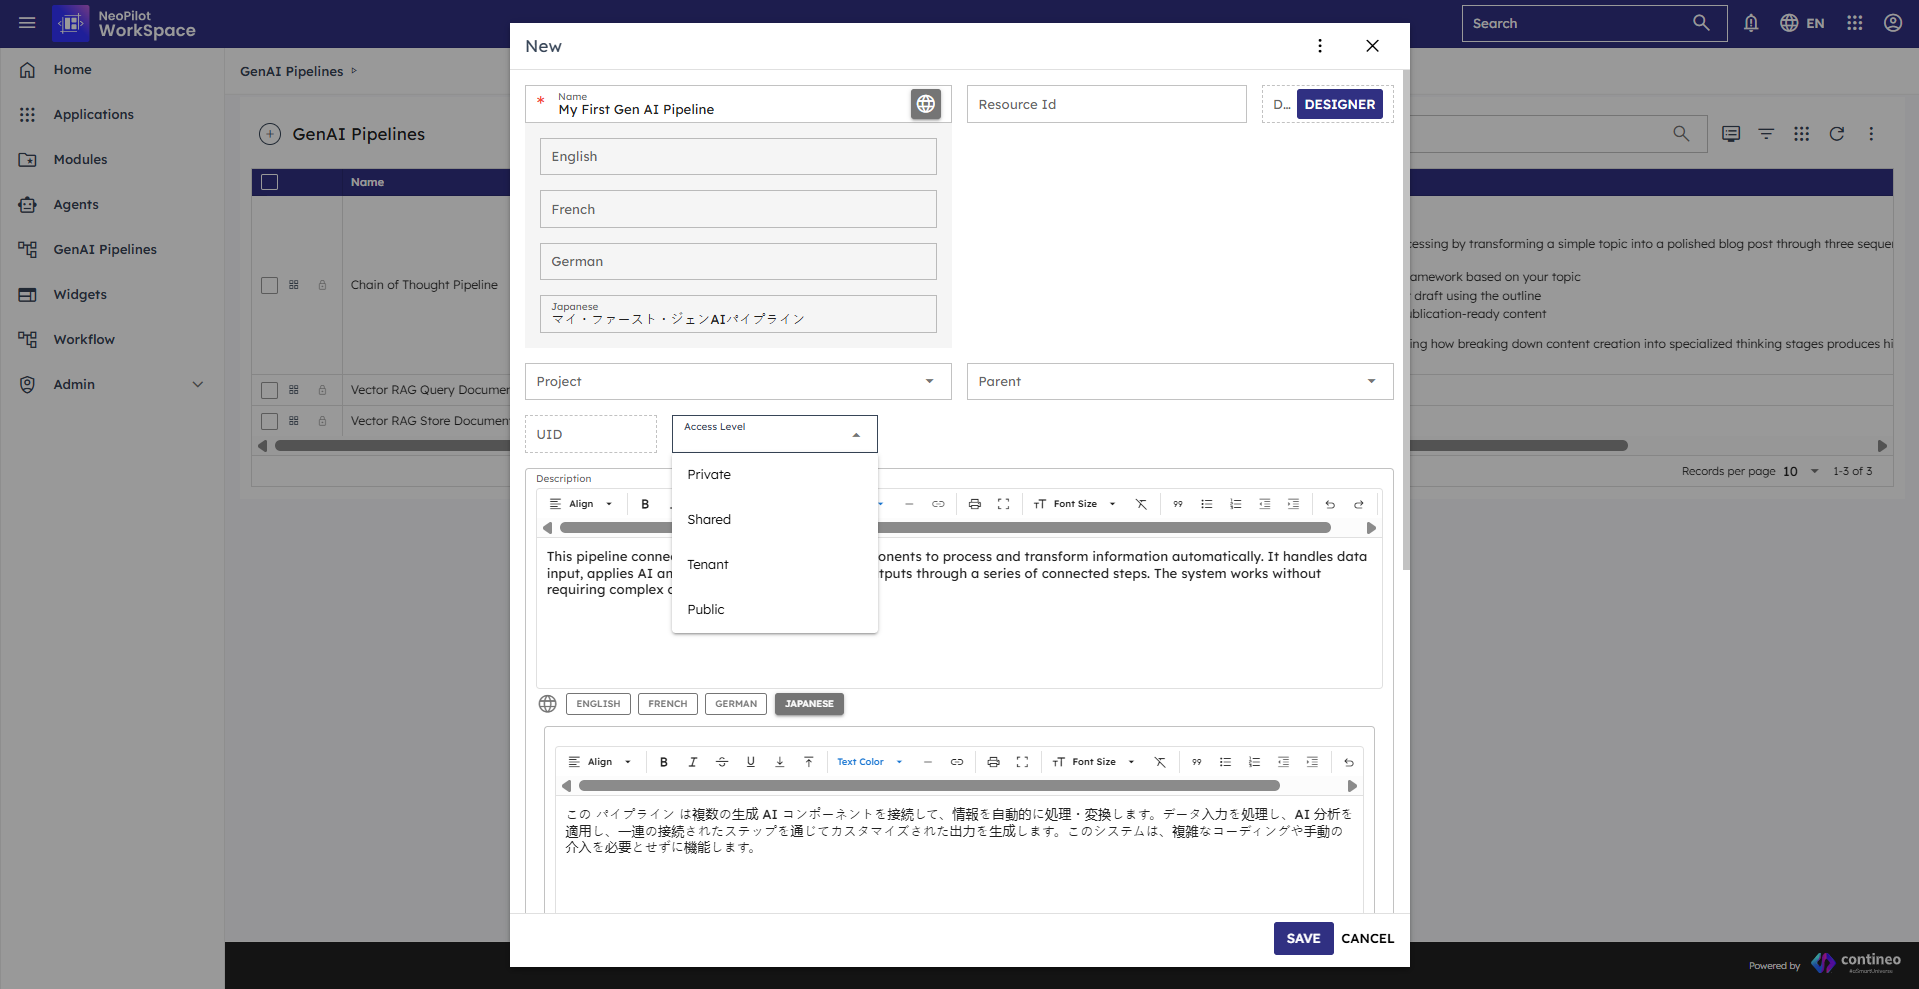 Figure 5: Pipeline Access Level
Parent and Project Fields
Parent and Project fields are not important for basic pipeline creation. You can keep them as they are and proceed to save your pipeline.
Save the Pipeline
Click SAVE to create your pipeline. This stores the basic information you've provided for your pipeline.
 Figure 6: Save Pipeline
View Your Pipeline
After saving, you can see your new pipeline in the list of available pipelines. From here, you can begin designing your pipeline workflow by adding and connecting components.
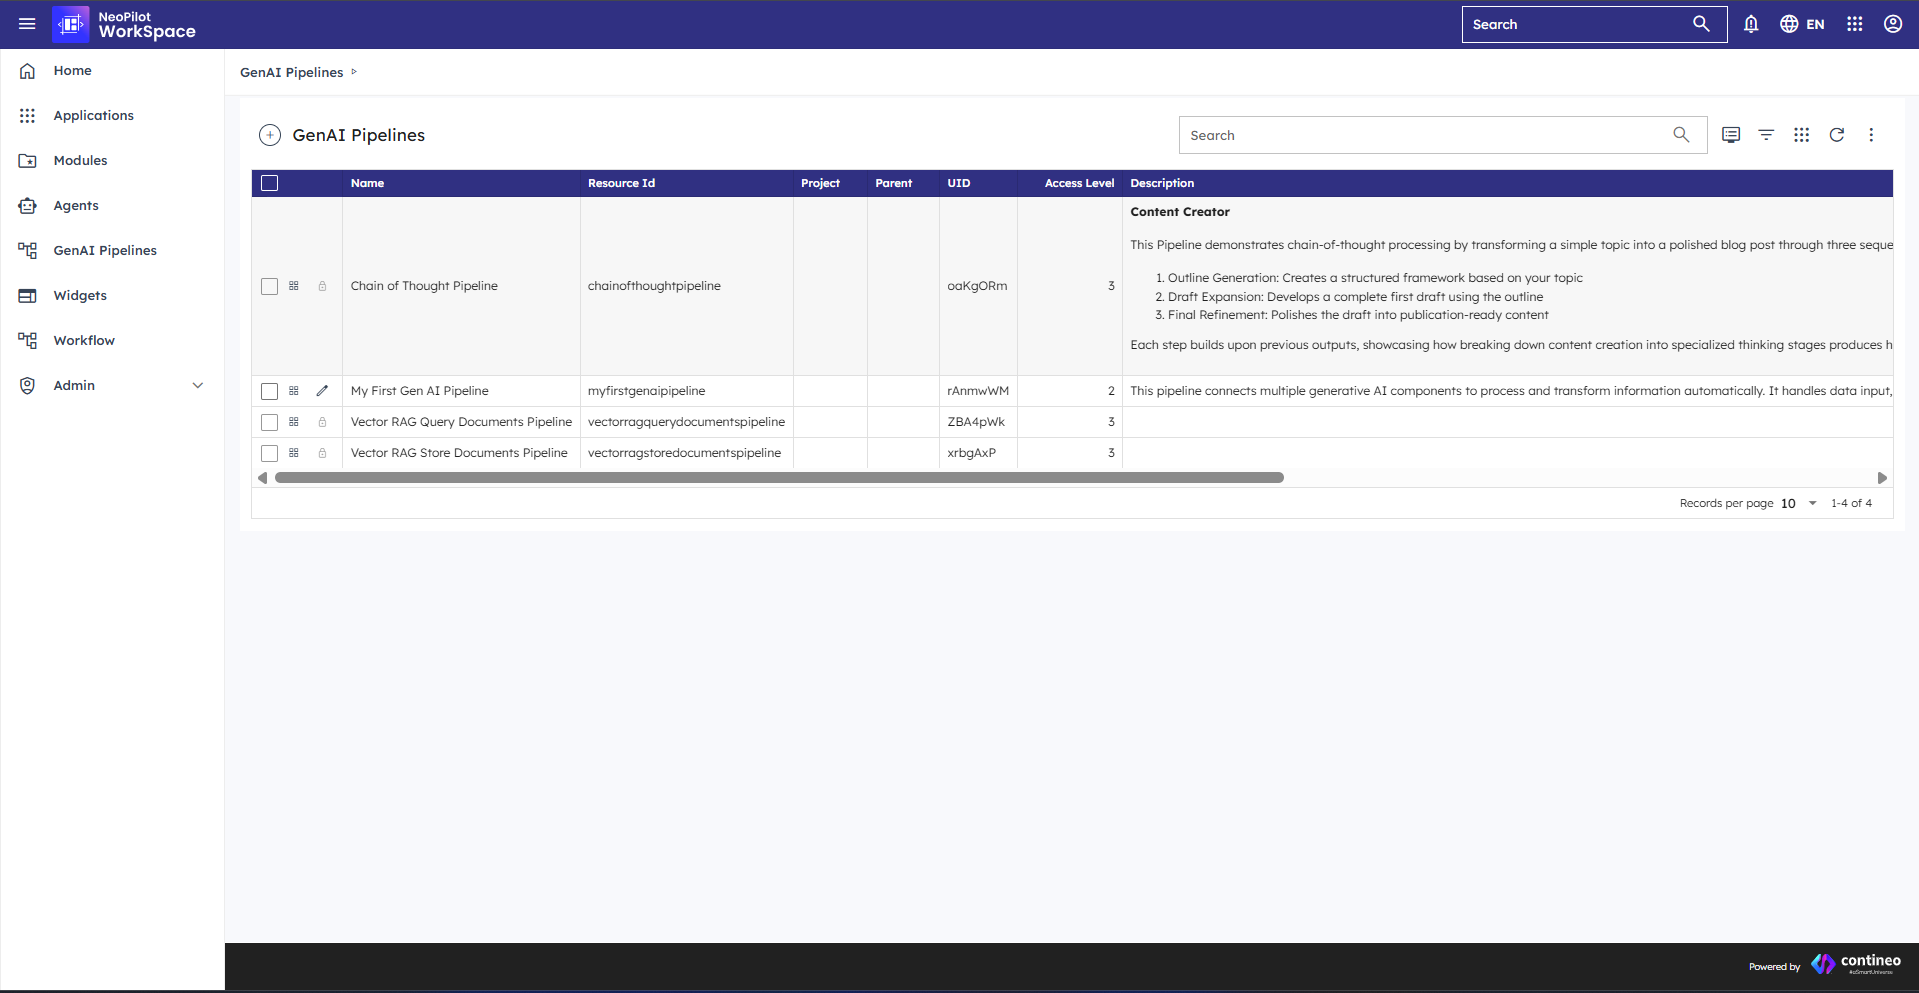 Figure 7: View Saved Pipeline