Branch Merging
Learn how to merge components.
Step-1: When you open an application

Click on
 , which is located on the top side. You can see
  this menu.
If the version is selected, then this menu shows the other versions of that application and branches of the selected version. Branches of other versions are not seen.
If the branch is selected, then this menu shows only its parent version.
You can merge Version into the branch, branch into its parent version, and version into version.
Select the target version from the menu.
Note:
This MERGE button can be used from the application level as well as from the specific component level.
Step-2
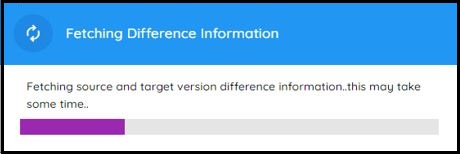
After clicking the target version or branch in the Merge Version menu, the following dialog box is displayed.
In the following dialog box, you can see a tree structure of the source version items.
Select items from the displayed tree to merge from the source version to the target version or branch. By default, all the items are selected. You can choose specific items from the tree by selecting the check box in front of each item.
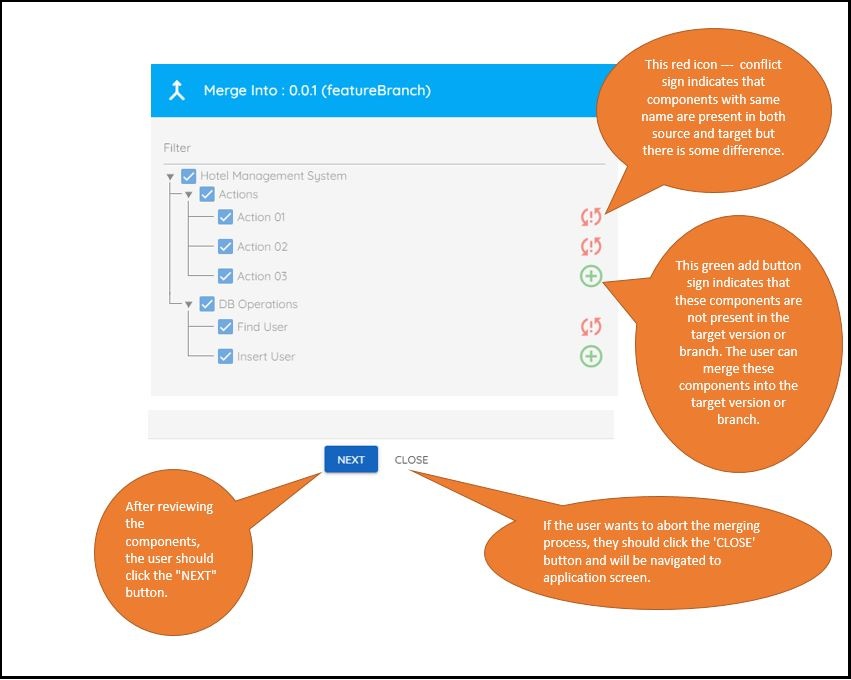
The equal sign (
 ) indicates that components with the same name exist in both the source and target versions and there is no difference.
Click NEXT.
Case A: There is some conflict in the components of the source and target
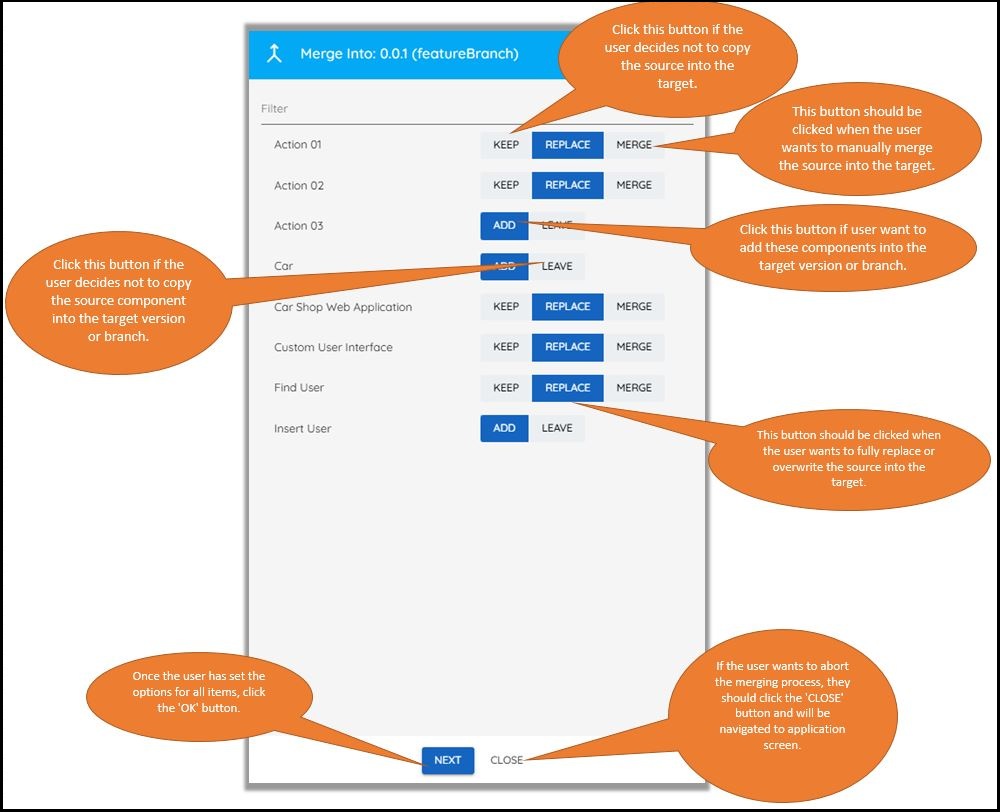
You can see all conflict components along with three option buttons: KEEP, REPLACE, and MERGE. By default, the REPLACE button is selected.
If a component is not already present in the target version or branch, two options are provided: ADD and LEAVE. By default, the ADD button is selected.
Decide which items you want to keep, replace, merge, add, and leave.
When you expand the Properties section, you can view both the properties of the selected component and the properties of the target version or branch component.
If a property has a single-line difference between the source and target, you can merge it directly by clicking the
 button.
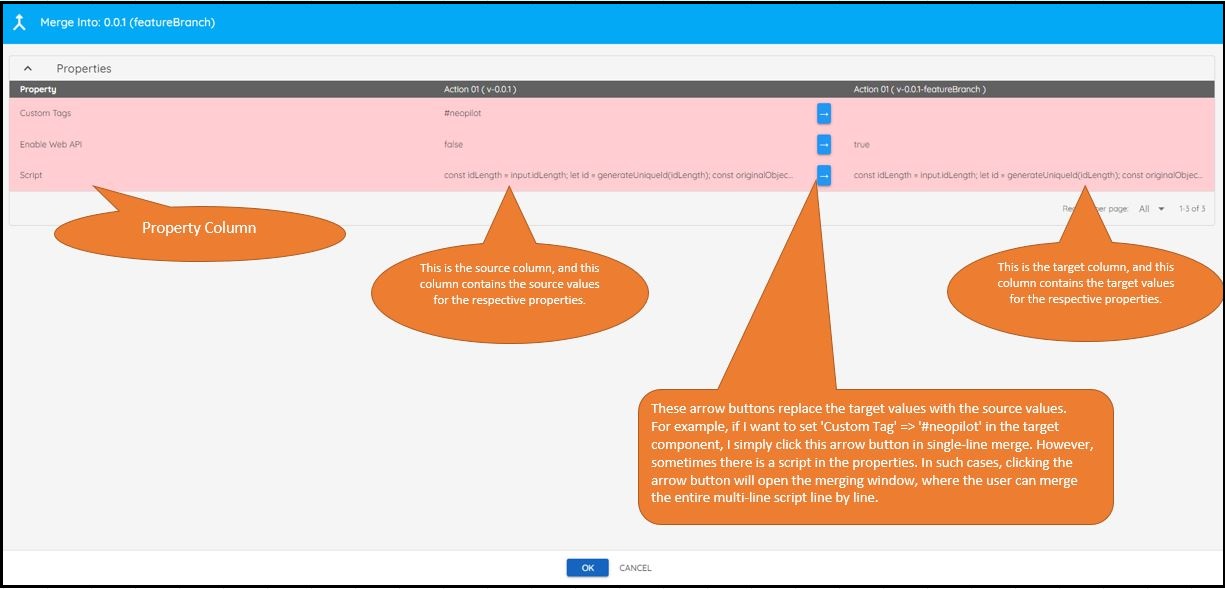

In this image, you clicked the
button in the first row, where a single-line difference is detected. As a result, the merge source item property is directly merged into the target item property, causing the background color of the row to change from light red to white.However, if the property has a multi-line difference, a merging dialog is displayed after clicking the
button.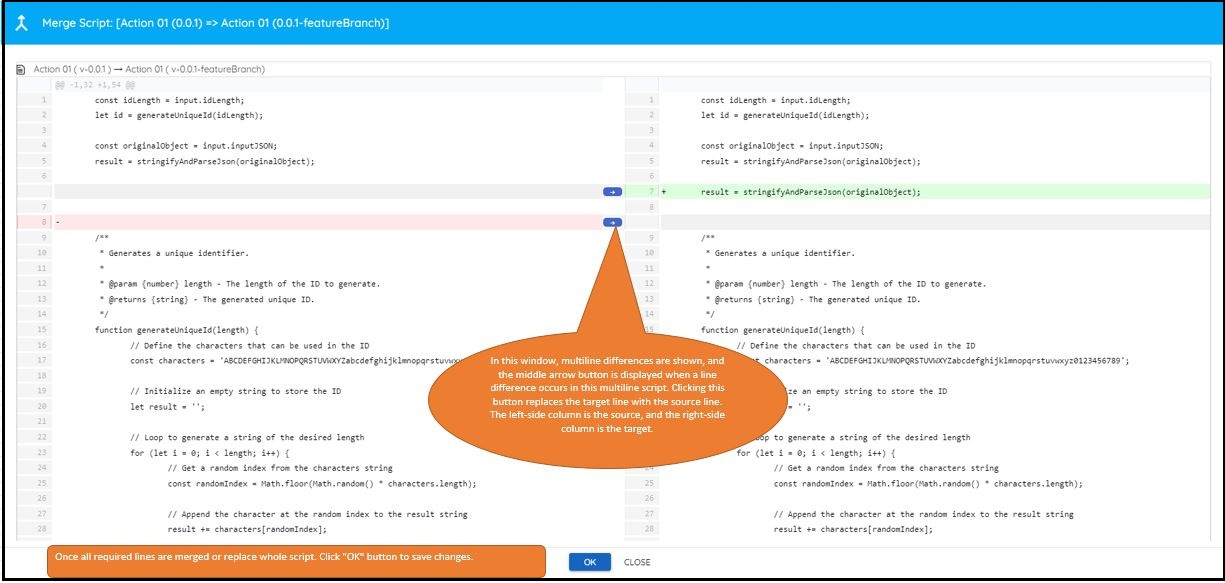
Once the difference is resolved, click OK. Return to the Merging Options dialog box.
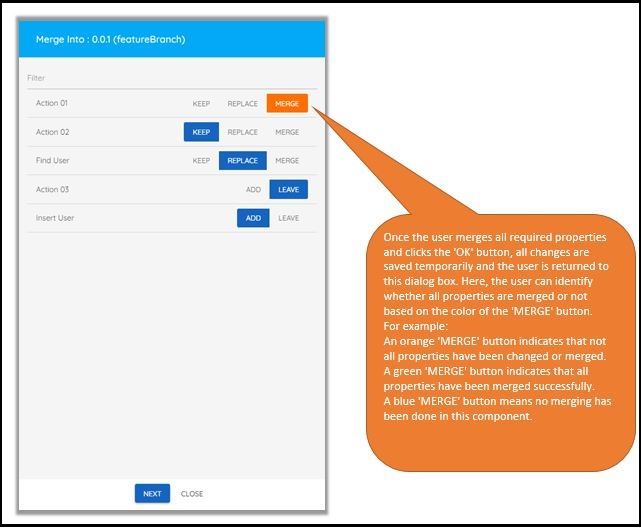
MERGE: If you click MERGE, a dialog box is displayed. You can manually merge source component properties into the target component properties.
When this dialog box appears, it displays the properties of both the source and target components. A white background indicates that no multiline or single-line differences are found.
If the background changes to 'light red', it signifies the presence of multiline or single-line differences, and these
buttons are visible.
REPLACE: When you want to replace the source component with the target component.
KEEP: When you do not want to make any changes to the target item.
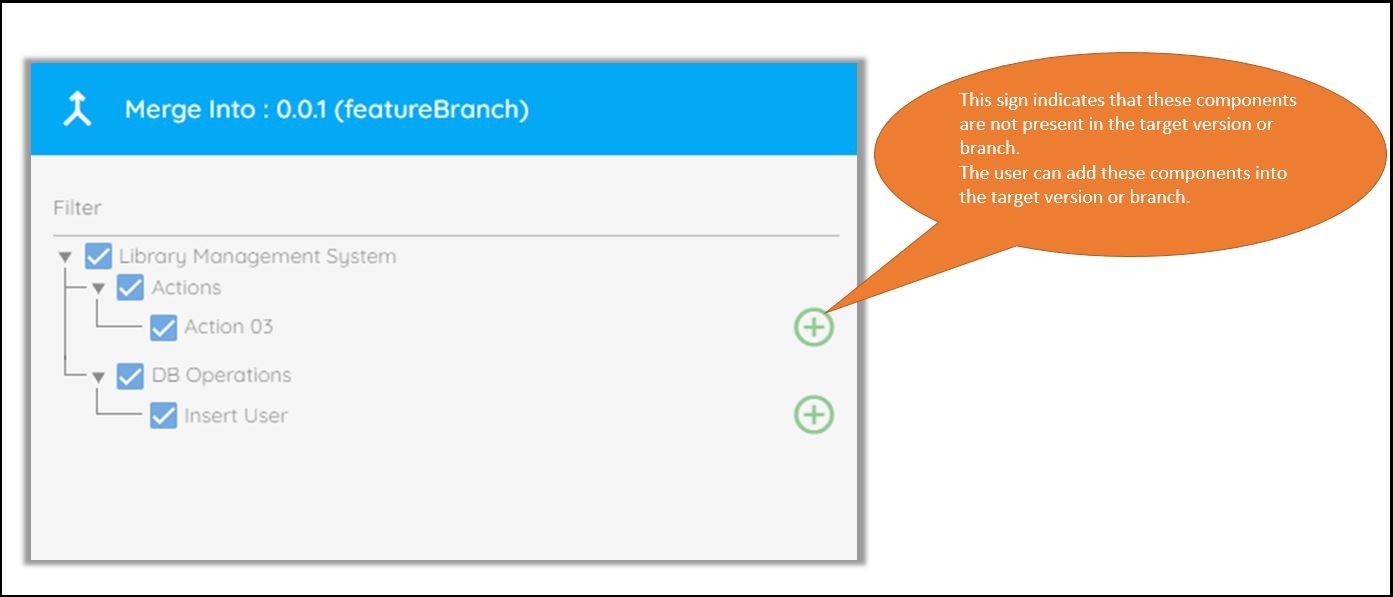
Case B: Components from the source are not present in the target
In the following image, you can view the tree structure of the source version or branch items. From there, select the items to merge into the target version.
Assume all selected items are unique, meaning they are not present in the target version or branch.
Click NEXT to see all selected items are ready to be merged into the target directly.
Click NEXT to add the selected components to the target version or branch. The following screen appears.
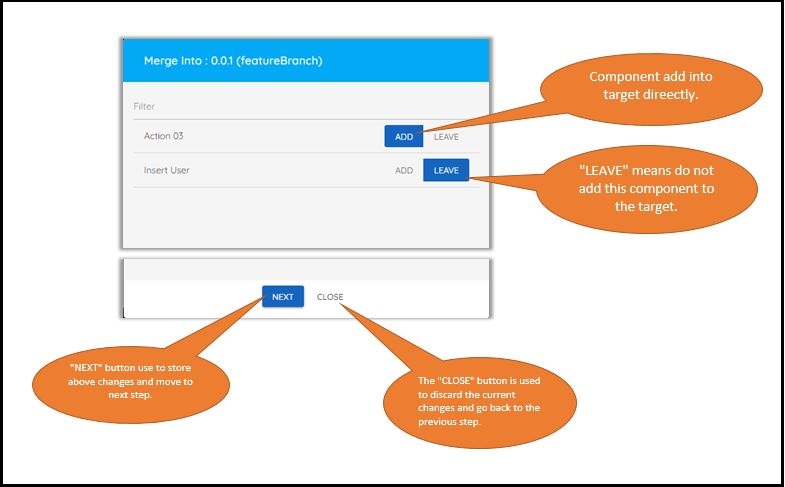
Either add the selected component to the merging process or exclude it by clicking LEAVE.
3.Click NEXT.
Step-3
All the following steps are similar for CASE A and CASE B.
The Merge Summary dialog box is displayed.

On clicking OK on the summary screen, an Info popup is displayed.

Step-4
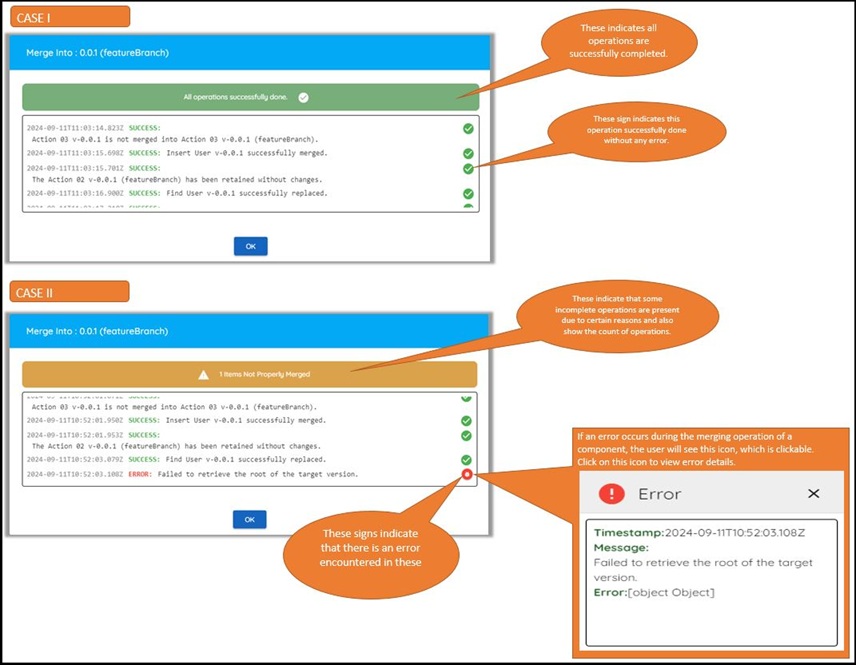
On clicking OK on the Merge Info dialog box, you can see the logs screen.
Case I: All the merging is done properly.
Case II: Some error has occurred when merging one of the components.