Deployment
To Deploy Application on Server
Click Deployments Icon.
Select the latest or desired server version.
Click Deployment menu.
Find the drag section in the Deployment menu.
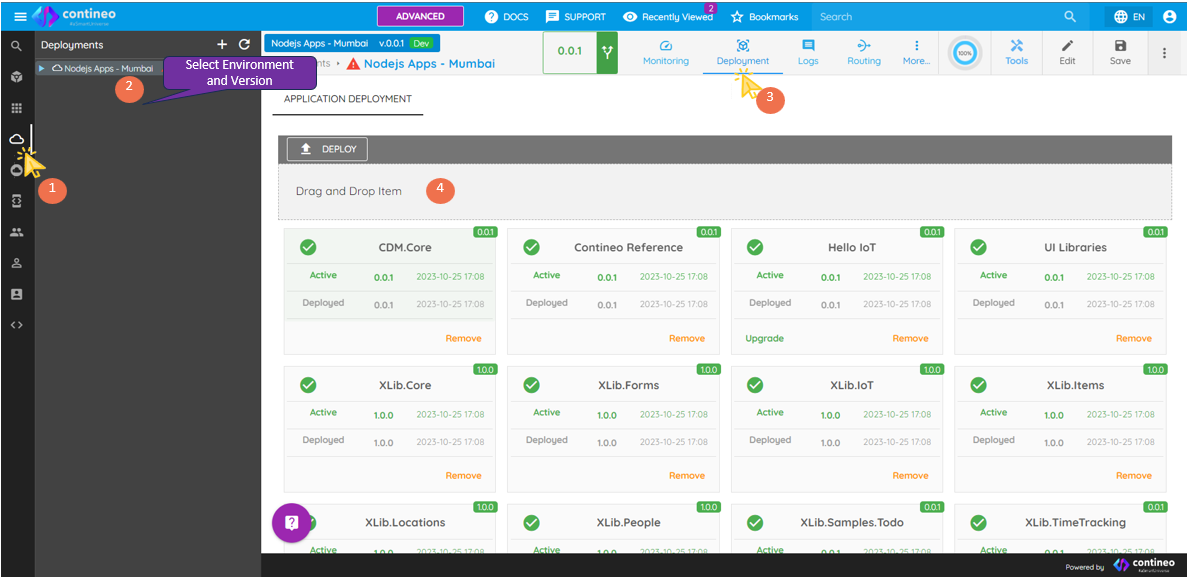
Click the Application Icon.
Drag your desired application in the drag section.
Click Save.
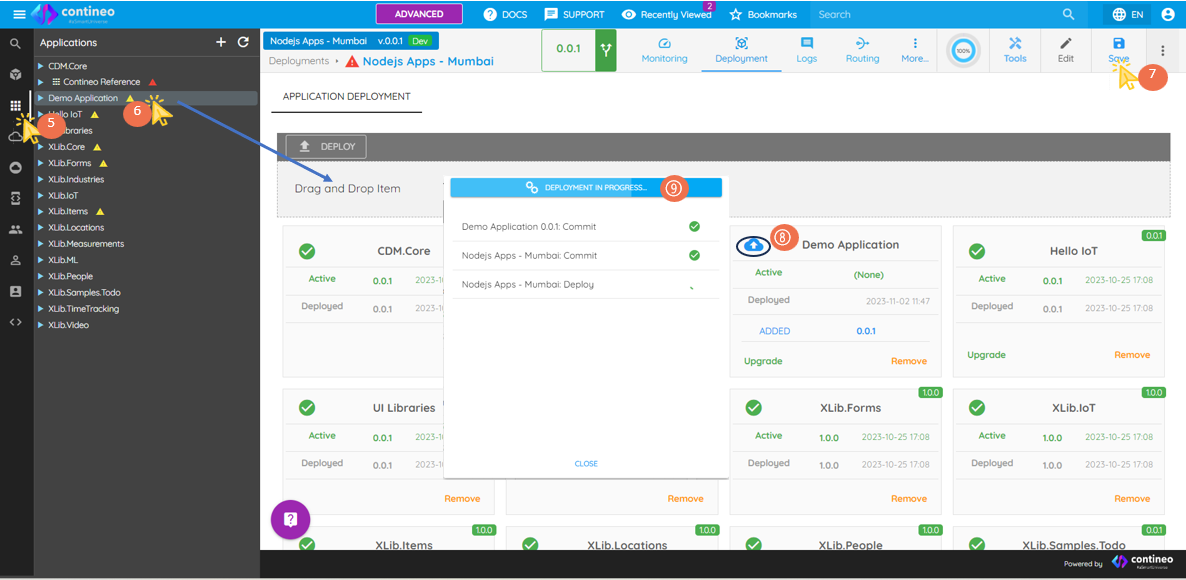
When you drag the application in the deployments section, the system adds an information box with the application name. This box has a cloud logo as shown in the image (number ➇). This icon indicates that the application is not deployed yet. After you save the deployment server, a popup appears showing deployment progress (number ➈).
Once all the items on the list in the popup are checked, close the popup.
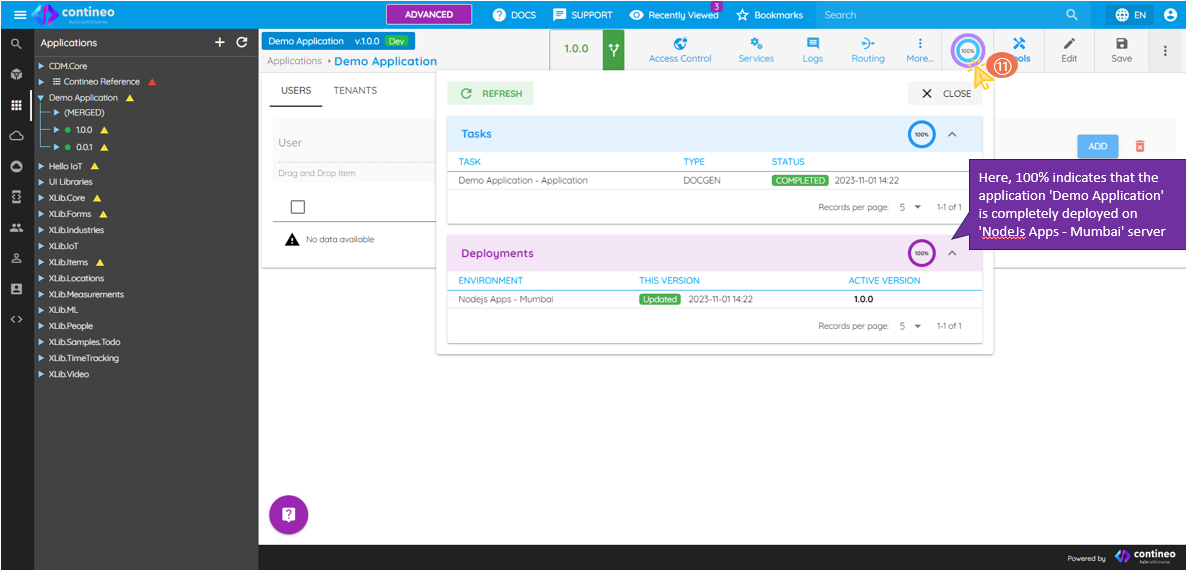
When deployment succeeds, the cloud icon is replaced with the check mark logo as shown in the image (number ➉).
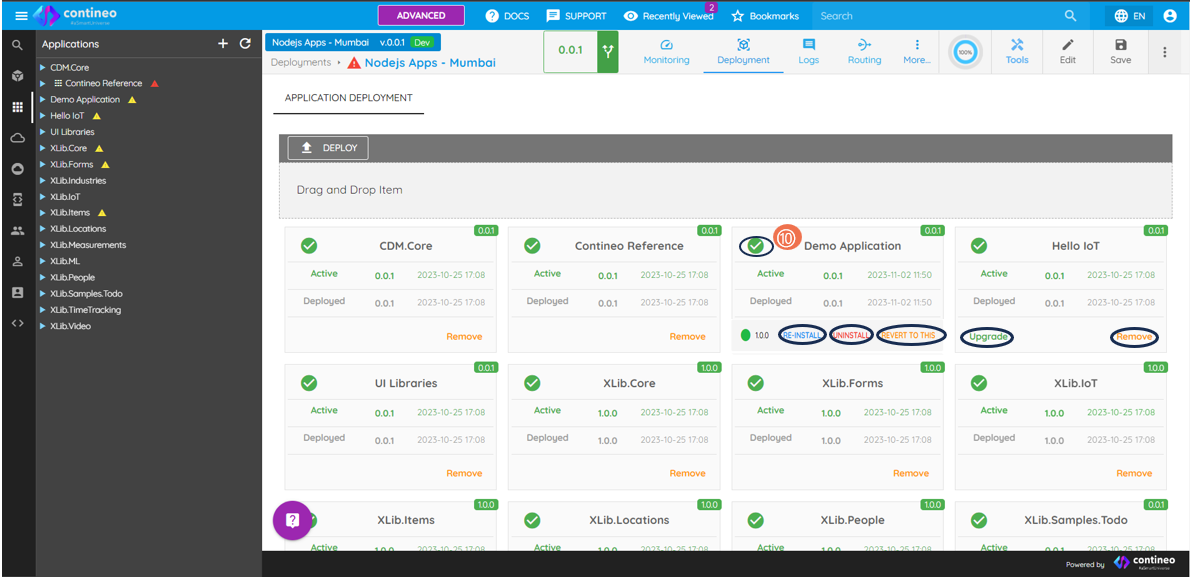
To verify if the application is deployed, click on the Circle as shown in the image (number ⑪). The percentage shows the status of the deployment.
If the progress pop-up does not appear or the cloud icon does not change to a checkmark:
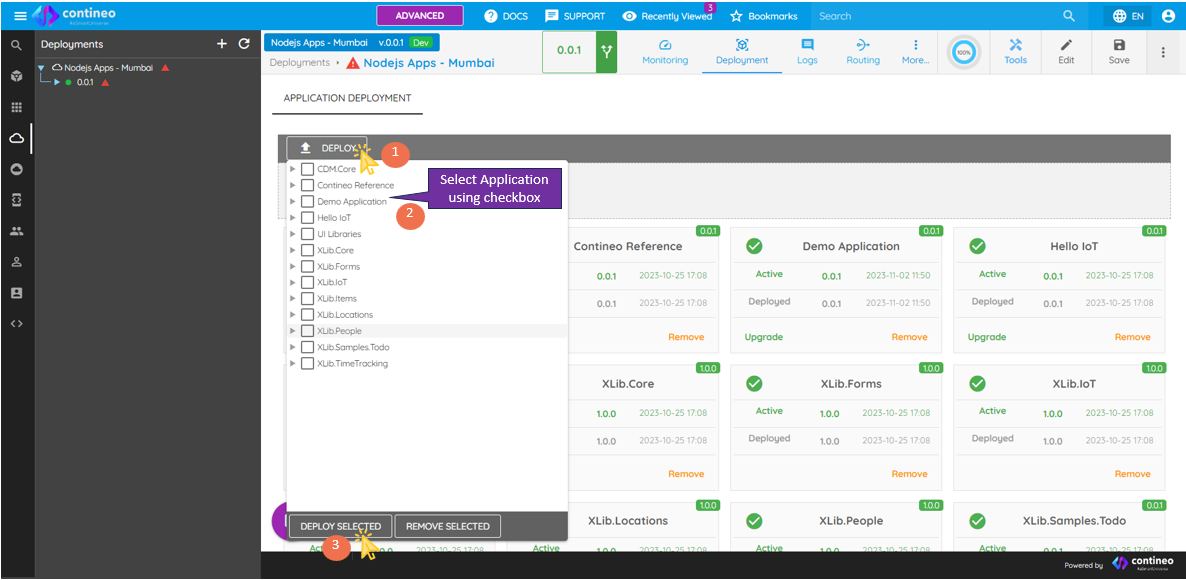
Click Deploy.
Select your Application by using the checkbox.
Click Deploy Selected.
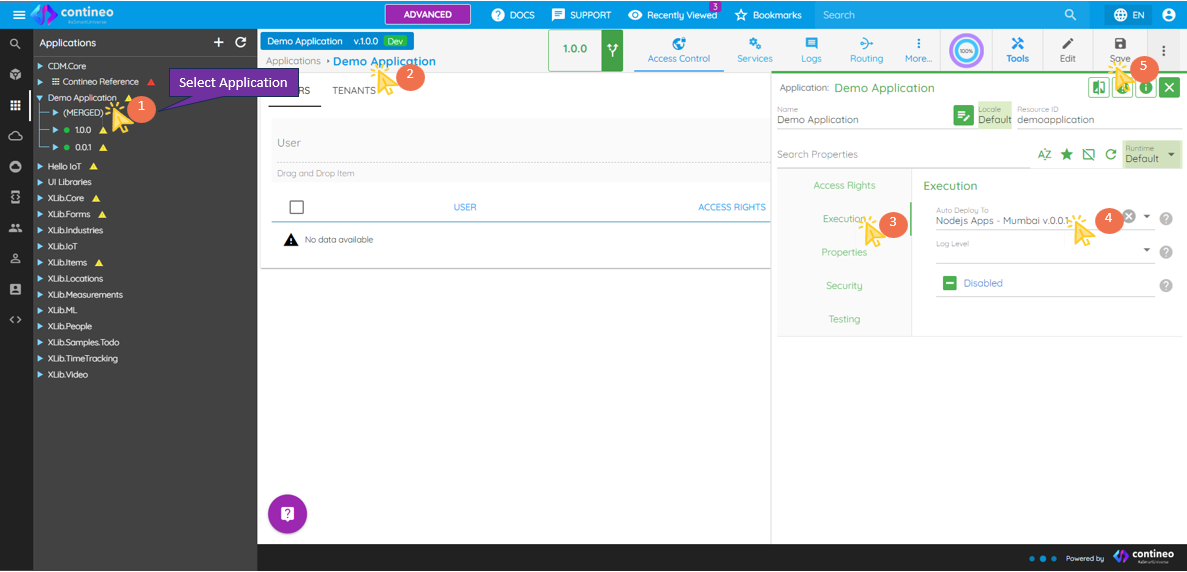
Another way To Deploy Applications on a single Server
Select your application.
Click on the application.
In the Property Panel, select Execution.
Click on Auto Deploy to, select your desired server from the dropdown list.
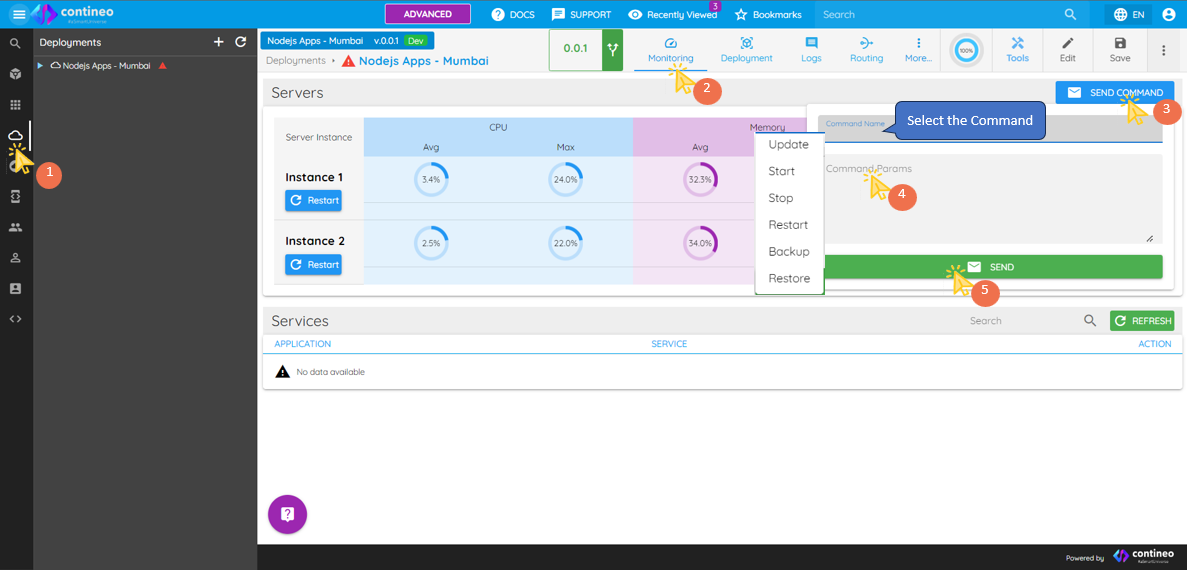
System Command
To Start, Stop, Restart, Update, Backup, and Restore the Server/environment, follow the steps below:
Click Deployments Icon.
Click Monitoring menu.
Click Send Command.
Select your command from the Command Name dropdown.
Add appropriate command parameters as per instruction. Default parameters are auto-populated when a command is selected.
Click Send.