Creating Custom Event Handlers
Learn how to define own custom event handlers, which can be invoked by emitting events.
Custom Event Handlers
When the standard events exposed by various UI components such as "On Click" or "On Mouse Over" do not suffice, custom event handlers can be defined for any section, cell, or UI component.
Example: You may need to fetch and reload data in a widget, UI Repeater, or any other component. Alternatively, you may want to open or close a dialog box after an operation is performed or completed.
Steps:
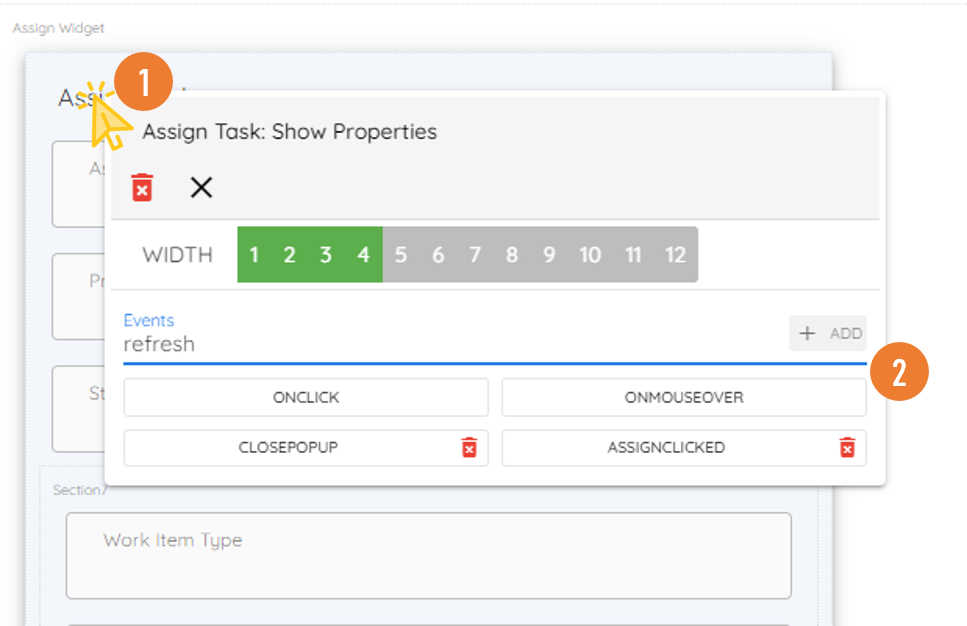
Right-click on the section, cell, or UI component to display the popup.
Enter the custom event name in the Events text box and click "+".
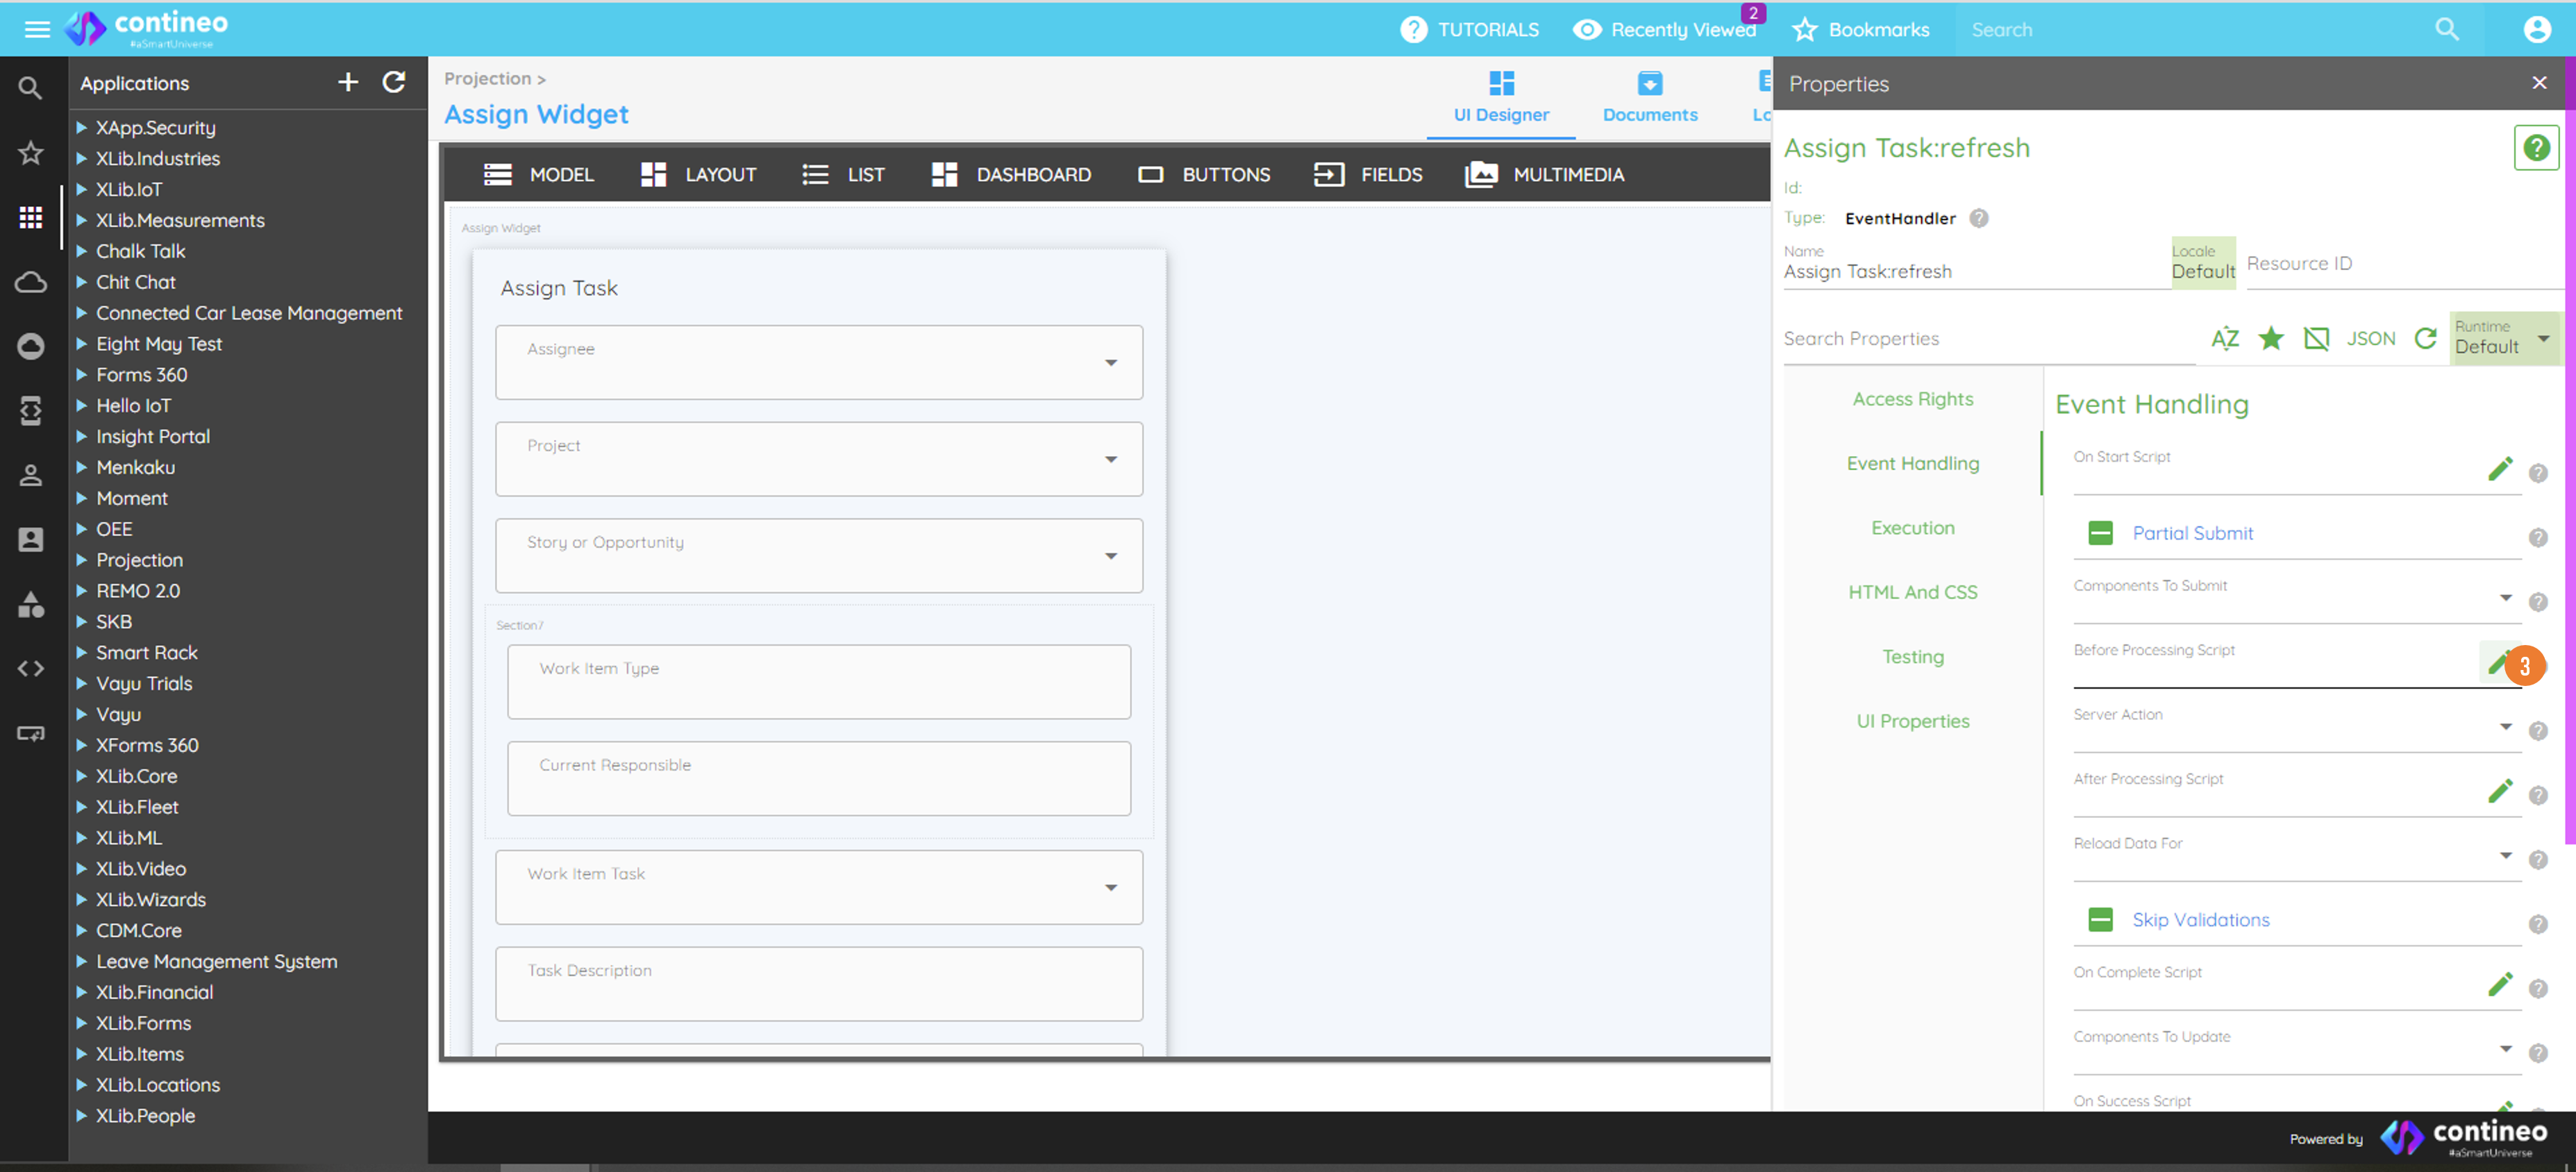
The panel on the right displays the properties of the event handler. Click the pencil icon to edit the "Before Processing Script".
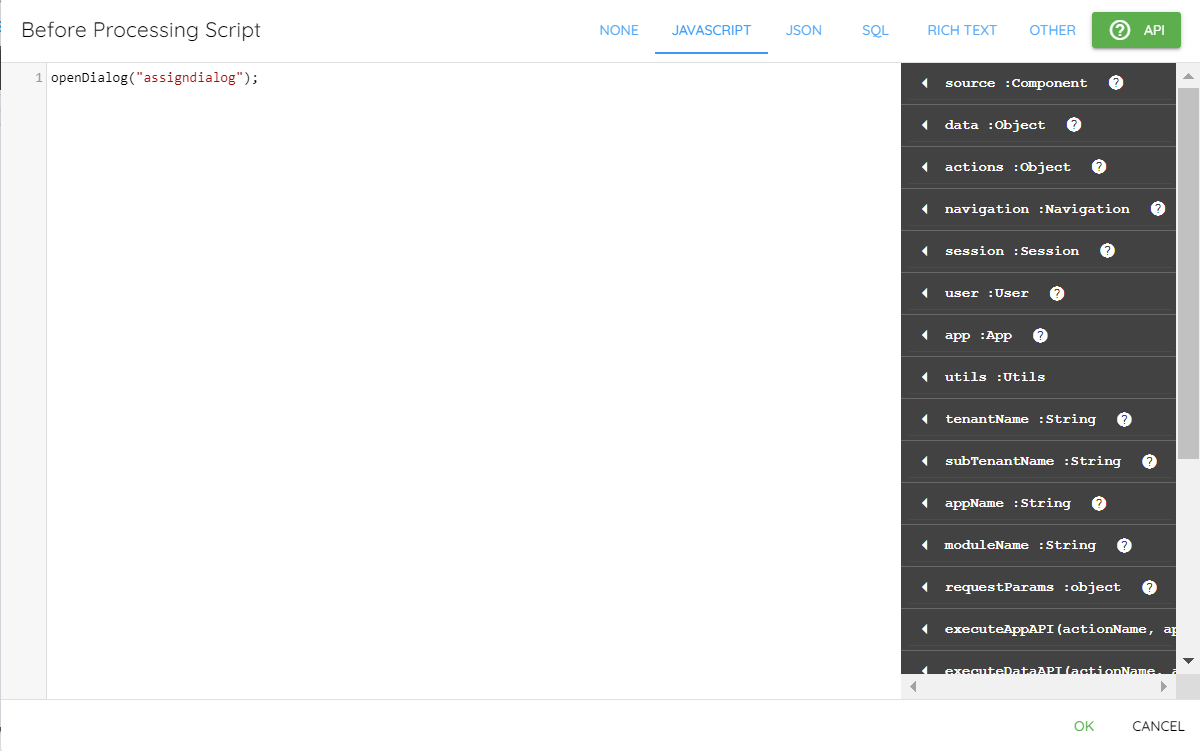
Define the event handler in the edit panel.
Navigate to UI Properties > Subscribe To Events, and subscribe to Global or Broadcast events. Multiple events can be subscribed to by adding commas in between.
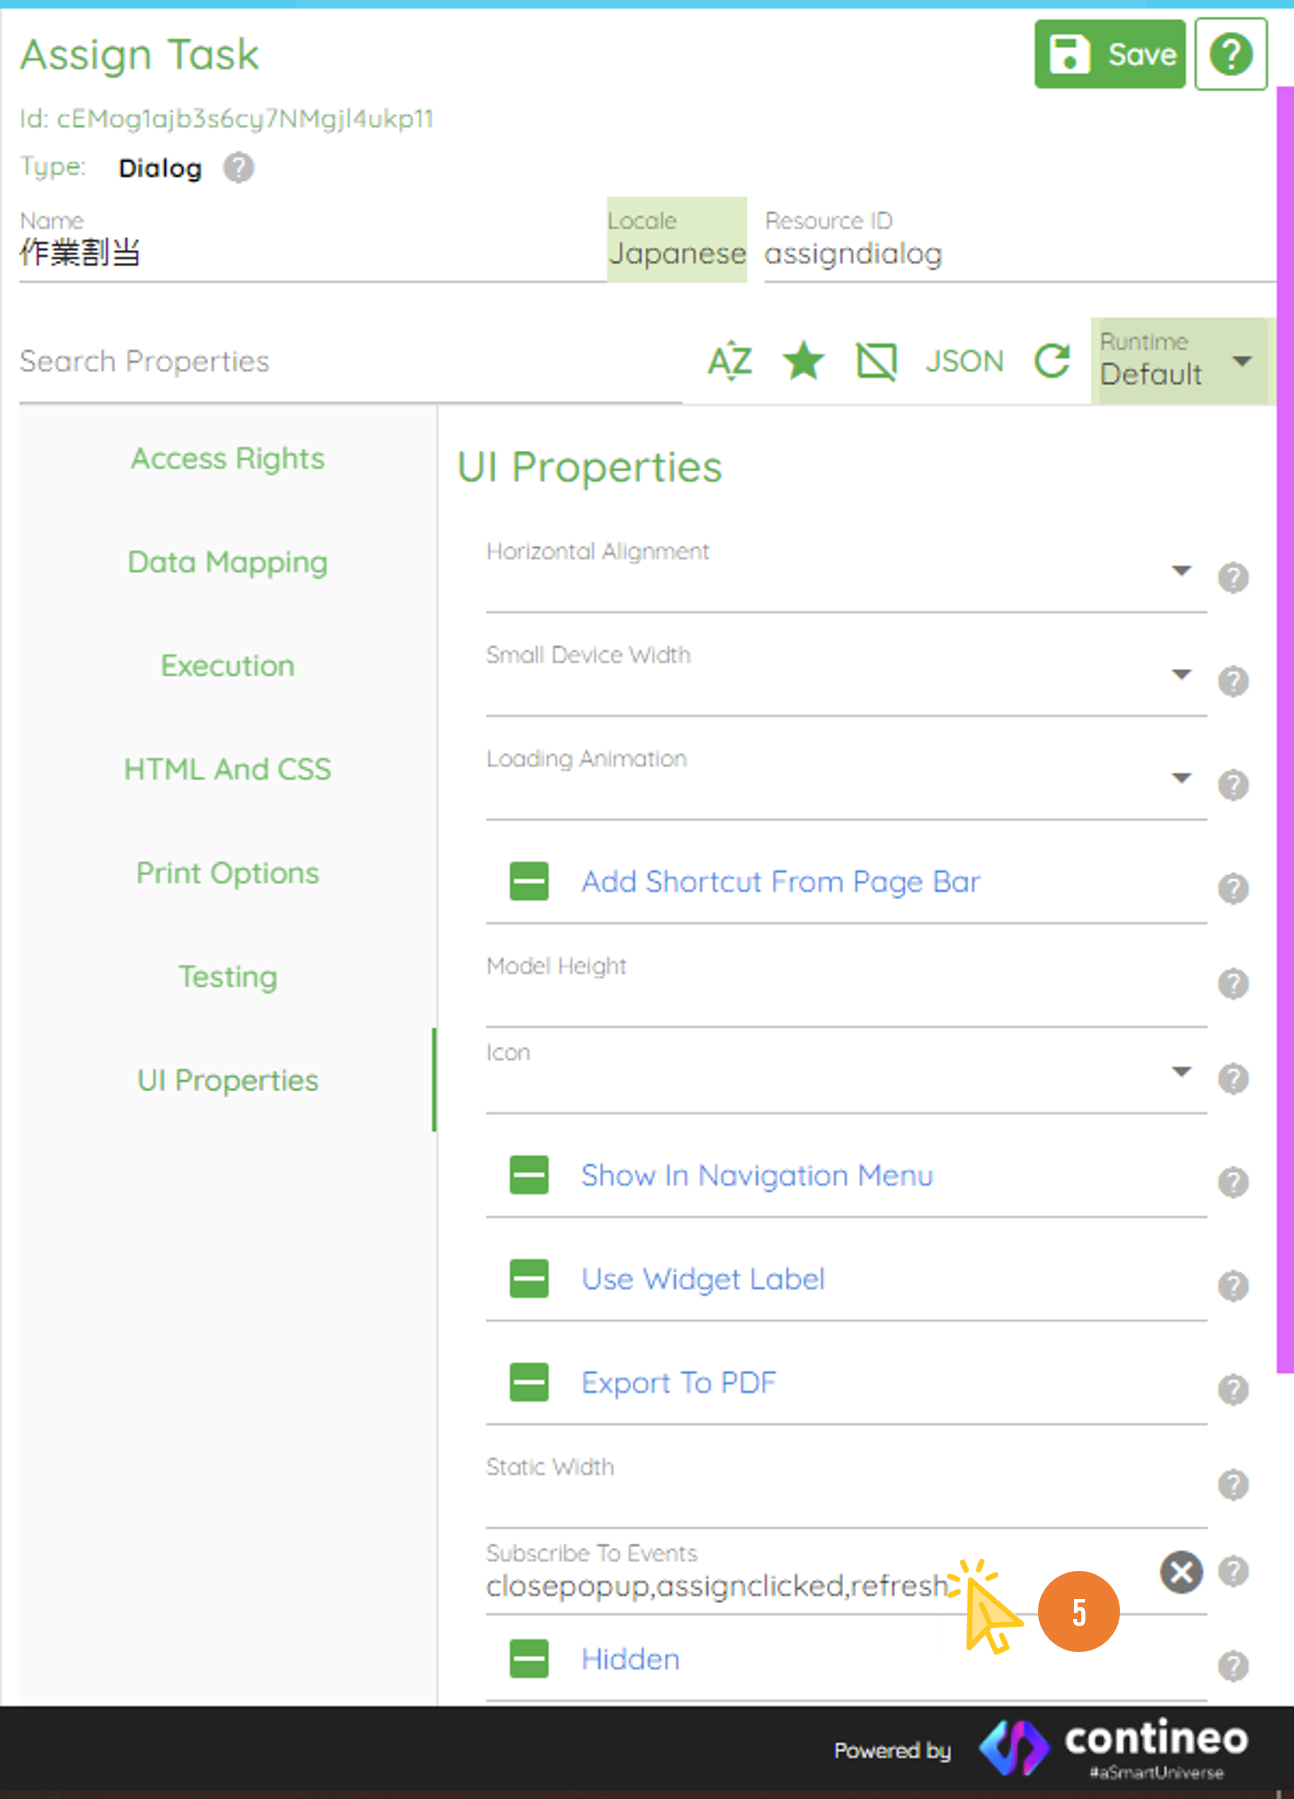
Events emitted to a Parent or Child widget do not require subscription.
In case of broadcast events emitted using
sendMessage, subscribe to themessagereceivedevent and handle it as follows:if(eventData =="REFRESH") {app.emitEvent("statuschanged", eventData);} elseif (eventData =="CALLREFRESH") {app.emitEvent("statuschanged", eventData);app.emitEvent("updatecalls", eventData);} elseif (eventData =="STORYREFRESH") {app.emitEvent("storychanged", eventData);}