Data Mapping - Ad hoc Data Bean Path
Build and utilize Data Bean Path in ad hoc manner.
This section explains the steps to:
Configuring Data Loader.
Set up Data bean path.
Rendering data in a UI.
Part 1: Create UI
Open or Create a Custom Widget.
Drag and drop Section (Parent component).
Add child components (such as Field, Label) to the Section.
Part 2: Configure Action to fetch data
Action to fetch the data can be a DB Action, a JavaScript Action, or an Action to get data from a third-party application.
Depending on the Parent component type, the data fetched by the Action should be a JSON Object or a JSON Array.
If the Parent component type supports repeating data or multiple data points, then the Action should return a JSON array.
Example: Grid, Chart, MapIf the Parent component type does not support repeating data, then the Action should return a JSON Object.
Example: Section
Although the following example refers to a DB Action, these steps are applicable to any Action.
Steps:
Click
<Application Name>> DB Operations > +.Give a unique name.
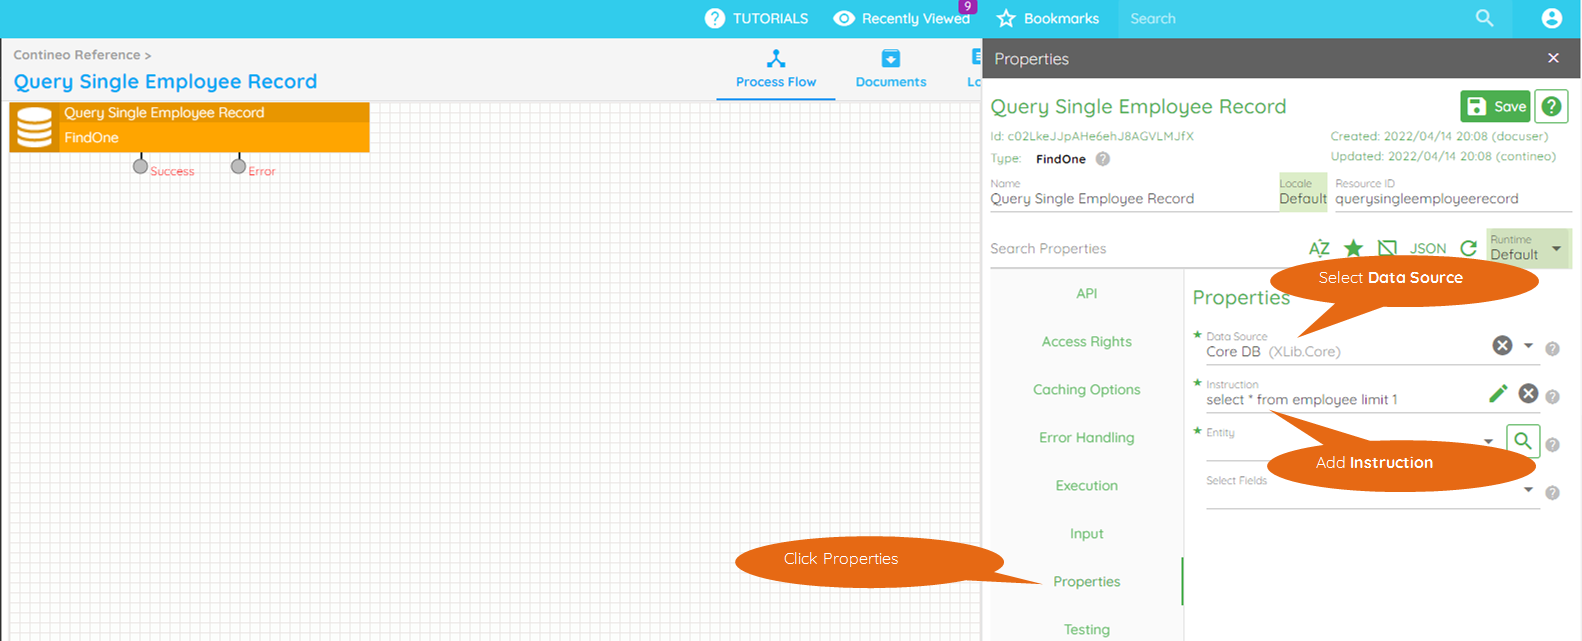
Select appropriate Action Type. In the current example, select FindOne, since Section is selected as the Parent component.
Open the Properties Panel.
Enter query to return a single row or multiple rows depending on the selected Action Type. In the current example, the query should return a single row.
Select the Data Source.
Part 3: Add the Action to the UI
Steps:
Open the User Interface by expanding User Interfaces and selecting the page created in step 1.
Expand the item explorer (DB Operations or Actions) containing the data-fetching Action.
Click Model tab in the User Interface.
Drag the Action into the Drag and drop items.
Part 4: Configure data loader
Actions dragged and dropped in "User Interface > Model" (Step 3) can be used as Data Loaders by the UI components.
Steps:
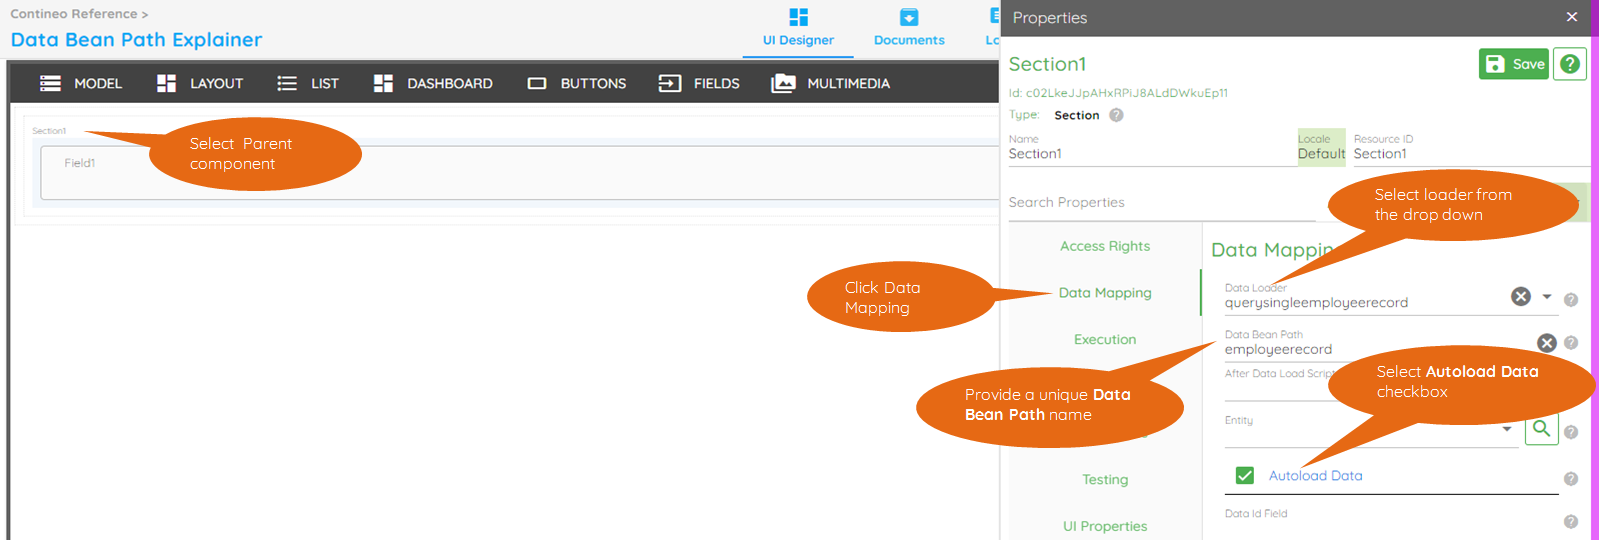
Select the Parent Component (such as Section, Grid, Chart, Widget).
Click Data Mapping.
Select the Action from the Data Loader dropdown list. This dropdown lists all the Actions dragged and dropped in Step 3.
Provide a unique name for the Data Bean Path.
Select Autoload Data checkbox. This loads the data whenever the page is rendered.
This step loads the data in the parent component when the page is loaded or refreshed. The loaded data can be consumed by the child components.
Part 5: Configure child components to render data
This part explains how the child components can access the data loaded by the parent component. In Step 4, data is loaded for the parent component Section.
The data loaded must either be a:
JSON Object
{"<key 1>":"<value 1>","<key 2>":"<value 2>",
  ...
}
OR
JSON Array
[{"<key 1>":"<value 1>","<key 2>":"<value 2>",
    ...
  },{"<key 1>":"<value 1>","<key 2>":"<value 2>",
    ...
  }]
The current example executes a FindOne query:
SELECT * FROM employee LIMIT 1which creates the JSON Object:{"id": <id>, "employeename": <employeename>, ...}Child component renders the data by referring to the
"key"element present in the JSON Object or the JSON Array.
Steps:
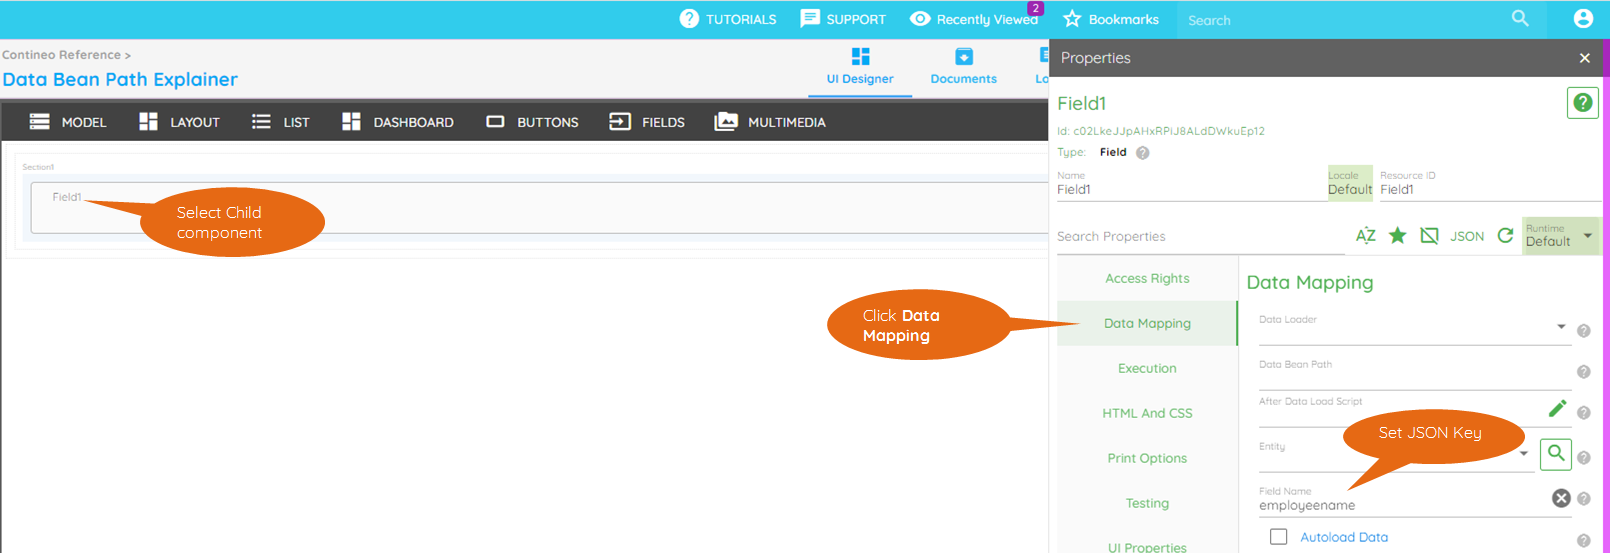
Select the child object such as the Text box.
Click Data Mapping.
Enter the name of the JSON
"key"in the Field Name.Repeat steps 1–3 above for each child element.
Part 6: Testing
Add the screen to a web module and launch the web module.