NeoPilot accelerates application development through an AI-powered platform that guides users through four key phases. The journey begins with requirement specification where users enter AI API credentials and define application requirements either manually or using the AI-assisted elaboration feature.
Next, in data model configuration, users define entities and relationships through an intuitive visual interface. The system offers predefined behavior patterns and suggests appropriate options based on described functionality.
The third phase focuses on Business Process Model workflow creation. Users can implement suggested workflows or develop custom ones by either uploading existing Standard Operating Procedures or generating them through AI assistance.
Finally, the analytics dashboard setup phase enables users to configure comprehensive visualizations with graphs, widgets, and interactive tables. NeoPilot automatically generates supporting SQL queries for these components.
Throughout the process, clear navigation buttons guide users through each stage, while sample visualizations help users understand available options. By combining visual interfaces with conversational AI assistance, NeoPilot enables efficient application development regardless of technical expertise, allowing users to focus on business logic rather than coding complexities.
Specifying Requirements and Start Building
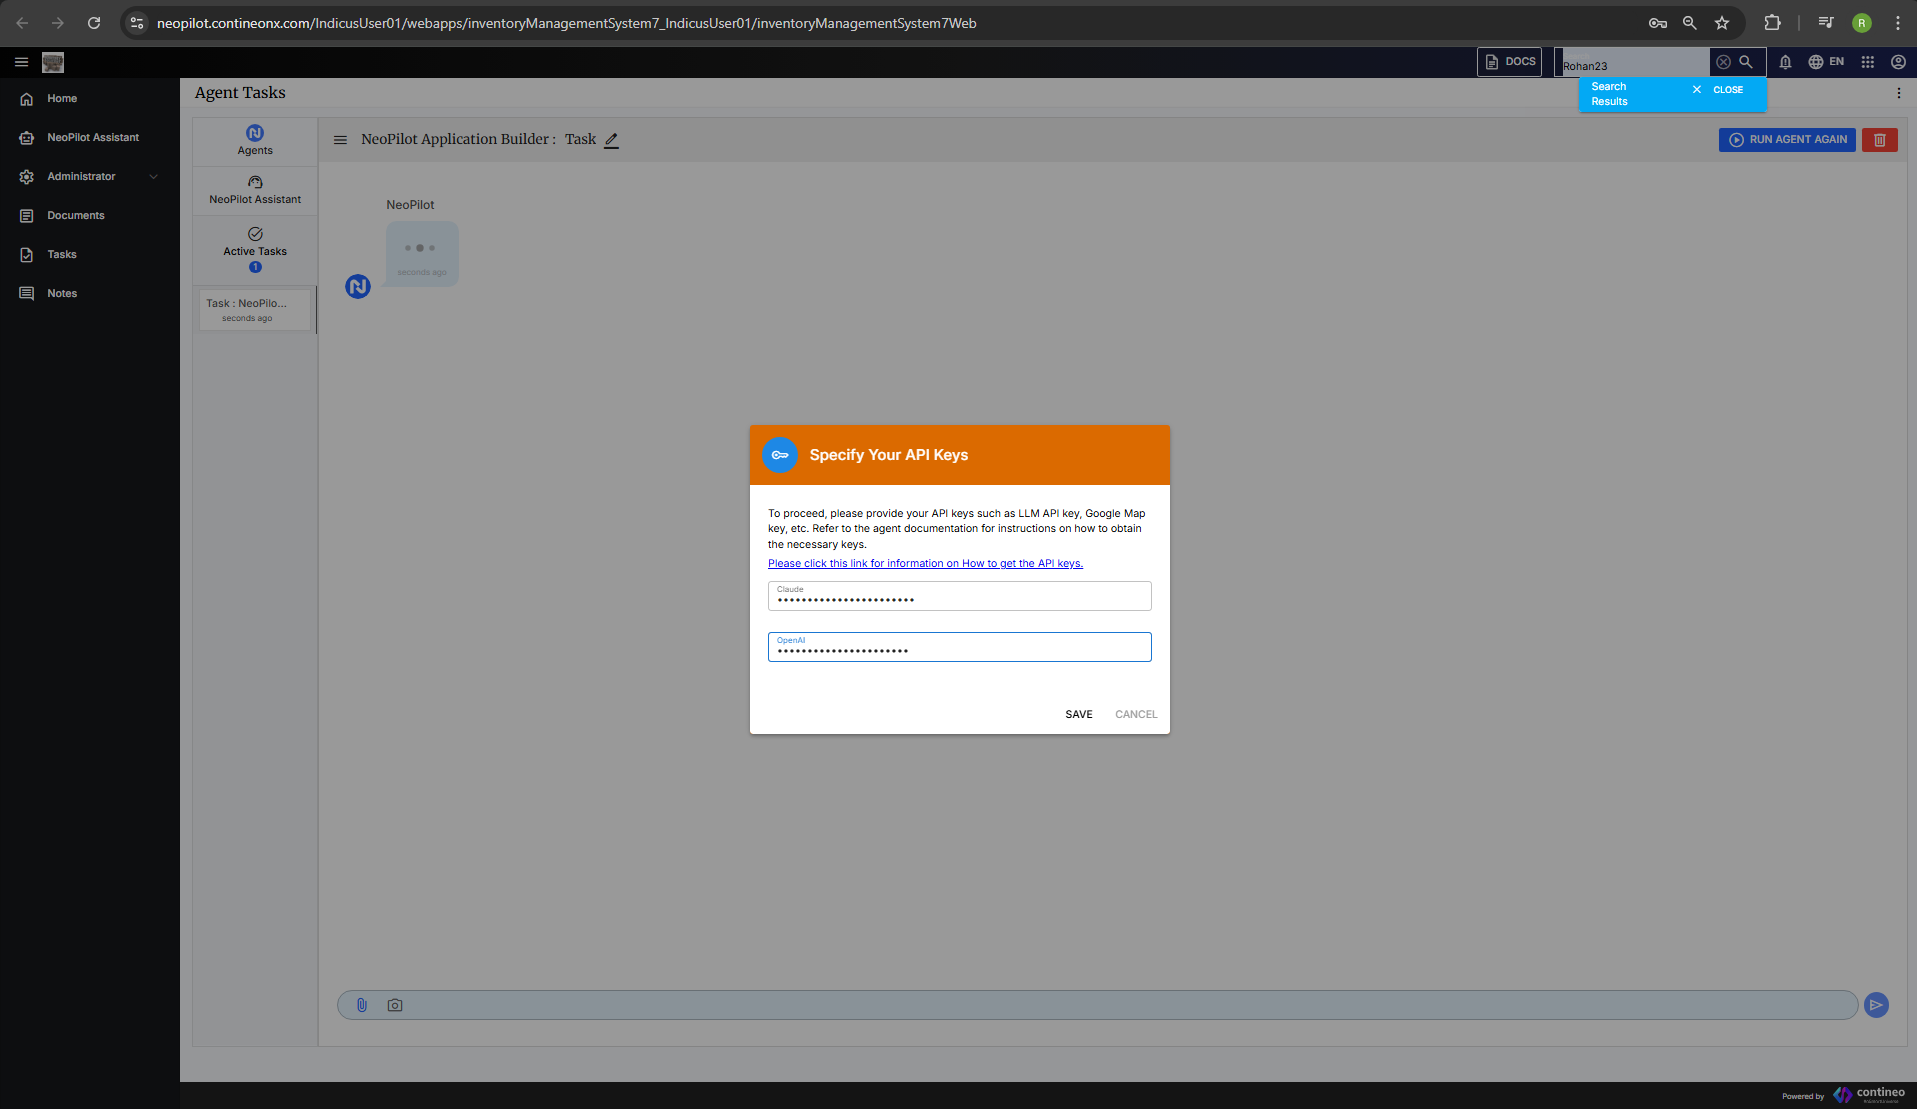
A new browser tab is open and displays a pop-up with the title Specify Your API Keys. Enter your Claude AI and OpenAI API keys, then click SAVE.
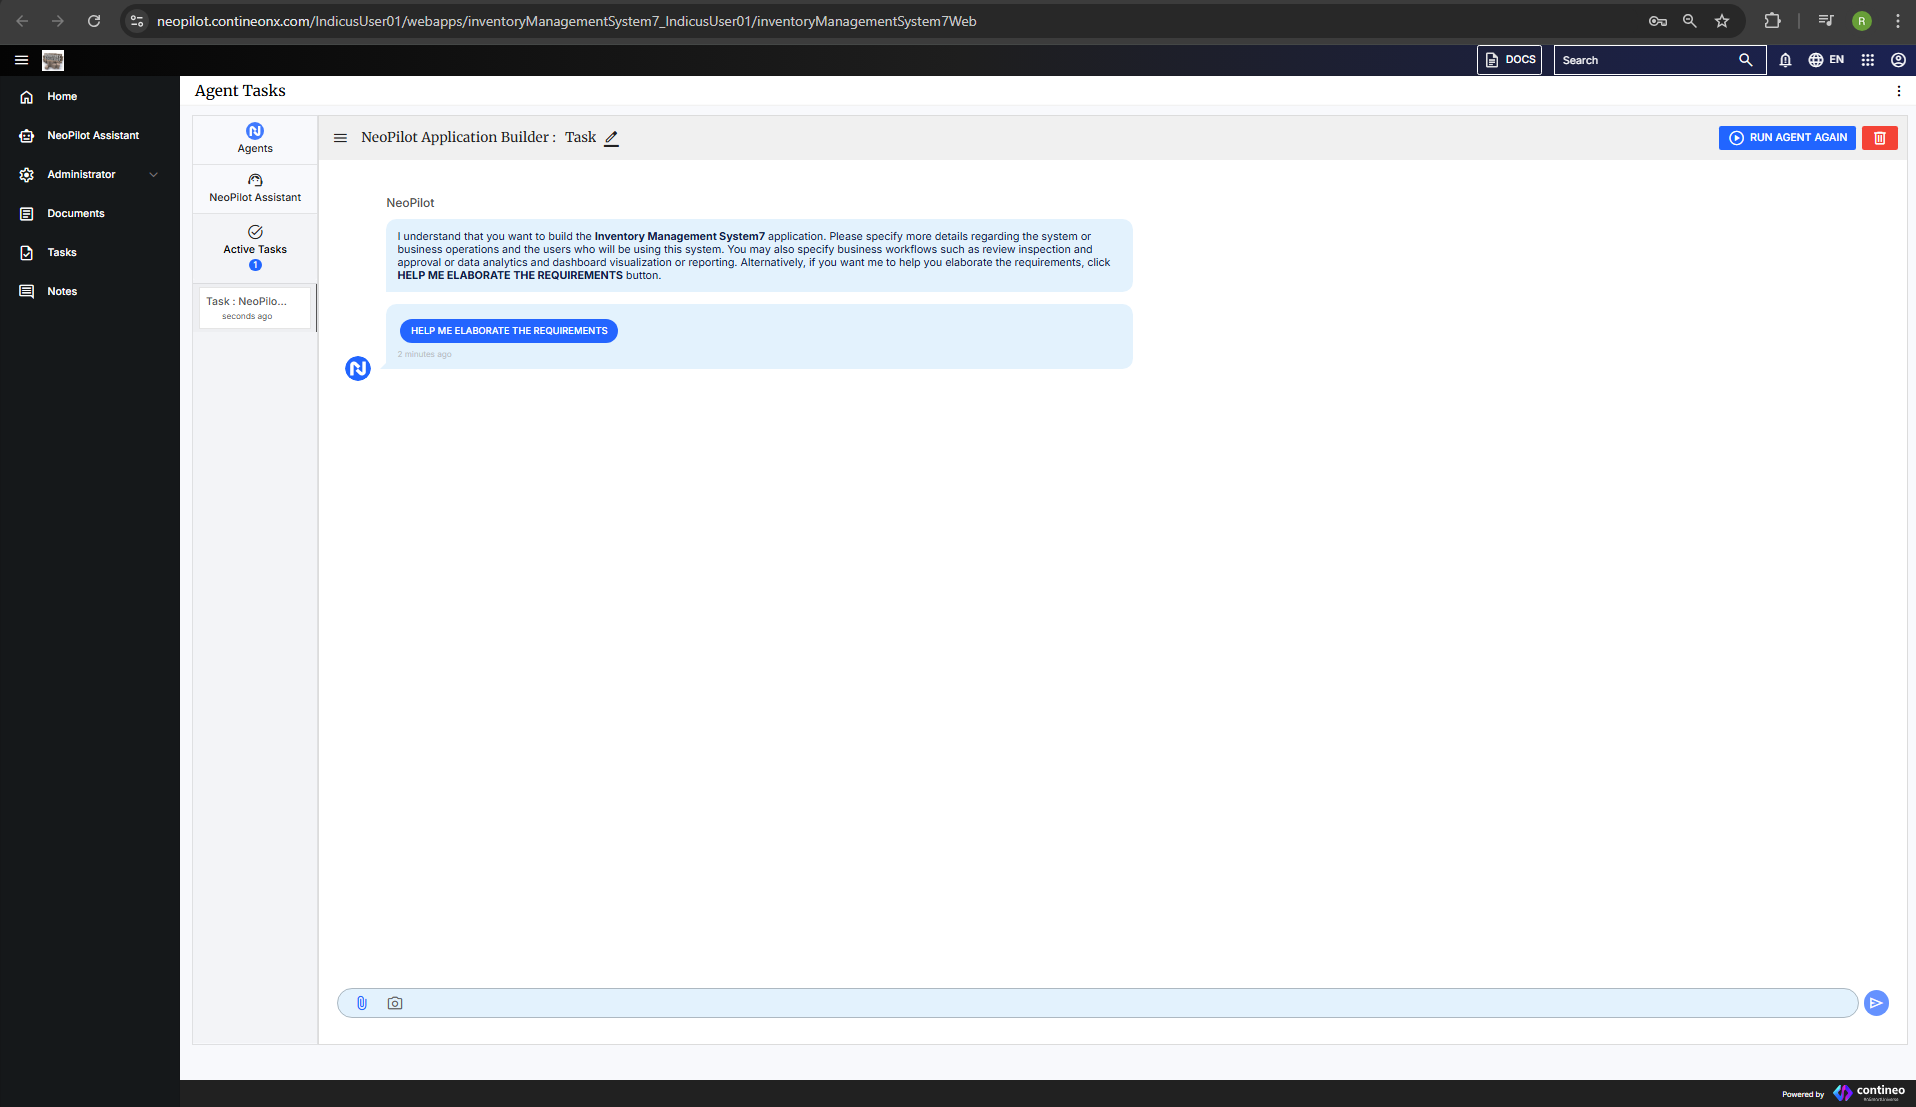
After entering your API keys, you can specify more details regarding your system. Here, you can either provide details about your application or to generate a more comprehensive set of requirements, click Help Me Elaborate the Requirements. NeoPilot can then build the most effective solution.
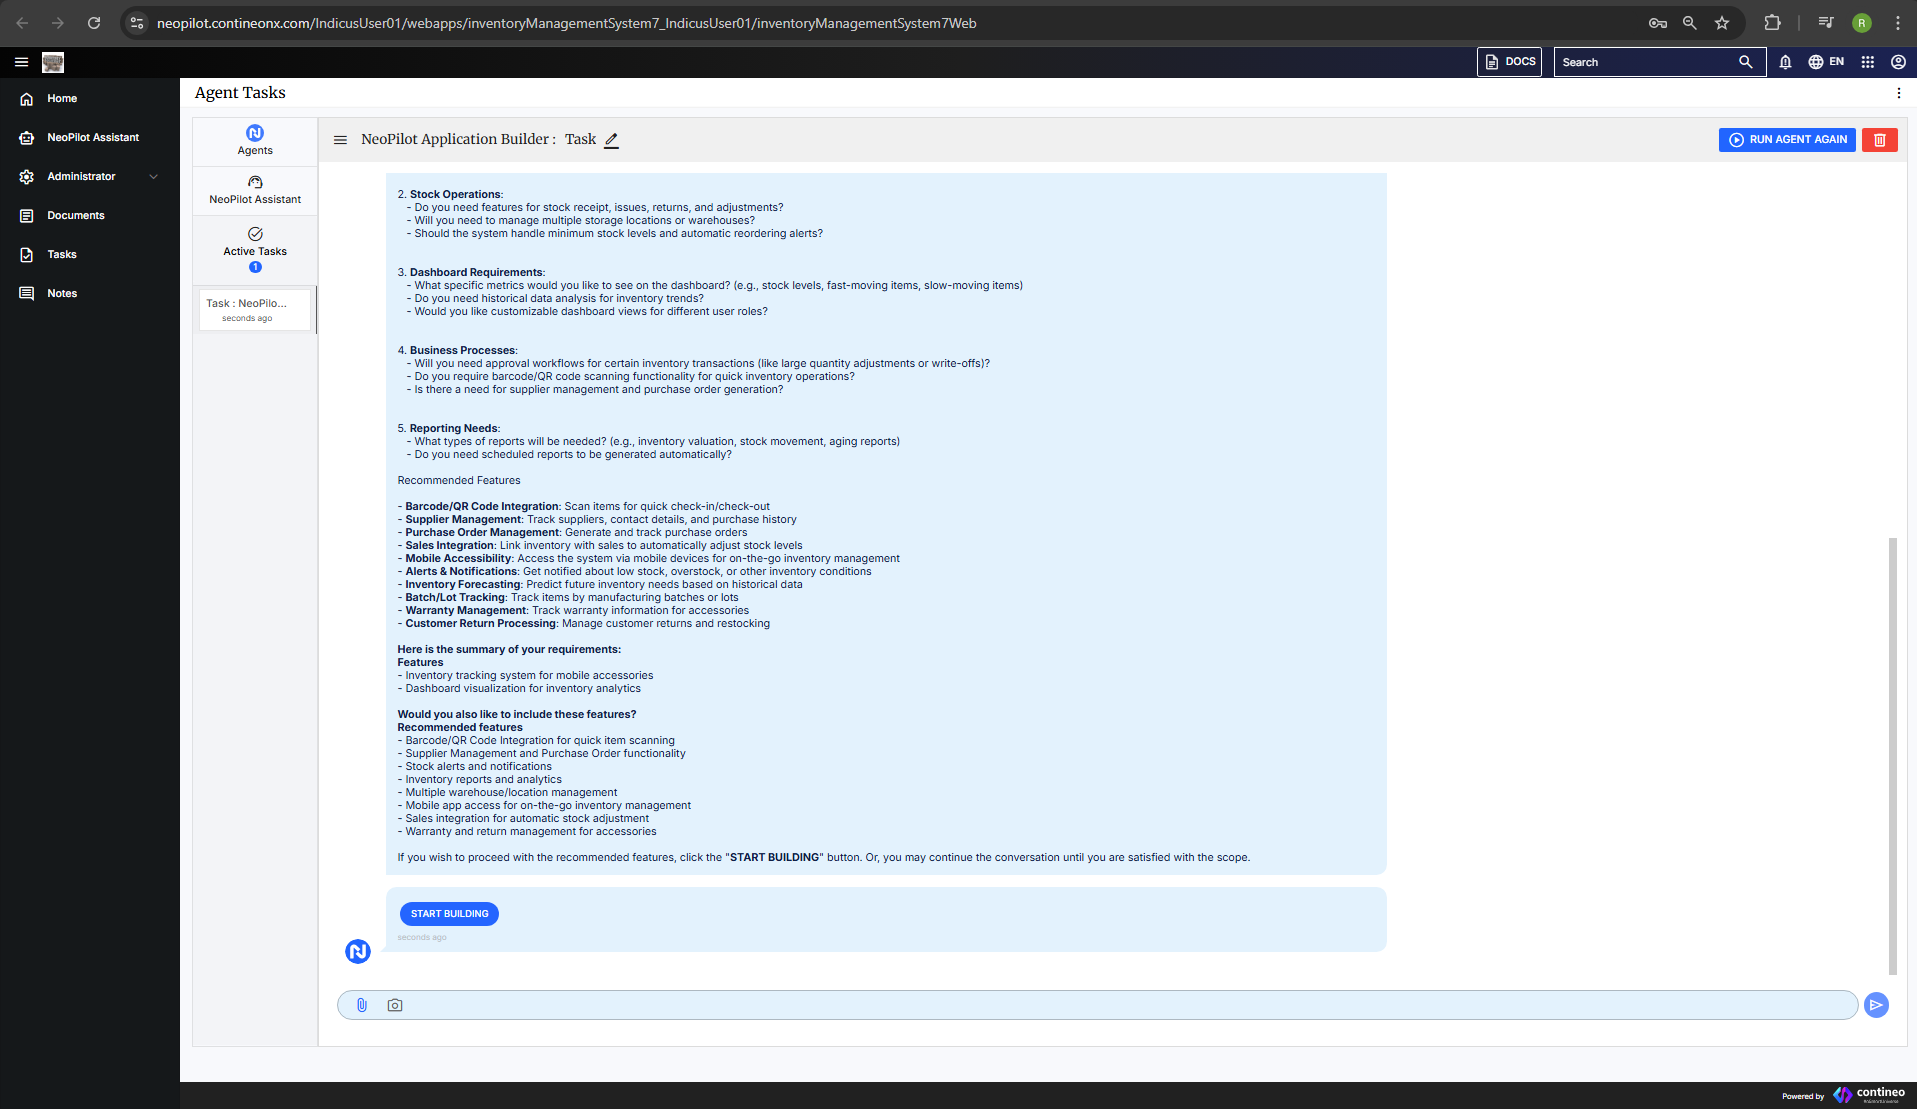
If you provide additional information about your application, NeoPilot analyzes the requirements and suggests appropriate features based on the input.
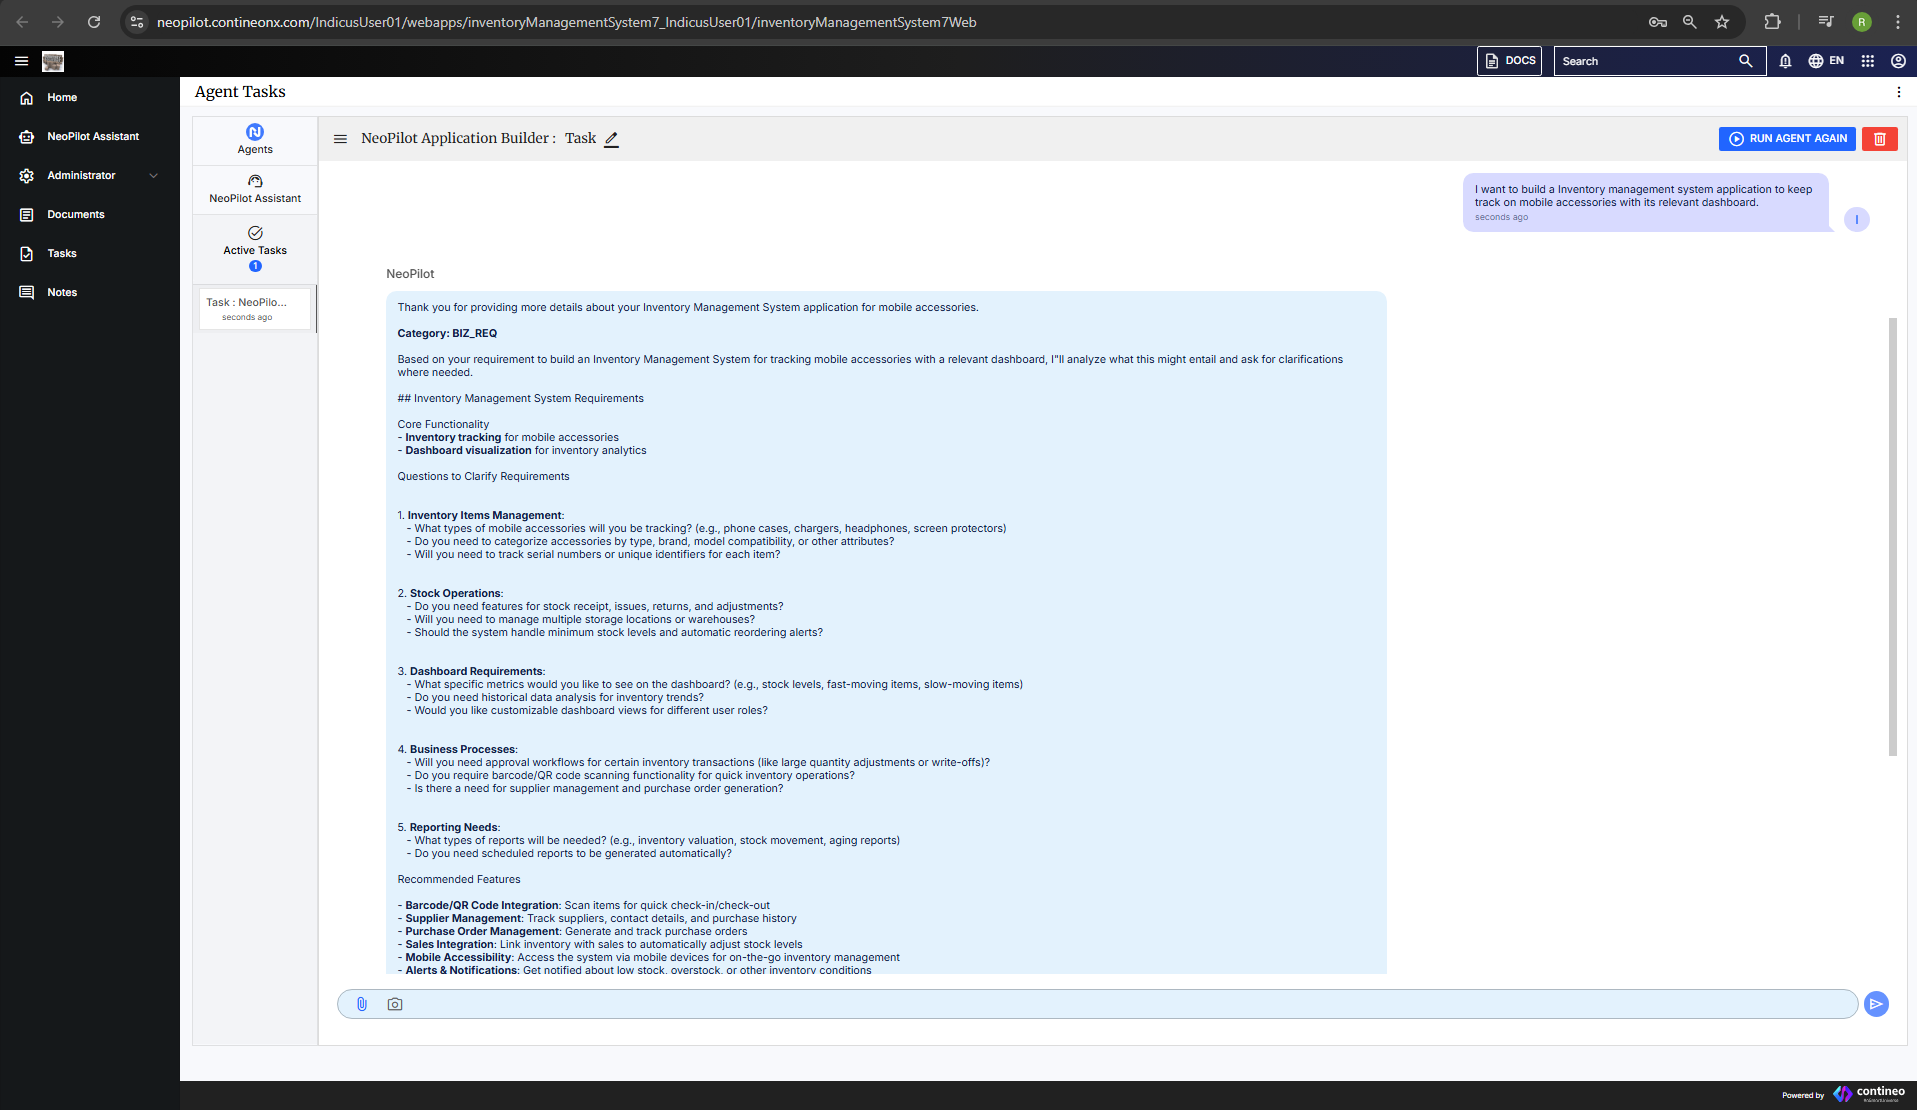
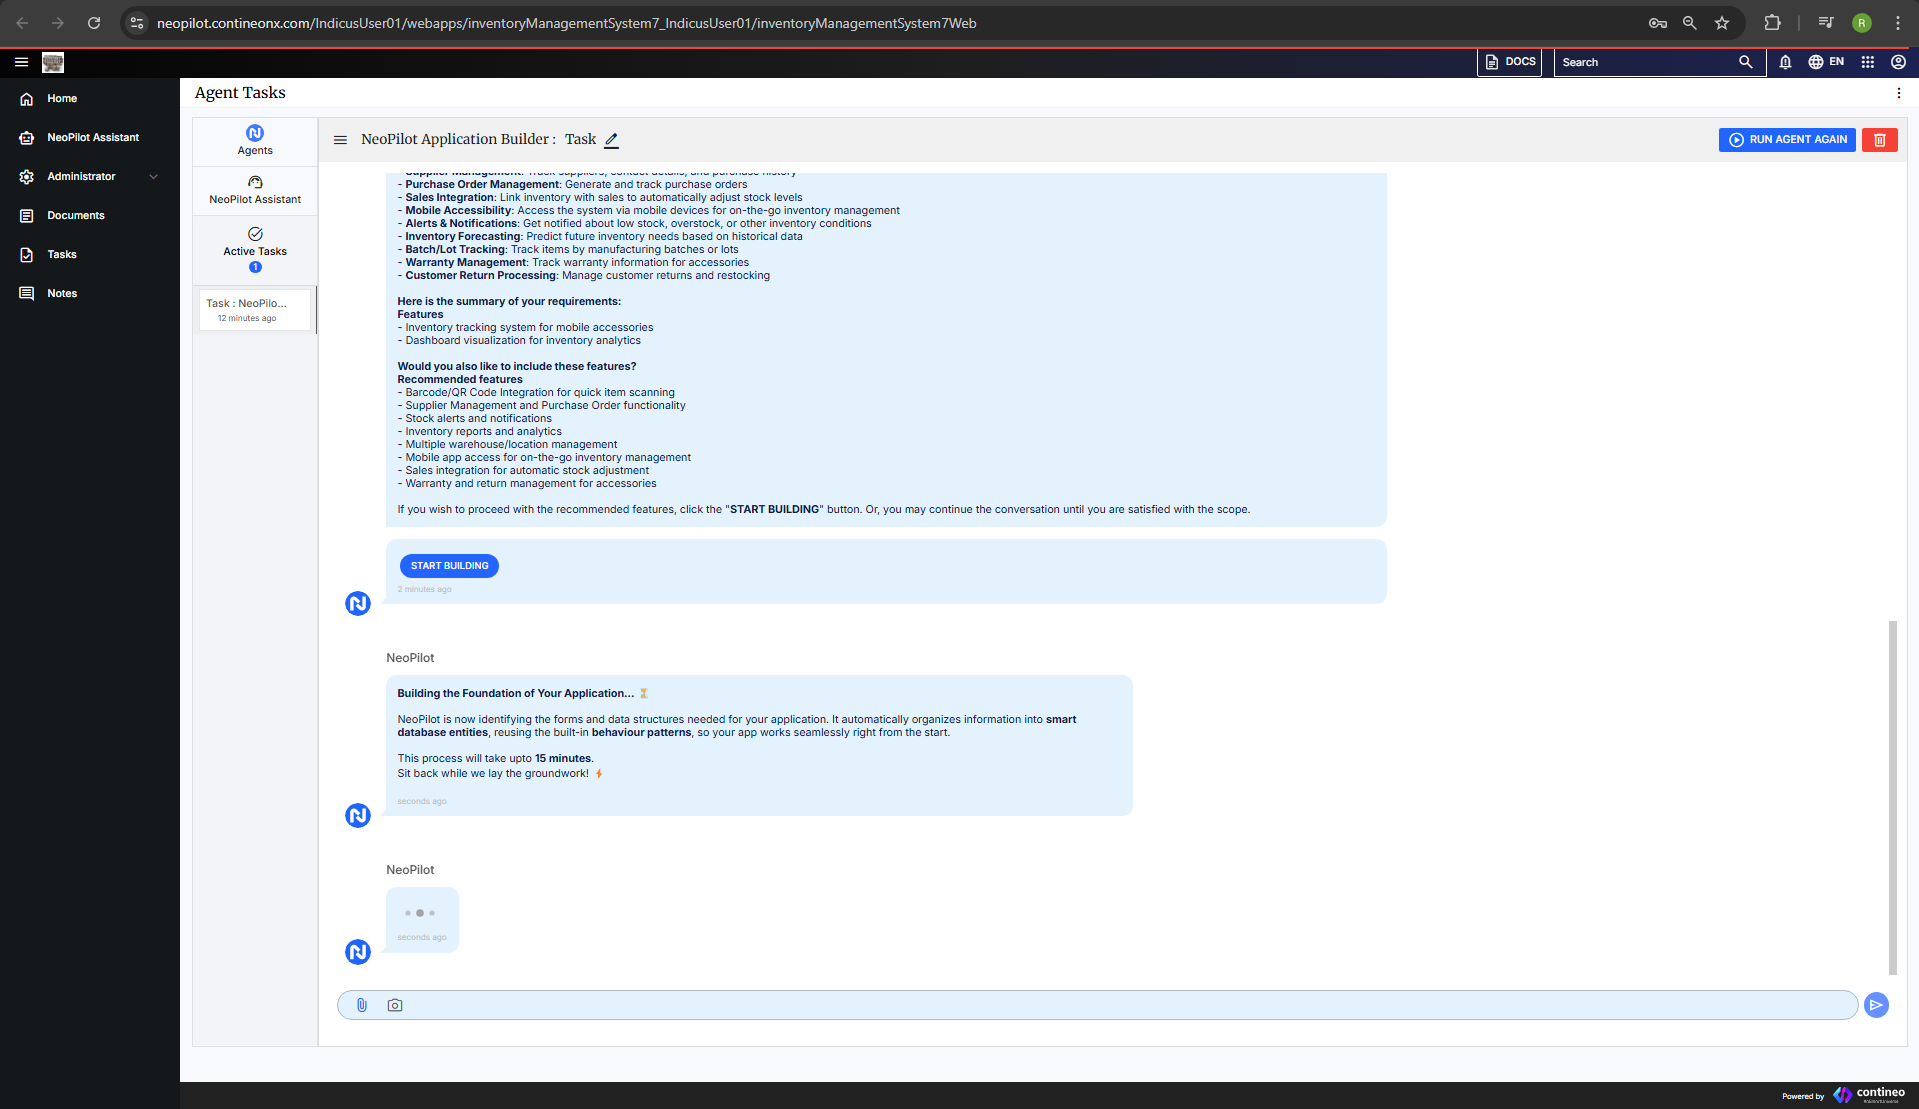
If you are satisfied with the current requirements, click START BUILDING. Alternatively, you can specify additional requirements such as:
Application purpose
Target audience
Specific business operation needs
The system then begins building the foundation of your application. Wait while this process completes.
Data Model Configuration
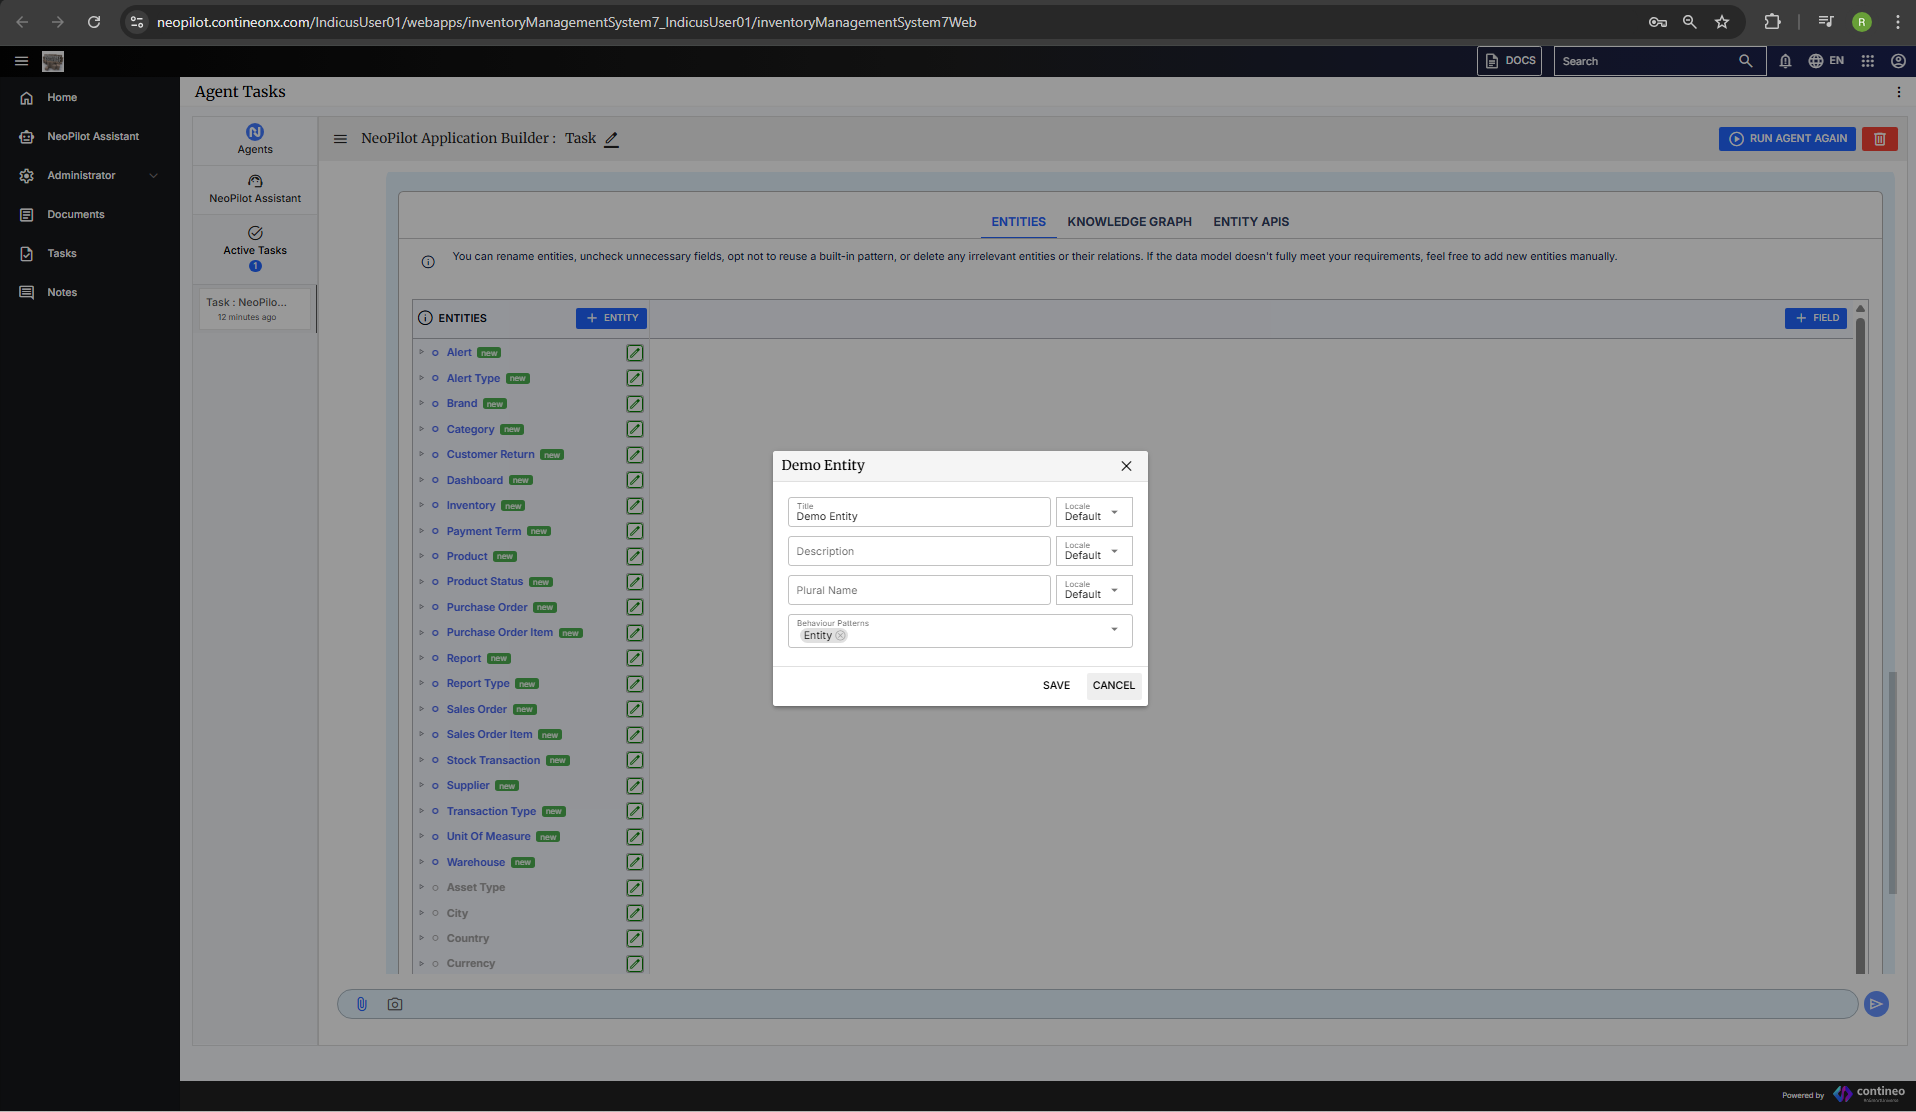
Once the foundation is complete, you can see a summary of the Data Models and their relationships. This interface allows you to:
Add or delete entities
Add or delete relationships
Configure behavior patterns
Add, update, or delete fields

Adding New Entities: Use the provided interface to define new data entities for your application.
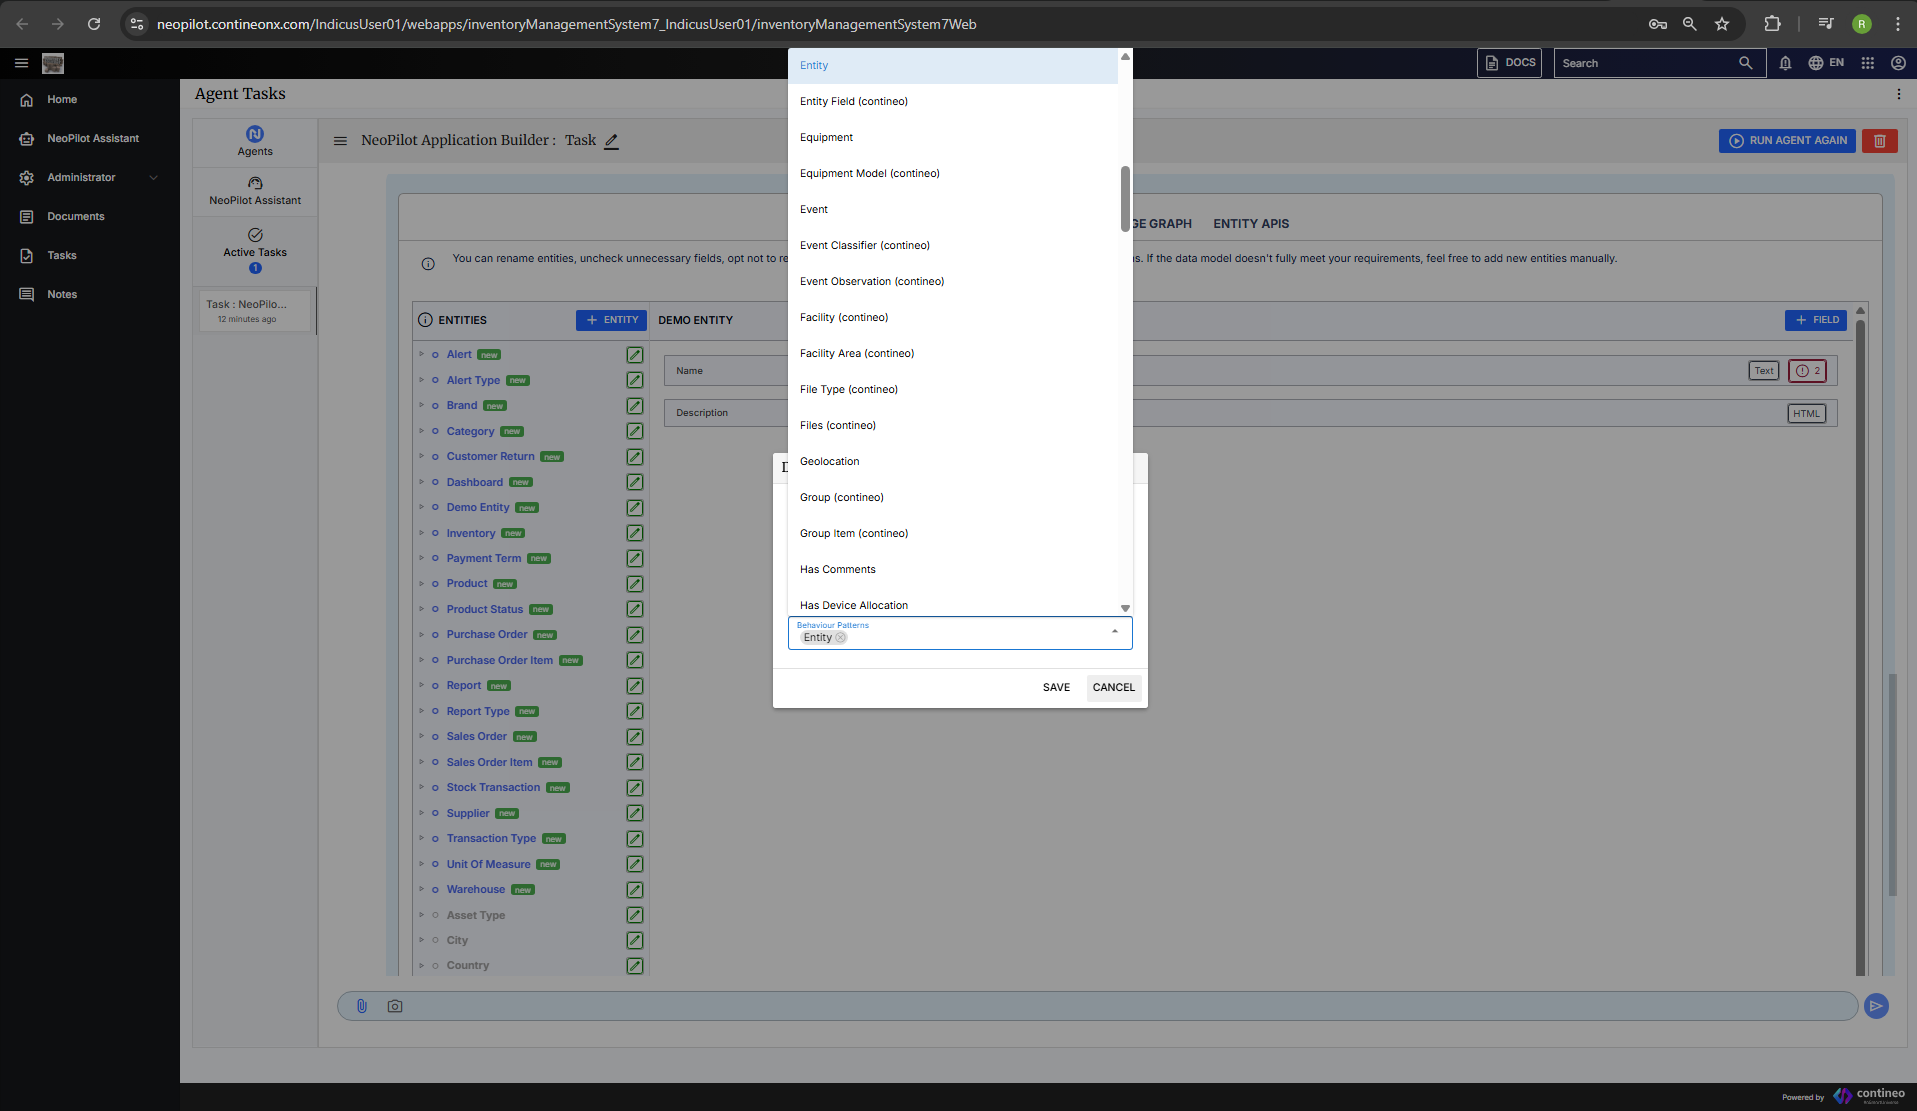
Managing Behavior Patterns: Add or remove behavior patterns to define how your entities interact.
If you are not sure about what behavior patterns are, simply describe the desired functionality, and NeoPilot identifies and applies the most suitable behavior pattern for your entity.
If you want to check the inherited behavior pattern, click the generated entity. A dialog box is displayed, where you can see which behavior pattern is applied to your generated entity.
Relationship Configuration: To Form a relationship:
Add a field
Set the type as LOOKUP
Choose the desired entity as the data type (this entity acts as the parent)
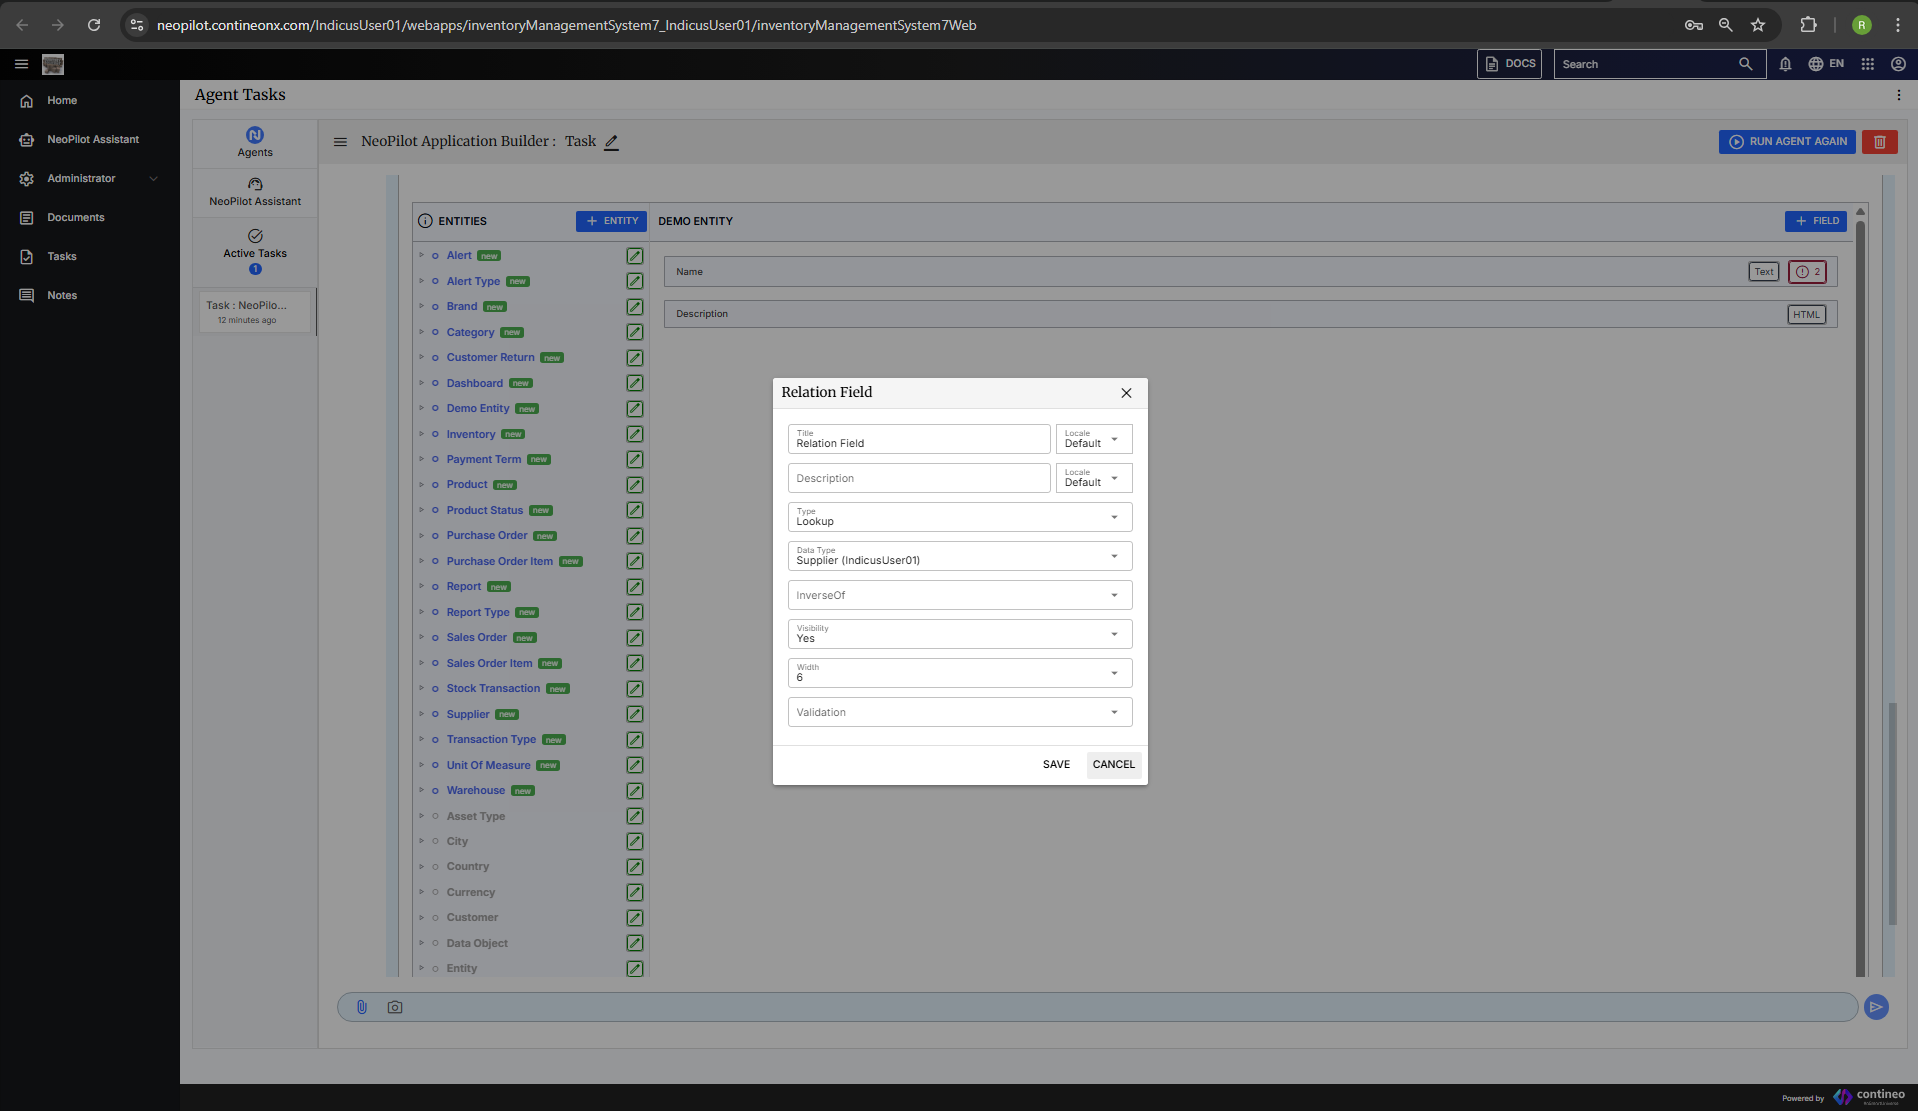
After configuring your data model, click NEXT to proceed.
Note: For more details regarding Behavior Patterns, see the following links:
Specifying Business Process Model(BPM) Workflows
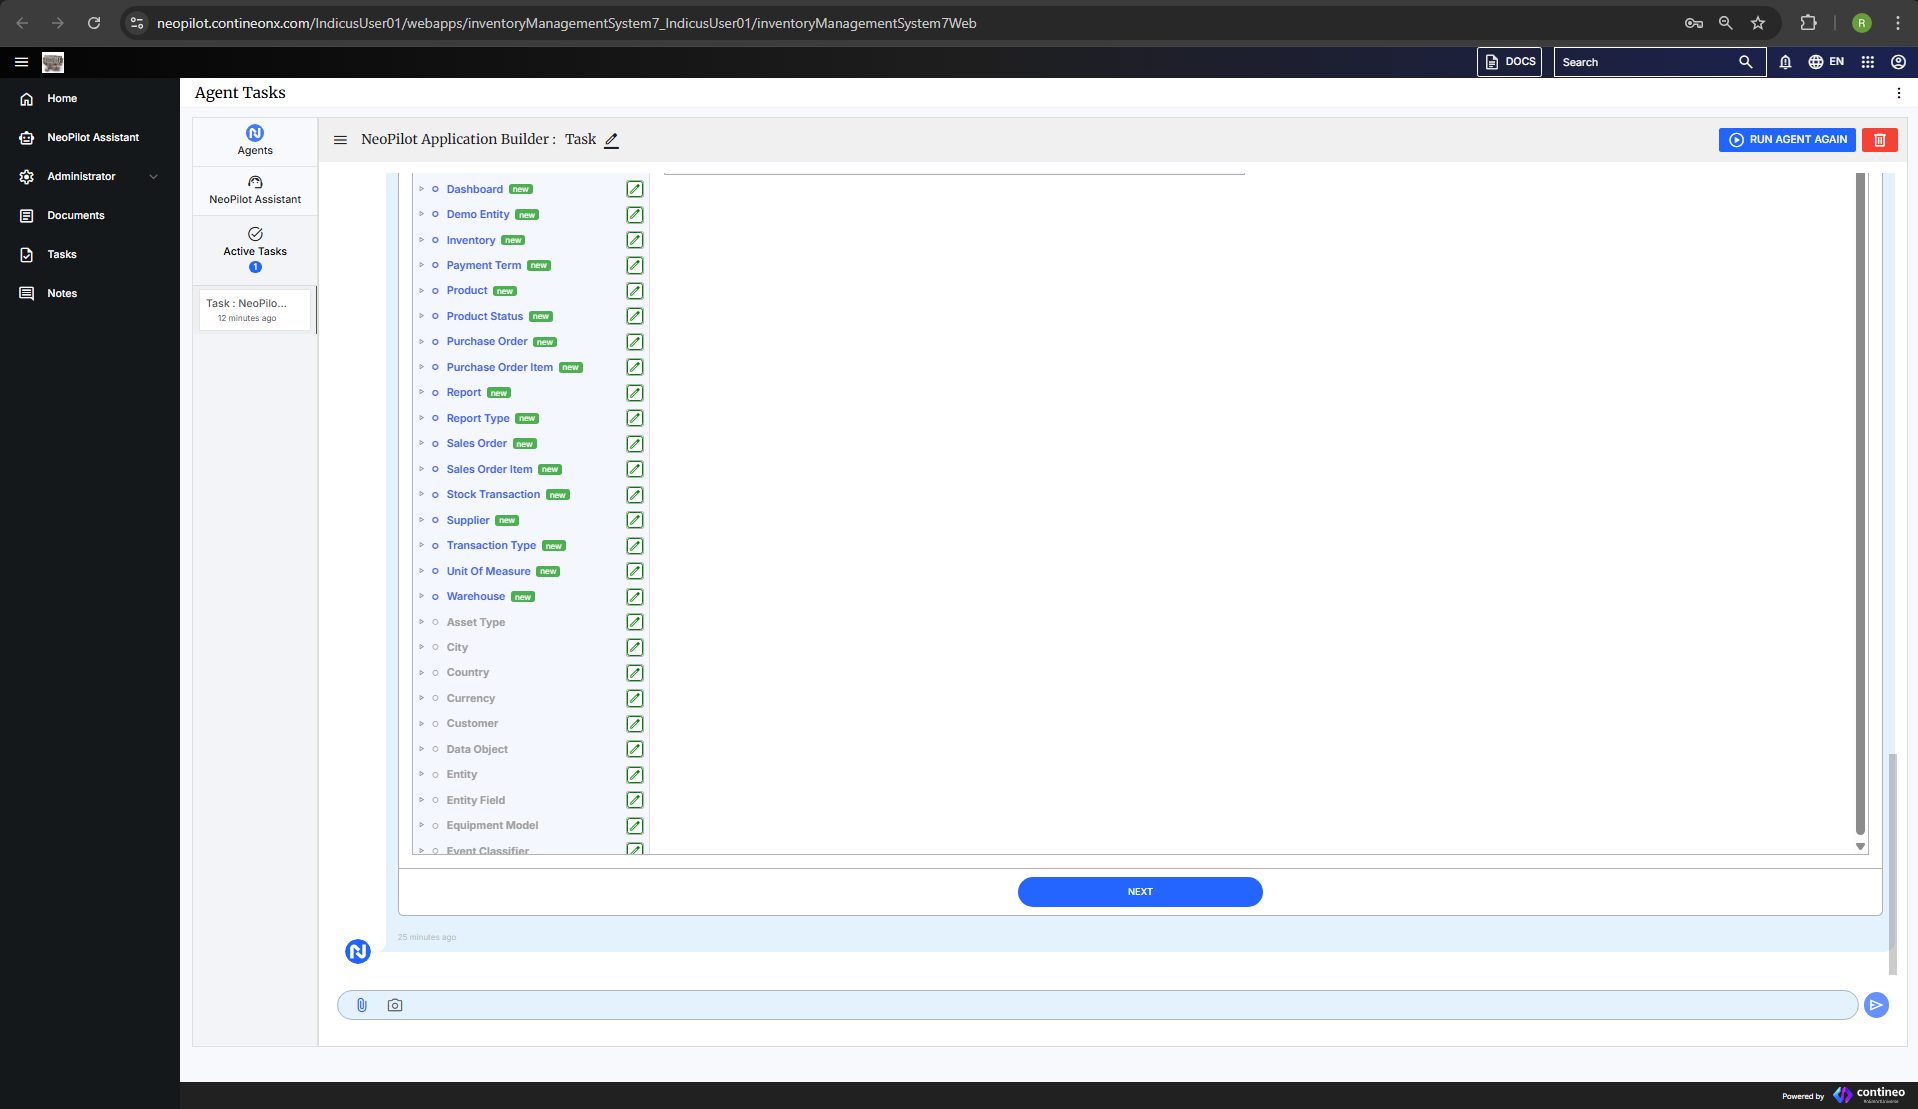
After confirming the Data Model, Neopilot suggests you with BPM workflows identified in your application if any. Alternatively, you can specify them yourself or even modify the suggested ones. Do the following steps:
Confirm the entities on which you want to build BPM workflows.
Next step is to provide Standard Operating Procedure(SOP) yourself or confirm/modify suggested SOPs. Once confirmed, workflows are generated and a preview appears.
Click Proceed to proceed with the BPM Flow.
If you have sample SOPs, you can upload them in the chat bar. Otherwise, click Generate SOP and NeoPilot can automatically create SOPs for the defined entities.
If you click Generate SOP, Neopilot generates a detailed SOP which looks as follows:
Once the SOP is generated, click Proceed to use the generated SOP or click Upload New SOP to provide your own.
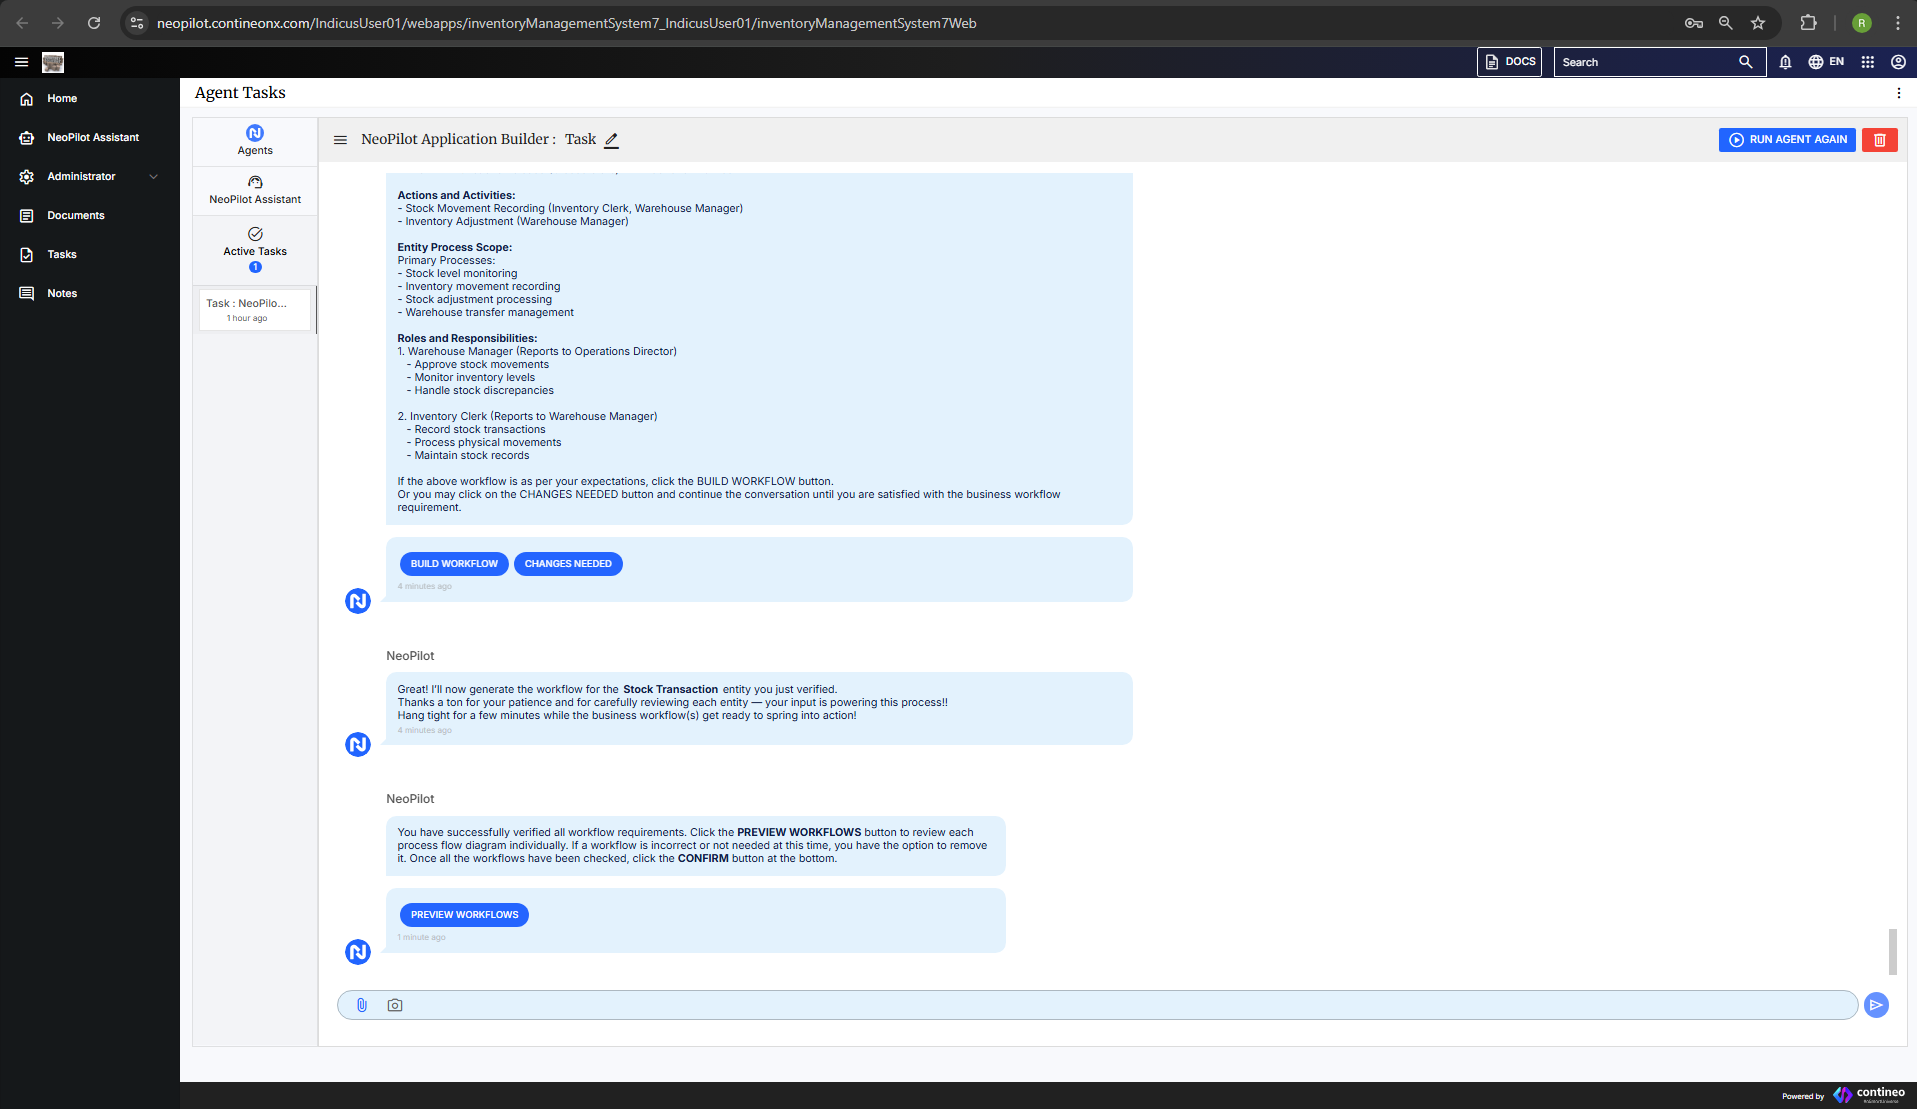
After clicking Proceed, NeoPilot builds workflows for each of the defined entities. Click Build Workflow to confirm.
Once all SOPs are confirmed, the Preview Workflow button is displayed. Click it to view the workflows.
Review the workflows and click Confirm to finalize them.
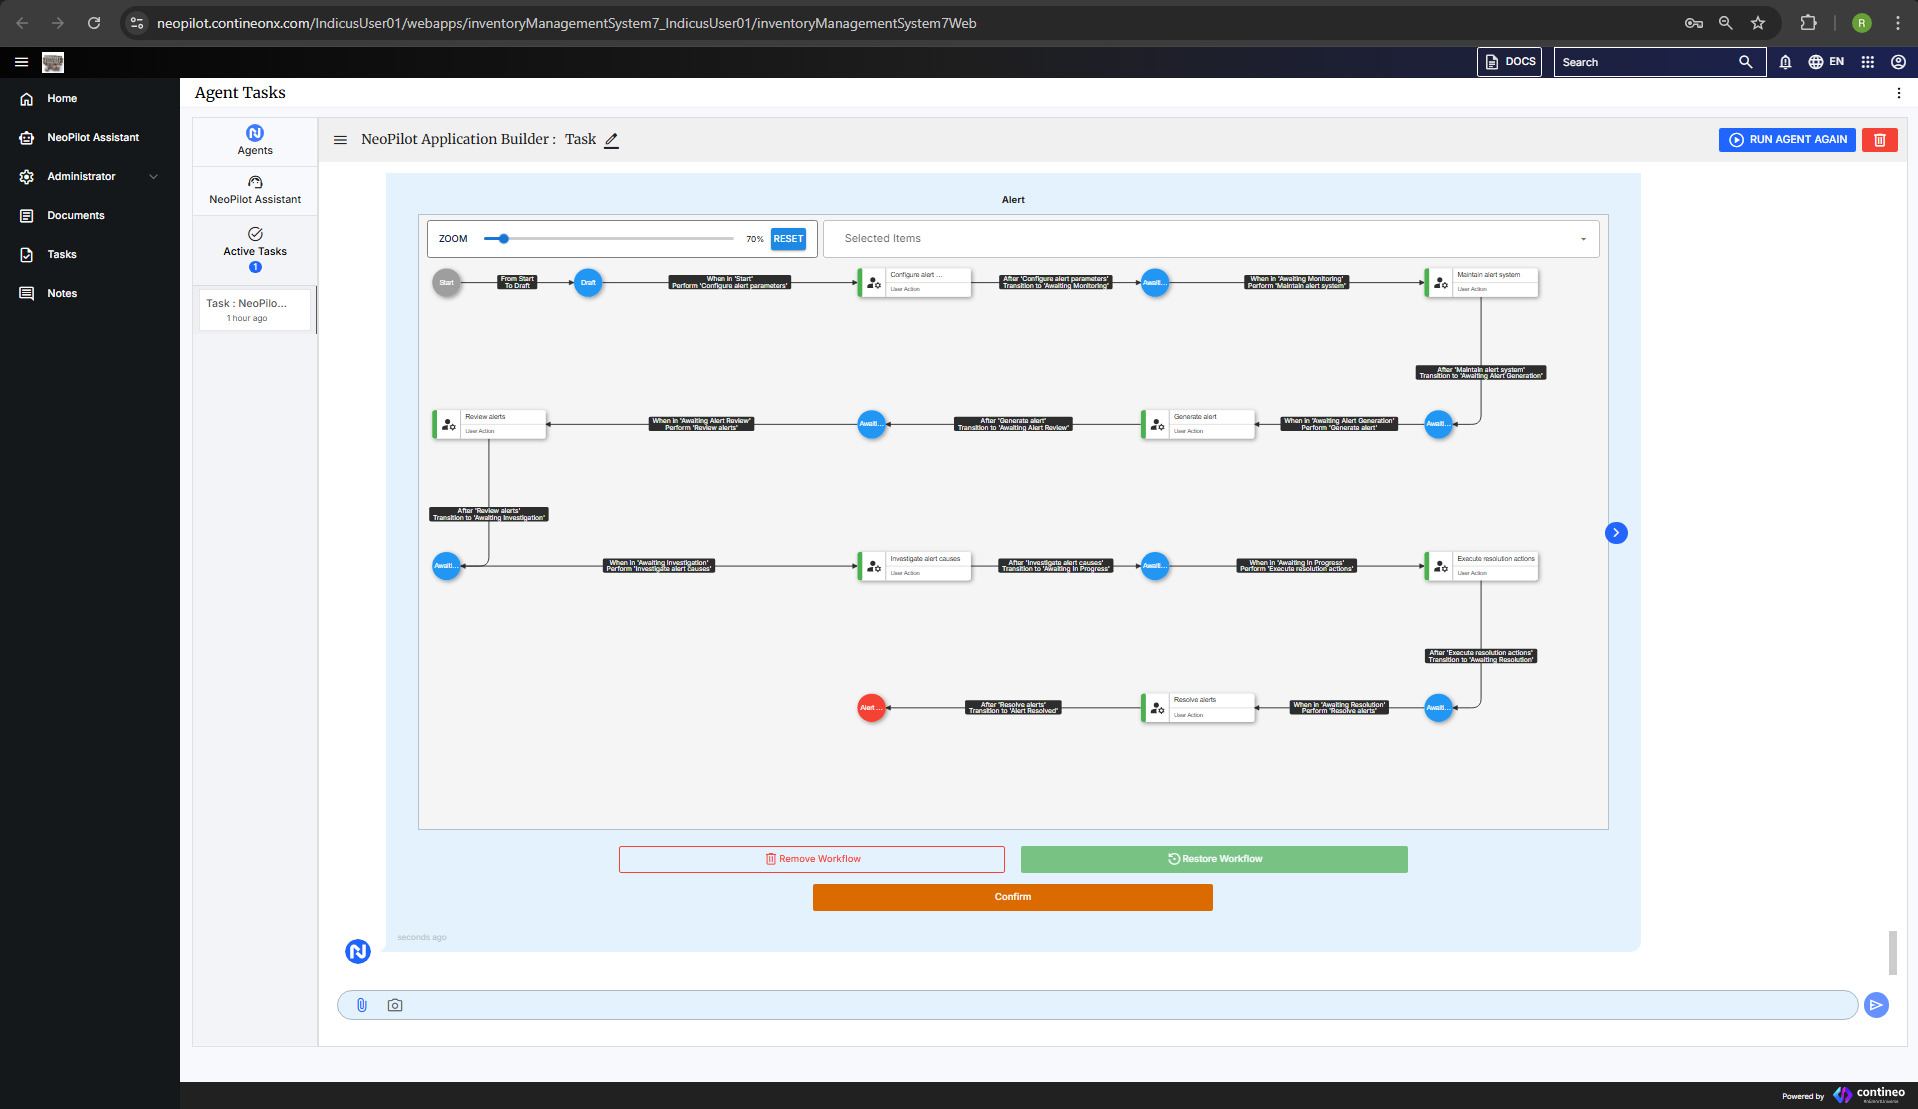
Workflows are created and you can proceed to the dashboard creation step.
Analytics Dashboard Setup
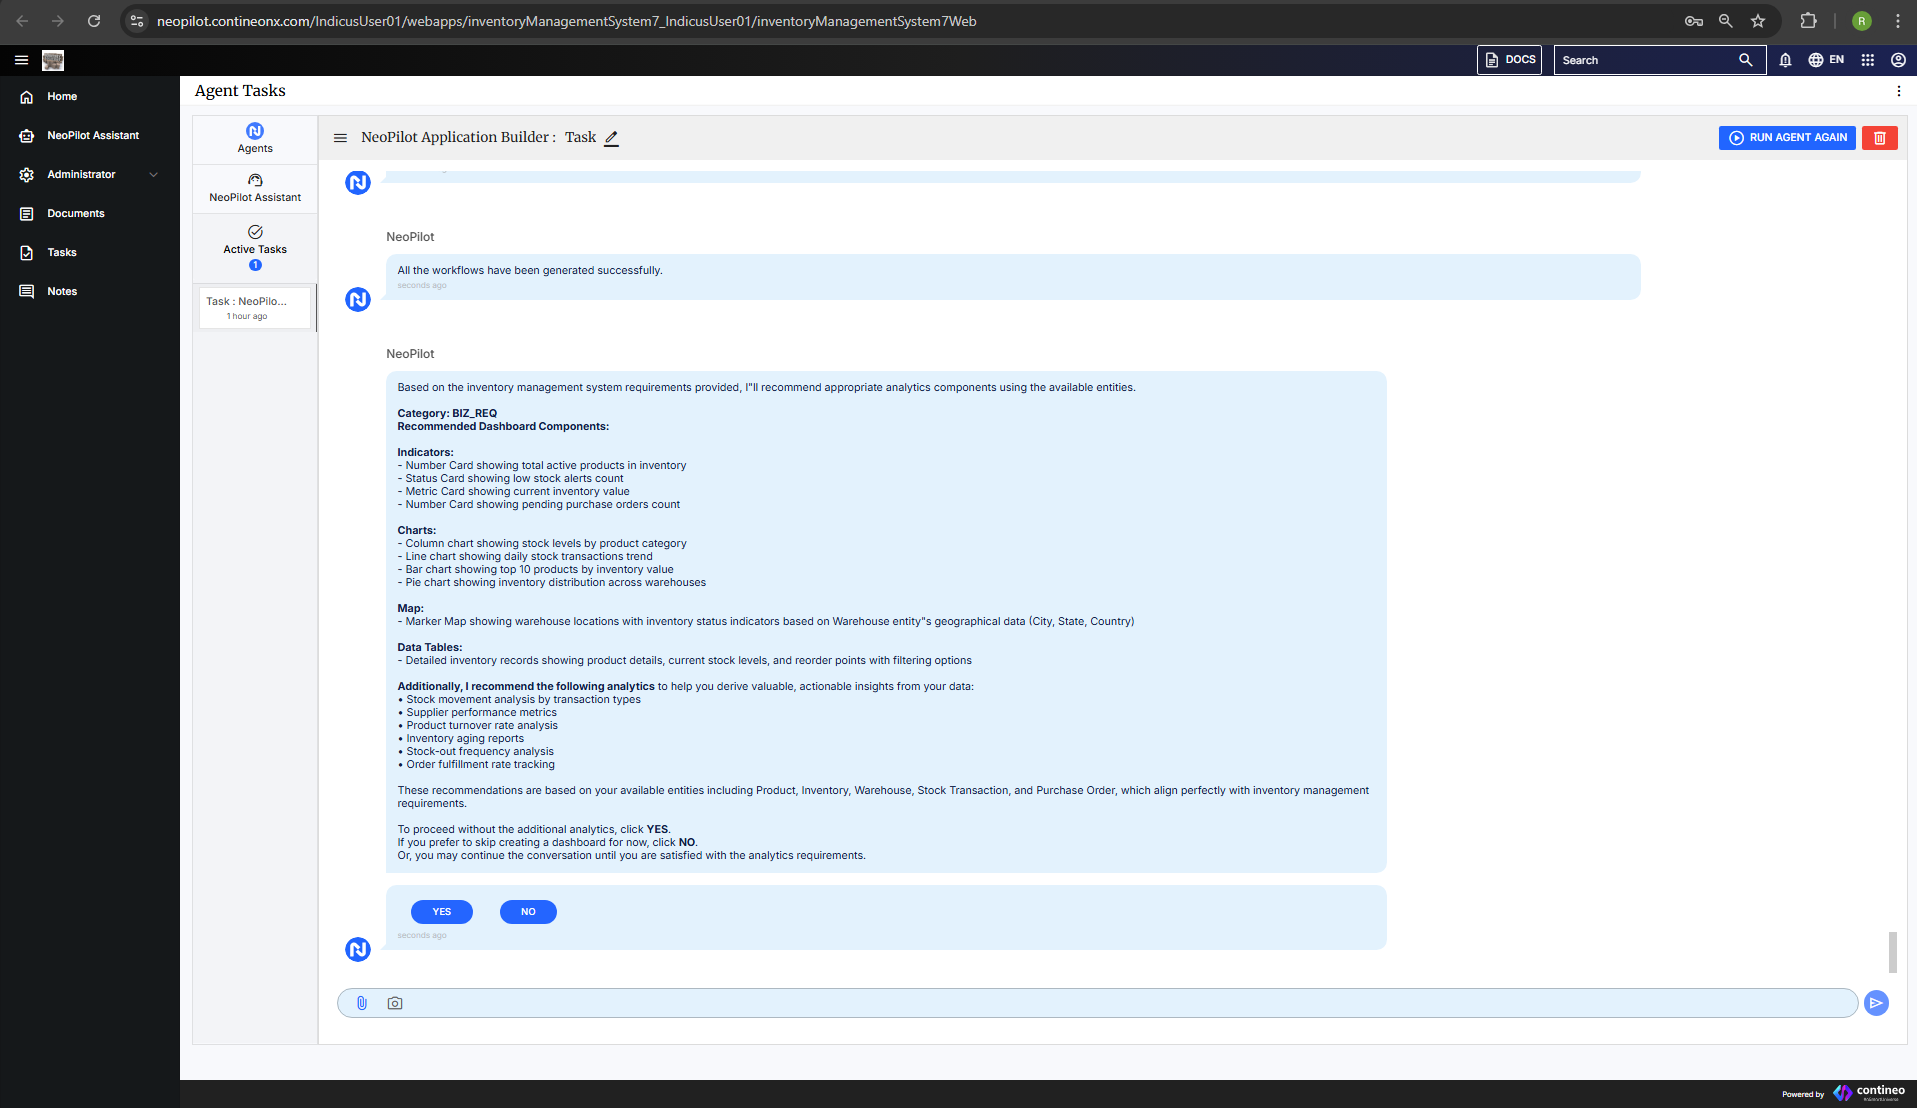
Once all workflows are generated, NeoPilot suggests recommended dashboard components based on your application requirements.
If you want to modify any dashboard components, simply specify the changes in the chat bar.
Once you're satisfied with the dashboard components, click Yes and NeoPilot begins creating a tailored dashboard.
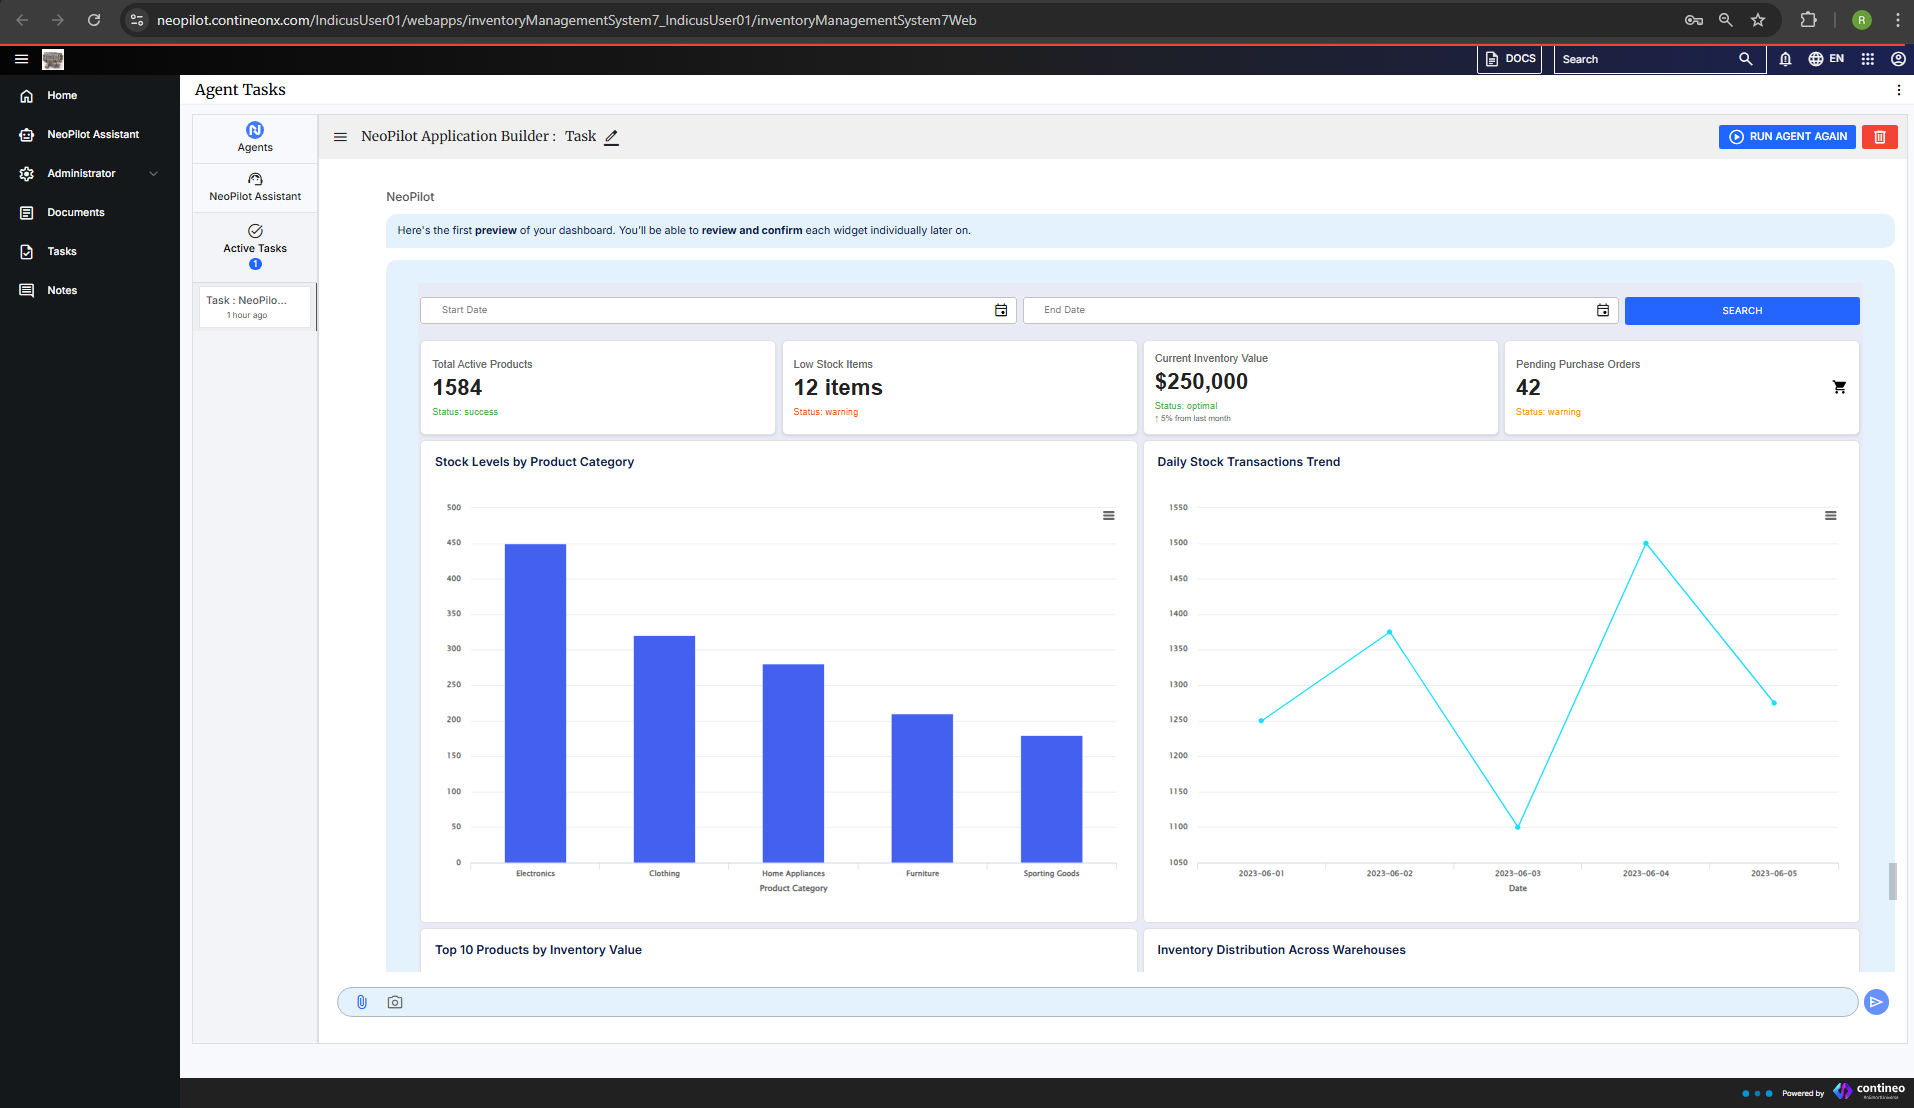
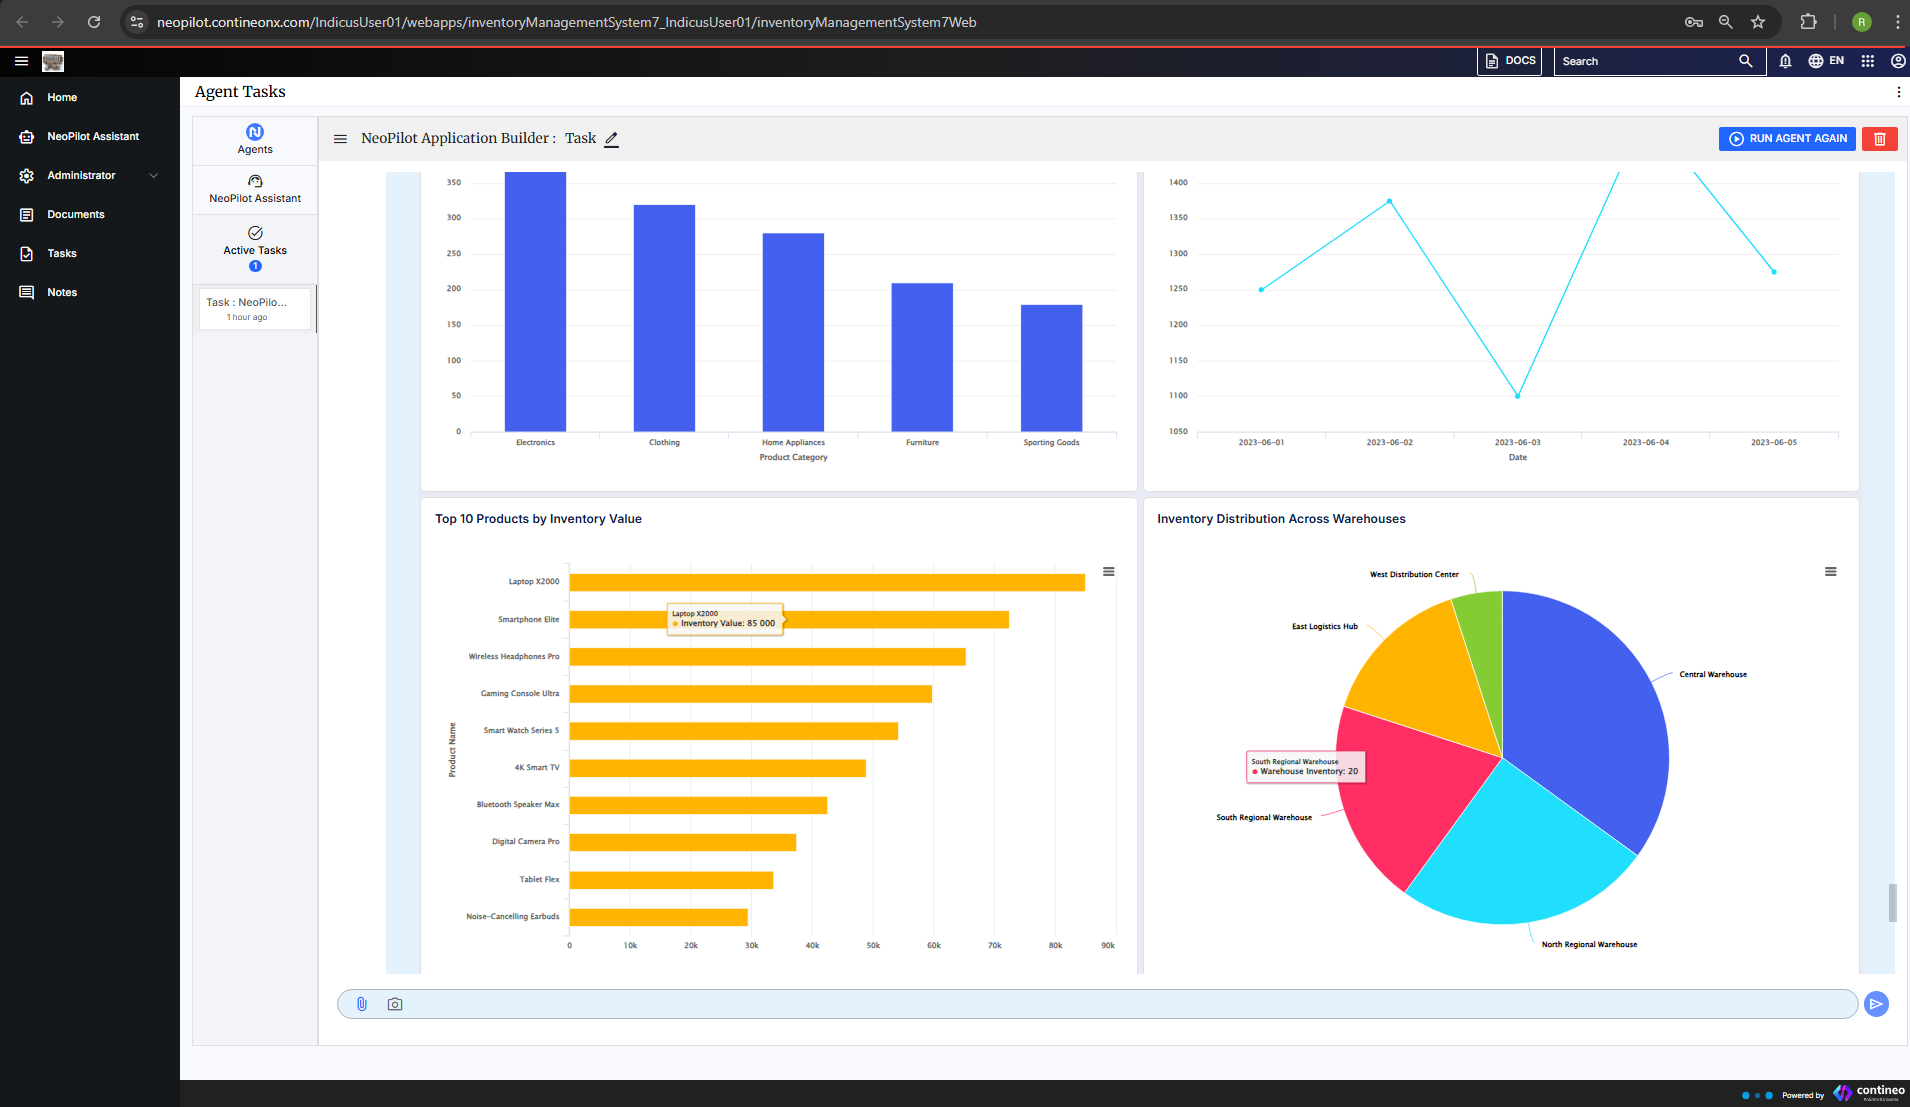
After clicking Yes, a dummy dashboard is displayed. Review the generated dashboard, which includes:
Visual graphs
Data widgets
Interactive tables
Sample data representations
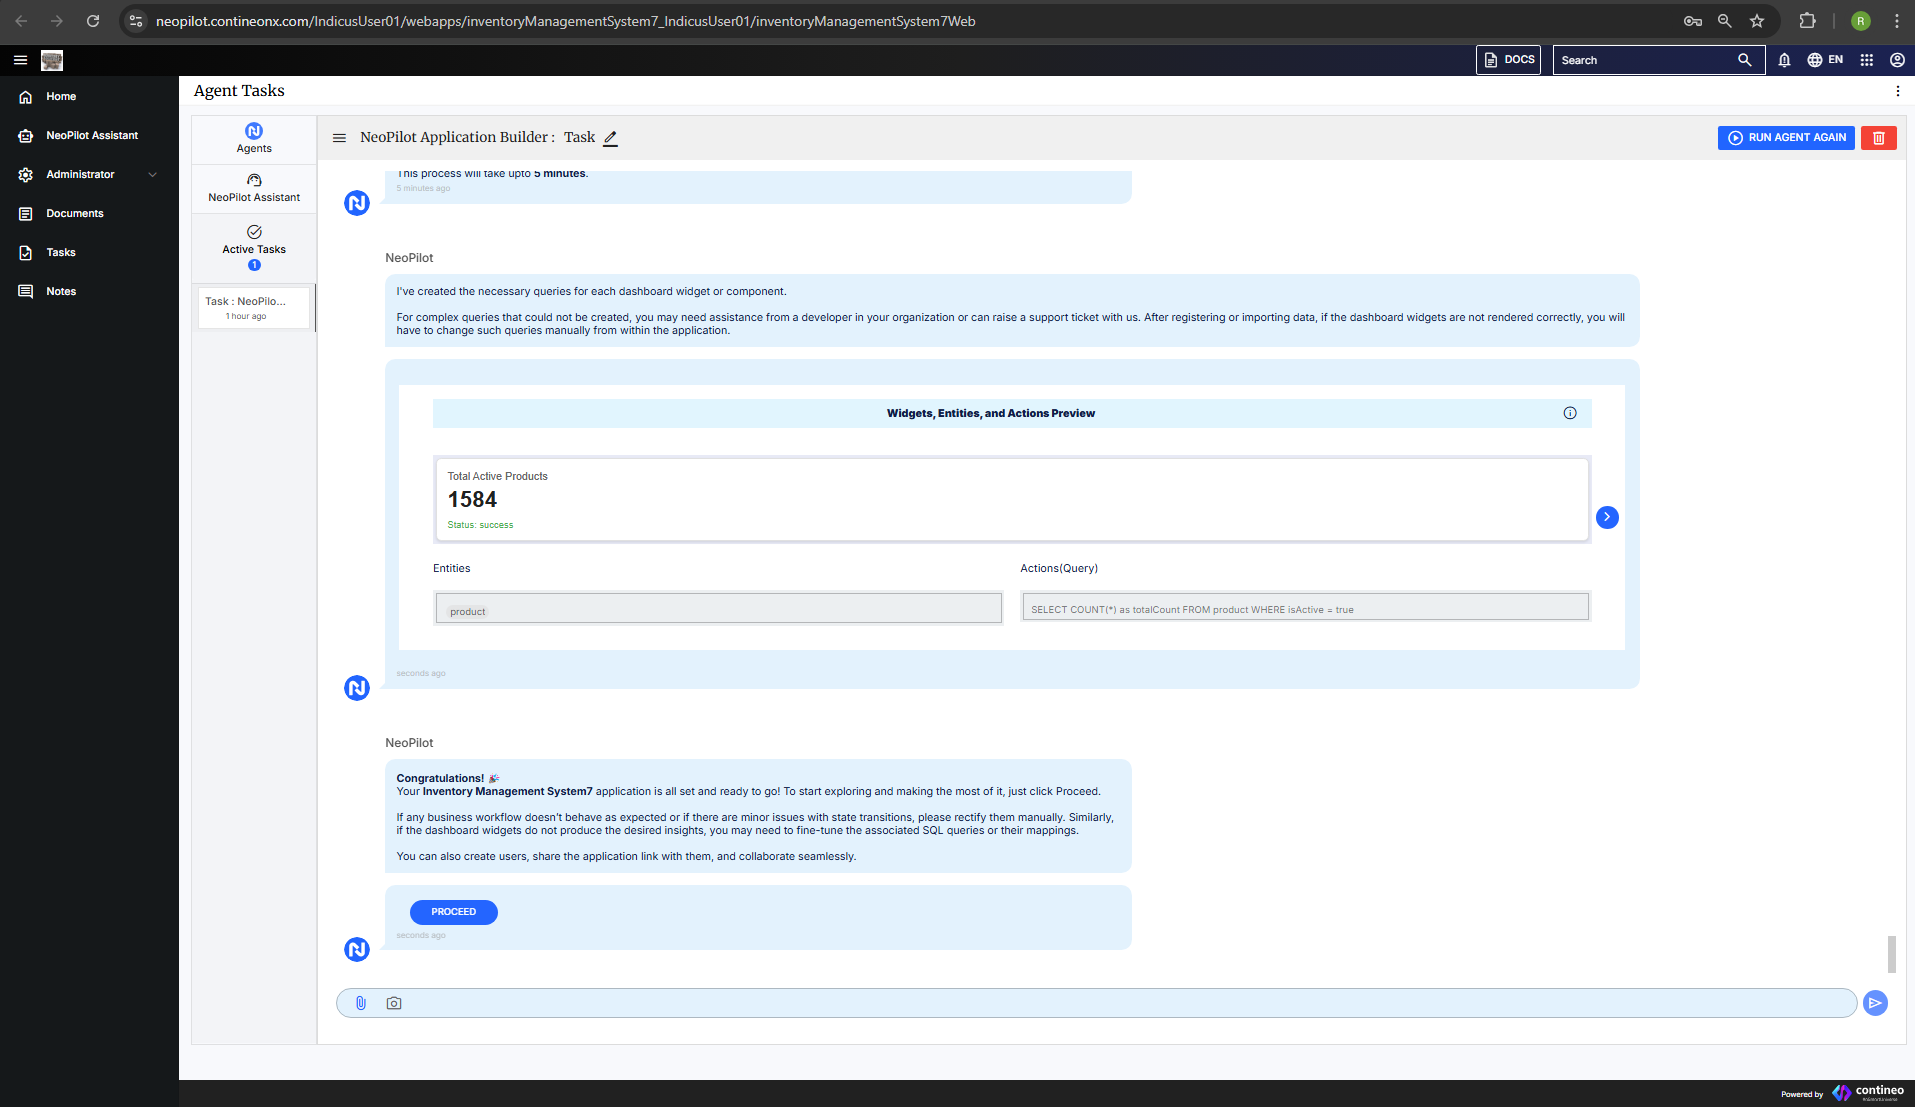
NeoPilot then generates the necessary SQL queries for the dashboard.

Once the SQL queries are generated, see the Proceed button to render the final application.

Review the dashboard and click Proceed to complete the setup.